Posts from the ‘Garlic’ Category

Black and Red Turkey Chili

My husband likes really meaty chili, whereas I like more beans and vegetables. This recipe was a compromise between the two differing preferences as well as an adaption of my previously posted chili recipe. It’s also getting colder at night as we move further into autumn, so this makes a rather comforting evening meal. There’s really nothing like a warm bowl of hearty chili to make you feel warm and cozy.

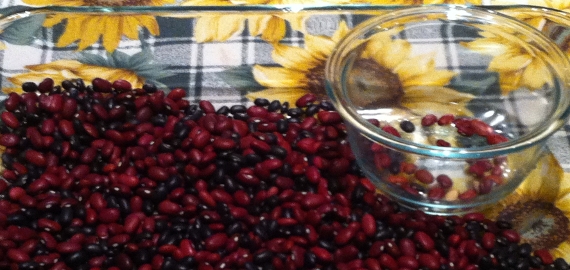
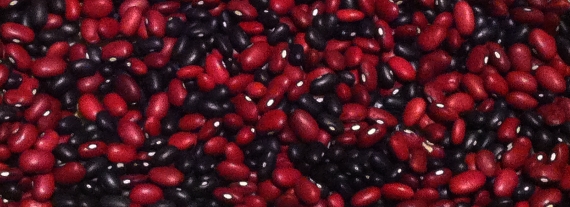
Black and Red Chili Beans

As my tummy has been extra sensitive lately, I made sure that this chili was as “Noel-friendly” and easy to digest as possible. I soaked the beans for a full day, changing out the water half way through. I added baking soda to cut down on the beans’ required cooking time. I skimmed the foam full of “impurities” (such as indigestible sugars and bitter compounds), which can cause bloating and affect the over-all flavor. I added a bunch of turmeric (I thought about adding asafoetida, as well, but didn’t want to stink up the house) and a strip of dried kombu seaweed (contains good bean-digesting enzymes). The spice mix I used contains cayenne pepper, but I added a little extra for more kick. I waited until the beans were tender to add in the salty and acidic ingredients. Just in case, I took a digestive pill, as well. If your stomach is not as touchy as mine is, you do not have to take all of these precautionary steps. All of them were definitely worth the hastle for me though. The chili turned out very tasty indeed. Besides, this chili is filled with protein, which is great, since my husband and I work out at our local gym.

Bean Sorting

Black and Red Chili Bean Turkey Chili
Adapted from my Turkey Black Bean Chili recipe.
Serve the chili with Paleo Carrot Coconut Muffins (made with cinnamon wildflower honey) and salad with fennel greens to further assist with digestion.

Yields about 30 servings

Ingredients
3 C Dried Red Chili Beans or Kidney Beans
3 C Dried Black Beans
3 to 3 1/2 qt Filtered Water
Extra Virgin Olive Oil
1/2 C + 1 T Minced Garlic
1 1/2 C Chopped Yellow or White Onion
1 1/2 lbs 80% Lean Ground Turkey
3 qt Filtered Water
2 tsp Baking Soda
1 Large Piece Dried Kombu Seaweed
3 T Bean Roundup Spice Mix
3 T Dried Ground Turmeric
2 tsp Dried Ground Cayenne Pepper
1 16-oz Jar Balakain Farms Blended Organic Green Zebra Heirloom Tomatoes
1 C Mild or Medium Salsa Verde or Tomatillo Salsa
2 T Lime Juice
2 T Unfiltered Apple Cider Vinegar
8 T Chicken Better than Bouillon, dissolved in 1 qt Hot Filtered Water
Filtered Water

Optional Garnishes
Cilantro Springs
Scallions, sliced
Avocado, skinned, pitted, thinly sliced
Vegan Sour Cream or Vegan Plain Yogurt
Daiya Cheddar Style Shreds
Daiya Pepperjack Style Shreds

Directions
Sort your beans. Discard any beans that are discolored, under developed, malformed or broken, as well as, any rocks. Rinse the beans with water. Soak the beans for at least 8 to 12 hours or overnight in a large non-reactive bowl with 12 to 14 cups of water, changing out the water about half way through. Rinse with fresh water.

In a large oiled stock pot, saute the garlic and onions until they are tender and clear with a long-handled wooden spoon. Add in and brown the turkey. Stir in the water, baking soda, seaweed, beans and spices. Bring to a boil. With a long-handled ladle or wire mesh, remove any foam that forms on the surface for about 2 to 3 minutes or until the beans stop foaming; I like to keep a little bowl handy to put the foam into. Lower the heat to medium-low and cook covered for 1 hour or until the beans are tender, stirring occasionally. Mix in the tomatoes, salsa, lime, vinegar and diluted bouillon. Cover. Return chili to a boil. Stir. Reduce the heat to low. Cook covered for 1 hour, stirring often to prevent the beans and meat from sticking to the bottom of the pot. Add more water as necessary. Turn off the heat.

Serve and garnish as desired. Enjoy!
Red-Label Curry no Ohji-Sama

I finally made S & B’s red box of Curry no Ohji-sama with chicken and mixed vegetables. It tasted so good! This variety is a Japanese sweet curry roux mix that was originally intended for children, but I don’t see why adults shouldn’t enjoy it, too. S & B also makes a blue-box version of this curry, too, which has a different flavor (from what I can tell based on the listed ingredients). What exactly the blue-labelled box mix is supposed to taste like is still a mystery to me, but it looks good. For more information, please read the sections I wrote on both varieties here  or here.

Thankfully, both flavors are gluten-free, as they include corn starch and white sorghum as thickeners in lieu of wheat. The directions call for the addition of meat, but you can substitute it with beans, tofu, nuts, seeds or whatever protein you prefer. The package instructions also call for potatoes and carrots (two sources of carbohydrates), which I felt were not inclusive enough. I didn’t just want to use a boring brown or yellow potatoes and a red onion (the sweet yellow and white cultivars carry less sulfur), and I decided not to serve the curry with rice but to add more colorful vegetables instead. I felt as though that the more colors I included, the healthier and tastier the meal would be, so my curry was a rainbow of yellows, orange, purple, red, whites and greens.

Each box comes with two curry roux blocks, enough to either make the curry twice or cook a double batch. The bricks are sealed individually, so you can cook one and save the other for later, preserving the flavor and moisture and preventing spoilage. As soon as I pealed back the wrapper on the roux, I knew I was in for a treat from the pleasant aromas and yellow curry color of the savory spices and slight sweetness of fruits and vegetables. I could already smell the wonderfully enticing scents of cumin, coriander and turmeric, and for some reason my mind went to cinnamon as a complimentary flavor. Maybe next time I should make a cinnamon infused dessert.

Cooking the Chicken & Vegetables

As usual, I made many of alterations to the recipe, but the dish turned out quite scrumptious, much to my delight and satisfaction. My husband liked it so much, he went back for seconds. He’s a pretty picky eater, so that’s certainly saying something. Please keep in mind that this is a sweet mild curry, so you may have to adjust the flavors to more of your liking; check out Sadie’s blog entry on the blue-box curry roux for some suggestions. Surprisingly with all of the extra meat and vegetables, the curry sauce was still rather thin in consistency. I used the same cooking techniques as described in the directions and decided not to add a thickener (like corn or arrowroot starch) on the first try, since the mix already contained some. Another option is to let some of the water evaporate rather than cooking the meat and vegetables so long with the cover on. Regardless of the outcome, the meal was a success and a learning experience.

Red-Label Curry no Ohji-Sama with Chicken & Mixed Vegetables
Adapted from the instructions on the back of the package
As stated above, this dish already includes enough carbohydrates, so do not serve this with a white rice. If you want to serve it along side or over something, I suggest something with fiber, for instance more vegetables (broccoli or cauliflower) or a seed-like “grain” (quinoa, millet or buckwheat) as a side.

Serves 6Curry no Ohji-Sama With Chicken & Vegetables

Ingredients
Extra Virgin Olive Oil
1 Medium Yellow Sweet Onion, peeled, trimmed, coarsely chopped
1 Head Garlic, peeled, trimmed, coarsely chopped
2 Medium Boneless, Skinless Chicken Breasts, cut into 1″ cubes
2 Medium Carrots, trimmed, sliced into 1/2″ pieces
2 Purple Potatoes (any variety), coarsely chopped
1 – 2 Chioggia or Red Beets, trimmed, coarsely chopped
2 Stalks Celery, diagonally sliced into 1/2″ pieces
1 Broccoli Head and Stem, trimmed, coarsely chopped
2 C Baby or Dinosaur Kale, stemmed, torn into bite-size pieces
2 C Carrot Greens, stemmed, optional
1/4 – 1/2 C Enoki Mushrooms, trimmed, left long or quartered
2 1/2 C Filtered Water
1/2 pkg Red Label Curry no Ohji-Sama Roux, finely chopped
Rice Wine Vinegar, optional
Sweet Paprika, to taste, optional

Directions
Saute the onions and garlic until the onions are soft and translucent in a large lightly oiled pan over medium heat (I used my Misto to spray on the olive oil). Mix in the carrots, beets and potatoes, stirring occasionally. Cook this mixture until the carrots are slightly soft.  Add the water, broccoli and celery. Bring the liquid to a boil. Cover and reduce the heat to a simmer. Cook the mixture for about 15 minutes or until the vegetables become tender. Remove the pan from the heat. Add the kale, greens and mushrooms. Fold in the curry roux, half at a time. Cover and return the pan to the heat. Simmer the curry for 5 minutes, stirring occasionally until the roux is evenly distributed. Taste the dish, add more paprika (and or other spices) to taste. Serve the curry either on top of an accompanying vegetable in bowl. Be sure to ladle on some extra sauce if you like.

I served this dish along side a tossed green side salad drizzled with a tasty miso sesame dressing.

Cooking the Chicken & Vegetables

Basque Cold-Poached Salmon

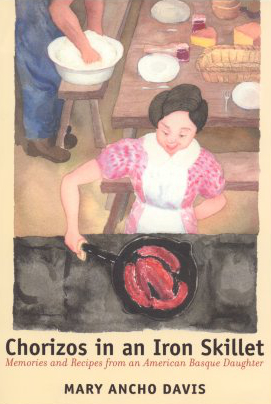
Earlier this year I got racks of lamb lamb from the Annual Basque Picnic here in town. I had a great time gathering together with my brother and cousins to celebrate the culture of out ancestors, listening to the language and songs, smelling amazing food being grilled, watching folk dances and seeing lots of people of similar descent (we are French-Basque) enjoy the all-day festivities. In addition to my cousin’s birthday, the day was absolutely filled with awesome activities. I started by perusing the Etcheverry Basque Imports booth, buying some great folk music and Chorizos in an Iron Skillet; I was not at all surprised to find The Basque Kitchen, which I already owned, amongst their selection. They had all sorts of amazing stuff! There was an American Basque guide book and an intriguing book on myths and legends that I added to my list to read later.

Annual Basque Picnic

Several months ago (sorry for the delay) during one of my grocery store quests for fish, I found salmon on sale and bought three pounds of it. I decided to try something different and flipped open my new Basque cookbook to the fish section. I had never poached salmon before but the recipe looked pretty easy and tasty, especially with the garlic aioli. My husband is usually not a sauce-on-the-side kind of guy but loved the aioli. They also went well with the side of steamed asparagus.

Cold-Poached Salmon with Garlic Aioli
Adapted from Mary Ancho Davis’ “Cold Poached Salmon” recipe published in “Chorizos in an Iron Skillet
 You can of course eat the fish cold, as suggested, but we decided not to wait and ate ours still hot.ChorizosIronSkillet
Yield: 4-6 Servings

Cold-Poached Salmon
Ingredients

1 qt Filtered Water
1 Sweet Yellow Onion, peeled, quartered
3 Celery Stalks with leaves
2 tsp Sea Salt, any variety
1/2 tsp Peppercorns, fresh ground
Marjoram, 1 T fresh or 1 tsp dried
Tarragon, 1 T fresh or 1 tsp dried
Basil, 1 T fresh or 1 tsp dried
1 Dried Bay Leaf
3 lbs Salmon Steaks, rinsed, boned

Directions
Boil all of the herbs and spices in the water in a large pot for 20 minutes over medium-high heat.

Wrap the salmon in cheesecloth to prevent them from falling apart as they cook and carefully place in the boiling broth. Simmer 15 minutes or until the fish is firm. Carefully remove the fish from the broth. Untie cloth and unwrap the fish, being careful not to burn your fingers.

Chill the fish in a covered container for at least two hours.

Serve with garlic aioli.

Garlic Aioli
Adapted from Mary Ancho Davis’ “No Fail Ali-Oli” recipes published in “Chorizos in an Iron Skillet.” According to Ms. Ancho Davis, the sauce gets better with times as the flavors meld together, so if possible, make this sauce A day or two ahead.
Yields: 8 Servings

Ingredients
1 C Prepared Mayonnaise (preferably homemade)
4 – 6 Cloves Garlic, peeled, trimmed, minced*
1 T Cold-Pressed Extra Virgin Olive Oil
1/4 tsp Lemon Juice, to taste
1/8 Sea Salt, any
Peppercorns, fresh ground, to taste (optional)

Directions
Mix the sauce ingredients together in a small bowl. Adjust the flavors as necessary. Chill until ready to serve with the fish.

*Keep in mind that this is raw garlic. You can roast the garlic first if you like. If you choose to use a food processor to mix the ingredients, you do not need to mince the garlic.

Pasta with Lamb Sausage & Mixed Vegetables

Pasta, Lamb, Green Beans & Peas
After a long day of visiting with downtown Petaluma with my mom when she was visiting, I threw this together. To be honest, I had to adjust the flavors a lot, since I didn’t quite get the flavors right the first time. I was so tired, I forgot to taste the dish as I was adding in ingredients and cooking them; I was kind of just throwing things in the pan. I’m glad I was able to fix the flavors pretty easily though.

I used the locally made lamb sausage from Own Family Farm that I bought at the Sebastopol Farmer’s Market. Thankfully this farm used to also sell their meats at the Santa Rosa Farmer’s Market twice a month when the market was still located at the Veterans’ Memorial Building parking lot, but that was before I moved to Petaluma.

Since then, the market has relocated to the Santa Rosa Wells Fargo Center, which is practically in Windsor. The Redwood Empire Farmer’s Market has moved into the Veterans’ Memorial Building lot (with lots of contention and controversy). I have not had a chance to go back yet. Does anyone gone back to the Veterans’ Memorial Building farmers market since Redwood Empire moved in? The “Original Santa Rosa Farmers Market” is having their grand opening at the Wells Fargo Center on June 30th. I’m interested in checking it out, but it’s located rather far away from me know. Thankfully, Petaluma, Cotati and Rohnert Park have summer farmers markets, which are all much much closer; here is a current list of all of the Sonoma County farmers markets.

Rice Pasta Shells with Lamb Sausage, Green Beans & Peas
Serves 8 to 10

Ingredients
Extra Virgin Olive Oil or Grape Seed Oil Cooking Spray
1 – 1 1/2 lb Moroccan-Spiced Lamb Sausage, sliced or casings removed
5 – 6 T Chopped or Minced Garlic
1/2 Medium White or Yellow Onion, finely chopped
1/4 – 1/2 tsp Mixed Peppercorns, fresh ground
1/4 tsp Ground Sweet or Smoked Spanish Paprika
2 tsp Cumin Seeds, toasted ground
Filtered Water
Pinch Sea Salt
4 Celery Stalks, trimmed, chopped
2 C Fresh or Frozen Green Peas
2 C Fresh or Frozen Green Beans, cut into bite size pieces
1/4 tsp Poultry Seasoning
OR 1/4 tsp Italian Seasoning
OR 1/4 tsp Moroccan Seasoning
1 T Dried Parsley
1 pkg Small Rice Pasta Shells
3 Scallions, trimmed, sliced
1/2 – 2/3 C Raw Almonds, soaked, dehydrated
Daiya Mozzarella Cheese Shreds, optional garnish

Directions
Cook the pasta according to the package directions until they are al dente. Drain and rise. Set aside.

Brown the sausage over medium heat in a lightly oiled pan over medium-low heat. Saute with the garlic, onion, pepper and paprika until the onions are translucent. Pour in the water and vegetables for three minutes, stirring occasionally. Mix in the herbs. Cook the mixture until the vegetables are tender-crisp. Stir in the noodles, cooking until the noodles are soft. Remove the pan from the heat.

Transfer the mixture to a cool serving bowl. Stir in the almonds and scallions with a large wooden spoon. Season with pepper and salt to your preference. Sprinkle on the cheese. Serve with a green side salad.

Brown Rice Mochi


A while back I bought two kinds of Grainaissance’s organic brown rice mochi at Community Market; Whole Foods also sells them. These mochi cakes are naturally gluten and dairy-free, which made me doubly intrigued, and since they are whole grain brown rice flour-based, the cakes have many more nutrients than most mochi manju, which are made with white glutenous rice flour (does not actually contain gluten). In each package comes a single rectangular block of hardened mochi dough with the flavorings already mixed in. The block may look small for the eight servings listed on the back, but the dough expands up to two times it’s original size while it cooks! Grainaissance makes eight tasty looking cook-and-slice kinds of organic brown rice mochi in sweet and savory flavors, including original, which contains only rice and water. There are so may great options to choose from, but I’m eager to try out the sesame-garlic when I go buy more.

chocolate mochi puffs

First, I tried the Chocolate Brownie Mochi, apparently their most popular flavor. It was a nice rich dark brown color and a really nice dark chocolate aroma. I cheated and tasted the dough as I was cutting it; it tasted really good even then. Just keep in mind that brown rice has a rich flavor all its own, so the flavor actually turned out rather subtle. Although sugar (evaporated cane crystals) is listed in the ingredients, the mochi dough in not as sweet or chocolaty as I exected. The package suggests possibly drizzling a sauce on top, which would add more flavor, sweetness and moisture. For umph, you can also brush some sauce on top of the squares with a pastry brush.

The directions say to cut the brownies into one to two-inch squares before baking them. I am so glad I chose to cut them into a one square-inch size in order to make 16 servings instead; the mochi cake expanded so much, two inches would have been way to big. I recommend scarfing on the brownies as soon as they are cool enough to handle. The mochi pieces are best when they are warm. Unfortunately, I should have only cooked half. I ended up only eating one or two squares at a time and took my time eating them.  I ended leaving a bunch out to snack on, so I’d have more time to savor them. This wasn’t the best idea, as I found out that they get rather dry as they cool. Thank goodness it was still kind of soft on the inside and still edible.

To help them retain some moisture, I stored the rest of the batch in an airtight glass jar when they were still a bit warm. Well, the evaporated water formed into condensation on the inside of the glass and was reabsorbed by the brownies over time, maybe within a couple of hours. When I reopened the jar to have some pieces on the next day, the mochi was extremely chewy and kind of tough, so they felt stale but still tasted fine. I recommend definitely making these in batches, only cooking as much as you are willing to eat in one sitting. This way they have a better texture, are easier to eat and are still nice and warm.


Maybe reducing the temperature from the direction’s 450 degrees F and increasing the cooking time a bit would help retain some moisture; Becky at Snackrobiotic cooked them at 400 degrees F for 10 to 15 minutes instead. I’ll have to try that with my next batch. I’m sure you can cook the mochi another way instead, but I’m not sure how the batch will turn out. Mochi that is cooked dry or with oil (grilled, baked or broiled) has a completely different texture, soft inside but slightly crispy outside, holding less moisture like mine turned out. I have also read suggestions for putting mochi cakes in sweet or savory soups, which I’ll have to try. Have you tried any of these soups before? At Nijiya Market in Japantown, I saw packages of white mochi cakes and wondered what they were for…. This is the type of kirimochi or kakumochi those websites were talking about. I love learning new cooking techniques and dishes!


The second batch to cook is Super Seed Mochi, which means I have more flavor options to make sweet or savory snacks. I think I’ll make a sauce to ladle over the top or make a dip to dunk the pieces into. Oh! Here’s an idea! Mochi waffles! (They are also known as moffles.)  Cut the mochi cake up into one-inch pieces, and cooked them in a waffle iron. The squares will pool together as they cook, creating a perfect food shape to spread nut butter, fruit puree or sauce onto. Any of the Grainaissance mochi flavors would be great to make waffles with. You can make sweet or savory ones; you can eat them as a flat-ish round with a knife and fork  or roll them up to make crepe or sandwich wrap-like dishes. You can also make mochi waffles with white rice mochi dough, too, but it’s not as flavorful or nutritious as brown brown rice mochi. I have also seen the moffle sandwiches, mochi waffles made into large enclosed sandwich-type waffle tarts. You can also cook soft mochi dough into moffles, too, in a waffle maker. Moffles have become so popular in Japan, that a couple companies actually make moffle makers; see the video below. They are kind of ridiculous.


The Grainaissance website states that the mochi can be stuffed with your favorite filling, which I hadn’t considered before. You have to slice and stuff them as soon as they are still warm but cool enough to handle. You don’t have to make little sandwiches, like in the picture to the right; you can stuff them with chopped nuts, vegetables or fruit, cashew cream, preserves, cheese, or whatever you like. Grainaissance also posted recipes, flavor combinations and techniques for preparing filled mochi. If you want, you can also e-mail the company with your address, and they will send you a recipe booklet.

There are other companies that make mochi cakes like this, too, like Eden and Mitoku. There are several other Japanese companies that make kirimochi that you can also use; just cut it up and prepare it like the brown rice mochi cakes. Although called other names, there are similar versions of the Japanese rice cakes that are made in China and Korea, so there may be some Asian markets that sell pre-made mochi-like cakes or dumplings that are made by Chinese and Korean companies, too. Here is Ahisma’s recipe over at “Like Mama Said” to make your own sugar-free mochi cake! It suggests that you divide the steamed rice in half in order to make two different dough flavors.  I will definitely have to try this. The mochi recipe is rather simple and very adjustable, so that you can make your own flavors.

Have fun making and enjoying your mochi creations. Which ingredients do you like use to make mochi? Which types of mochi have you tried? Which flavors do you like best?

Vegetable Pesto Pizza


With my plans to make cornbread, I knew I would have a bunch of the gluten-free baking mix left. I also had a bunch of vegetables left over from a ham and vegetable medley my brother and I made. I had been talking to him about making pizza for dinner one night, which is a rare treat for me. It was difficult to choose a pesto sauce. I have so many good recipes, but I chose a vegan Italian pesto sauce. Although the original plan was to also put Italian chicken sausage on the top, we forgot about prepping it sprinkle on top, so we just had some sausages on the side, saving the rest of them for making the tamale pie later.

I have never worked with a pizza stone before but have seen one of my friends use one before. I had heard they are really great to have and rather convenient, as well. The flat stone helps cook the crust evenly by distributing heat.

Vegetable Pizza with Pesto Sauce Adapted from Flaky GF Pie Crust, Rose’s GF Curry Pizza and Garlic Herb Pizza Crust
Serves 12

Crust Ingredients
Extra Virgin Olive Oil
2 C Gluten-Free Biscuit Mix
8 T Filtered Water
OR Unsweetened Almond Milk
2 – 3 Large Garlic Cloves, finely chopped
1/4 tsp Crushed Dried Thyme
1/4 tsp Crushed Dried Basil
1/3 C Earth Balance Spread with Olive Oil
Cornstarch or Rice Flour

Directions
Lightly oil the pizza stone. Dab off the excess with a paper towel. Set aside.

In a mixing bowl, combine the biscuit mix and spread with a fork or pastry cutter. Gradually mix the water, 1 to 2 tablespoons at a time, until the dough sticks together. Work in the dried herbs and garlic. Form the dough into a ball.

Cover your flat work surface with cling wrap. Flour the plastic wrap and a rolling pin with either cornstarch or rice flour. Roll out the dough from the center into roughly a 12-inch circle with a uniform to 1/4 to 1/2-inch thickness. Add more starch to the top of the dough and rolling pin as necessary to prevent the dough from sticking to the pin and tearing the dough. If your dough tears, reconnect the torn edges and smooth them together with your fingers. Place the baking stone, oiled side down, on top of the dough. Invert them together, making sure the dough doesn’t slip off, so the dough now rests on top of the stone. Reshape the dough if necessary so the dough does not hang over the edge of the stone.

Topping Ingredients*
1 – 2 T Extra Virgin Olive Oil
2 tsp Cumin Seeds, fresh ground
2 tsp Garlic Sea Salt
1/4 – 1/3 C Vegan Italian Pesto Sauce
1/2 Large Red or Orange Bell Pepper, cored, seeded, sliced
1/2 Large Bunch Kale, stemmed, torn into bite-size pieces
3 Scallions, trimmed, sliced
1/2 – 1 C Golden Cherry Tomatoes, sliced
3.8 oz Can Lindsay Naturals Sliced Black Olives
1/2 – 1 C Mushrooms, stemmed, sliced or chopped
1/2 – 1 C Broccoli Florets, chopped
2 – 4 oz Daiya Mozzarella Cheese

*The amount of veggies you want to use as pizza toppings is really up to you. It all depends on how messy you want your pizza to be.

Directions
Place the oven rack in the middle of the oven. Preheat the oven to 450 degrees F.

Oil the top of the dough evenly with the flat of your hand until the dough feels smooth and does not not crumb apart. Spread on the sauce. Sprinkle on the cumin and garlic salt across the surface. Layer on your vegetable toppings. Sprinkle with cheese. Bake your pizza for 25 minutes or until the crust cooks through and the edges turn brown and crispy. Let the pizza rest 5 to 10 minutes. Cut the pizza into 12 pieces with a sharp-edged pie cutter, pizza cutter or large chopping knife. Serve with a side vegetable or green salad. Enjoy!

Turkey Black Bean Chili with Green Salad

Chili is a nice simple meal with not much prep work involved. Mostly you just have to wait for the beans to soak and then become tender. The chili is always worth the waiting though, since it is a good comforting that can be eaten throughout the year, no matter the season. There are always leftovers that you can enjoy later or use in other recipes, too, like tacos or a hearty soup with vegetables. Chili with beans and turkey is also full of vitamins and minerals and low in fat, but you you can make vegan chili, too. Chili is also a rather diverse and flexible food; you can use lentils, different kinds of meat, beans, and add vegetables. Here’s even a raw vegan chili recipe made with marinated vegetables over at Golubka. Each of your vegetable, protein and seasoning inclusions can vastly change the overall flavor of the dish. You can make your chili sweet, spicy, salty, thin, hearty, smooth or chunky.

Turkey Black Bean Chili
Adapted from Fantastic Black Bean Chili and Sizzling Black Beans Chili
Serves 16 or more

Ingredients
1 17-oz. pkg Sizzling Black Bean Chili (3 C dried beans)
1 T Extra Virgin Olive Oil
1 Large Yellow Sweet Onion, peeled, chopped
1 Large Red Onion, peeled, chopped
7 to 9 Garlic Cloves, chopped
1 lb. Ground Turkey Meat
Dried Vegetable Mixture
Spice Packet
1 T Napa Valley Naturals Red Wine Vinegar or Bragg’s Apple Cider Vinegar
1 T Lime Juice
1 + 1 qts Filtered Water
2/3 C Medium Salsa Verde
1/2 to 2/3 C Salsa Fresca
2 Handfuls Red Fingerling Tomatoes, crushed
2 Handfuls Golden Cherry Tomatoes, crushed
1 – 1 1/2 C Fresh or Frozen Corn Kernels
4 T Better Than Bouillon Organic Reduced Sodium Chicken Base, dissolved in 1 qt hot water
Daiya Pepper Jack Cheese Shreds, optional garnish
Daiya Cheddar Cheese Shreds, optional garnish
Queso Fresco Cheese, crumbled optional garnish
Follow Your Heart Vegan Gourmet Sour Cream OR So Delicious Plain Greek Cultured Coconut Milk, optional garnish
Cilantro Springs, optional garnish
Scallions, sliced optional garnish
Lime, sliced optional garnish

Directions
Sort the chili bag contents to separate the dried vegetables from the beans. Discard any wrinkled, discolored, broken beans, and rocks. Even though the package directions does not call for soaking the beans, always, always, always soak your beans (unless they were pre-soaked and then dried) to get rid of the indigestible oligosaccharides that cause boating and gas. Pour in at least twice as much unsalted water as beans into a large pot, since beans double in size. Do not add any salt until near the very end of cooking; salt prevents the release of the indigestible sugars and the bean fiber from softening. Soak the beans overnight or at least between 8 to 12 hours. Bubbles will float to the top as the sugars are released. If you add salt to early or don’t soak the beans before cooking, they will take much longer and be harder to digest.

In an oiled stock pot or Dutch oven, saute the garlic and onions over medium heat until the onions become tender and translucent. Add in and brown the ground turkey, stirring with a long-handled spoon. Mix in the spices, beans, dried vegetables, vinegar, lime juice, and 1 quart of water. Cover and simmer for 1 hour on medium-low heat, stirring occasionally. Stir in the corn, tomatoes, salsas, dissolved bouillon, and 1 quart of water. Return the chili to a boil for at least two hours or until the beans are tender and the flavors are blended. Once the beans are soft, turn off the stove. Serve and garnish the chili in bowls to your liking.

We had our chili with a refreshing side salad, topped with red radishes and avocados in lime. You may have noticed that I included many garnish options. What do you like on your chili? I also thought about making gluten-free honey cornbread muffins with gluten-free cornmeal and gluten-free baking mix but ran out of time. Bob’s Redmill also makes a gluten-free cornbread mix, but the store we visited doesn’t carry it. A cornbread muffin recipe may be in a future post soon. 😉 How do you make your chili? Which garnishes do you use?

Garlic Thyme Cheesy Kale Chips

I know kale chips are really “fashionable” right now, but they are actually really tasty, nutritious and super easy to make. Kale is rather mild in flavor and goes with pretty much anything. You can cook it like chard or other winter greens. Kale is great in sautes, soups, sandwiches and mixed in with other salad greens; use the tender younger leaves in raw dishes. You can make savory or sweet chips. I’ve made chips with sea salt and garlic, Italian herbs, and spicy paprika; I have seen recipes for chocolate kale chips and sweet cinnamon kale chips.

Many recipes say to remove the stems, but the entire leaf is edible. If you like celery, you’ll like kale stems, too. After stemming the kale leaves, you can snack on the stems like any other vegetable sticks and even dip them in hummus or some other tasty dip or dressing.

I bought my kale at the Santa Rosa farmers market. There are so many different kinds to choose from at the various farmers’ booths. The Himalayan sea salt and organic dried French thyme I used was from the Savory Spice Shop. The garlic I got was from Costco; to save time, I bought a peeled bag of Christopher Ranch heirloom garlic. I minced it in my food processor and bottled it in jars; it’s ready to go whenever I need it. Don’t worry though; it gets eaten before it has a chance to go bad. I bought the nutritional yeast in the bulk section at Oliver’s Market.

There are several kale cultivars available, some edible and some non-edible ornamental. Of course for making chips, you want use the edible ones. Red Russian kale has green leaves with purple veins and stems, whereas Siberian kale has white veins and stems and blue-green leaves. Tuscan (lacinato or dinosaur) kale is very dark green, and the leaves are shaped like romaine lettuce but are bumpy looking. Red variety of curly kale (or Scots kale) is entirely bright purple, stems, veins and leaves, whereas the green variety is blue-green. Another variety of Scots kale that is bronze-rust color near the edges, like red leaf lettuce.Like mustard, kale is in the cabbage family; there’s even a flat-leaved kale that looks much like mustard greens but lacks the spicy flavor kick.

Cheesy Garlic Thyme Kale Chips
Adapted from versions 2 & 3 of Raw Food: Kale Chips 9 Ways
You need 4 or 5 dehydrator trays.

Ingredients
1/3 C Filtered Water
1/2 tsp Himalayan Sea Salt
3 – 5 T Minced Garlic
1 T Dried Thyme Leaves
1/3 C Nutritional Yeast
1 T Extra Virgin Olive Oil
5 C Kale, stemmed, torn into bite-size pieces

Directions
To make the marinade, mix the water, salt, garlic, thyme and yeast in a large glass mixing bowl. Set this aside for 20 to 30 minutes to allow the flavors to mingle and the thyme to hydrate. Mix the marinade again, and stir in the oil. Add half of the kale on top of the marinade in the glass bowl, and massage the marinade into the leaves. Don’t be afraid to really squish the leaves with your hands as you massage them; they will wilt anyway, which makes more room for the rest of the batch. Add the remaining kale, and continue to massage the marinade in until it is fully saturated.

To make raw dehydrated chips, line the dehydrator trays with non-stick flexible sheets or pieces of parchment paper. Transfer the kale bits to the trays, and spread them out so that the leaves do not overlap as they dry. Dehydrate the kale at 115°F for 4 to 6 hours, depending your desired crispness. To decrease the drying time, you can set the temperature to 145°F for the first hour without cooking the leaves; they will still be raw and merely loosing moisture (or so I have read). Check on the chips after 4 hours. If they are not dry enough, check again after an hour or two. If the chips are too crisp, the flavorings will flake off, so you may want to retain some flexibility if your chips are bigger than an half dollar.

To cook kale chips in your oven, preheat it to 350°F. Line some baking sheets with parchment paper. Transfer the kale to the baking sheets, but make sure the chips do not overlap. You don’t want them to stick together as they dry. Bake the chips for 25 to 30 minutes, rotating the baking sheets once at about 12 to 15 minutes, half way through the cooking time. After 25 minutes, make sure you check the chips frequently for doneness so they do not burn or get to hard. Cool the chips for about five minutes, and then chow down!

Kale chips are a great substitute for carbohydrate-rich potato and corn chips. Plus, kale has a ton of vitamins, minerals and fiber. The chips are so tasty, it is easy to loose track of how many you have eaten. Make sure you portion some out for yourself, otherwise you may find that you have eaten half of the entire batch. That’s a lot of kale, although it is very very good.

Greek-Seasoned Turkey and Vegetables with Gluten-Free Pasta

I made this with my mom when I was down in Modesto, visiting my family recently. I spotted the new Sunset Best Recipes issue and was instantly drawn in by the delicious looking cover. I am already subscribed to their “Living in the West” series of the magazine. I picked it up and started thumbing through it with my mom while we were waiting in line. The recipes all looked really good, so I told her, “If you aren’t going to buy this, I will.” Needless to say, she bought it for me. (Thanks, Mom!) The while in line still, I decided to make the Greek-inspired pasta dish, which was originally with chicken and not nearly as flavorful.

Yes, I know bamboo shoots are not Greek, but they taste good and also sounded good at the time. The magazine called for only one garlic clive, but since I was making the dish within the Wharton household, my dad peeled and minced eight for me. What can I say? We love garlic. Originally the recipe called for feta cheese, but I left it out due to my allergy and intolerance. Once plated, my mom added Parmesan, which smelled fantastic will all of the other flavors. At home I have Daiya mozzarella vegan shredded cheese, and I’m pretty sure it would taste great on the pasta, too.

Greek Turkey Pasta Adapted from Sunset, May 2011; Sunset Best Recipes, 2012
Serves 4 to 6

Ingredients
6 oz Brown Rice Spaghetti Pasta
1 1/4 lb Turkey, ground
1 Batch Greek Seasoning (see below)
1-3 T Extra Virgin Olive Oil
1 C Red Onion, peeled, chopped
8 Garlic Cloves, minced
1/2 C Pinot Grigio or Other Dry White Wine
1 C Kalamata Olives, pitted, vertically sliced
1 C or 13 oz Marinated Artichokes, chopped, marinade reserved
2 8-oz Cans Bamboo Shoots
1 C or 4 1/2 oz Pine Nuts, roasted
1/2 tsp Kosher Salt
1/2 tsp Black Peppercorns, ground
8-12 oz Baby Spinach
3 oz Parma! Vegan Parmesan or Parmesan Cheese, grated, optional
OR 3 oz Feta Cheese, crumbled
OR 3 oz Daiya Mozzarella Style Shreds

Directions
Cook the pasta according to the package. Mix the meat and Greek seasonings. In a very large saute pan, heat the oil over medium heat. Cook the onions and garlic in the oil until the onions are tender, about 5 minutes. Stir in the wine, olives, artichokes, reserved marinade, bamboo, nuts, pepper and salt, and continue to cook the turkey and vegetables 4 minutes. (I kept ours separate, since we had two different types of pasta available. We mixed ours together on the plate.) Drain and rinse the pasta with hot water, and return it to the pot. Cover the pasta to reduce cooling. Remove the meat-vegetable mixture from the heat, and stir in the spinach and pasta. Plate the pasta, and garnish it with cheese if desired.

The Sunset magazine version of the recipe doesn’t call for the Greek seasonings, but I thought the pasta needed an extra something. The herb mixture below is something that I just could not pass up on. I liked it so much I made a whole jarful for my parents. Thankfully I found an extra glass spice jar as I was going through their herb and spice collection.

Greek Seasonings Mix Adapted from the Taste of Home Test Kitchen recipe
Ingredients
1 1/2 tsp Dried Oregano
1 tsp Dried Thyme
1/2 tsp Dried Basil
1/2 tsp Dried Marjoram
1/2 tsp Onion Powder
1/2 tsp Coarse Garlic Powder

Directions
In a small bowl, combine all ingredients with a fork. Store in an airtight glass jar in a cool dark dry place for up to 6 months.

This slideshow requires JavaScript.

Easy Roasted Butternut Squash

This recipe comes from Sam Chesley.  It might have been from Thanksgiving, or just some tasty dinner.  Either way, it is now a regular guest at my house.

Get a nicely shaped butternut squash.  The fewer contours the better, since you are going to have to peel it.

Image Source

I cut it into discs before trying to hack off the skin with a big ol’ knife.  Scoop out the seeds.  Roast and eat them if you are Noel (probably, I’m just guessing, but she’s into that sort of thing).

Cube your peeled squash into about 1 inch chunks.

Toss in a bowl with minced garlic (as much as you like.  I like a lot of garlic), oregano, salt, freshly ground pepper if you are as cool as I am ;), and olive oil.  Or just mix it up in the casserole dish to save on washing.

This slideshow requires JavaScript.

Put in a casserole dish and bake at 350 for about an hour.  Stir it all up about halfway through.  The pieces will be nice and soft and your house will smell great (like garlic).

Butternut Squash is pretty darn good for you.  Its full of anti-oxidants, Vitamin A, B-Complex Vitamins, and fiber, with no fat.  Its cheap at the grocery store or farmer’s market and if you really don’t want to cut it up, it is available in the freezer section of most stores already cubed for you.   You have no excuses to not eat this tasty, tasty squash.

How do you like your squash?  Do you have a favorite type of squash?  I’ll admit, I’ve never cooked spaghetti squash or acorn squash.  The former you can do a weird fork thing to split it into “noodles” and acorn squash is good cut in half and roasted with cinnamon and maybe raisins… its been awhile since I’ve had it and my memory is a bit vague on that one.  Any suggestions for me to try it?