Posts from the ‘Sauce’ Category

Kale Saag

Velvety Kale Saag

I love saag and palak dishes, especially since they are so nutritious. They are so tasty, and I love the texture and spices. Palak is made with spinach, whereas saag is made with dark winter greens in general, like kale, collards or mustard greens, which are all very rich in fiber, iron, potassium, calcium, and vitamins A and C. You can mix pretty much any kind of protein into the greens, like homemade cheese (like paneer), chicken, lamb, fish, chickpeas, lentils, tofu or nuts (like cashews). Alternatively, you can use the saag as a kind of sauce and pour it over hearty vegetables, like carrots, broccoli or cauliflower; grains , such as rice, barley or buckwheat; or grain-like seeds, like quinoa, millet or amaranth.

Winter Greens

Kale Saag
Adapted from Ambika’s Saag Paneer.
This recipe is vegan.

Yields 4 to 6 servings

Ingredients
6 – 7 C Kale with stems, trimmed
1 Medium – Large Sweet Yellow Onion, peeled, skinned
3 T Minced Garlic
1″ Ginger Root, peeled
1/4 tsp Ground Turmeric
Pinch Sea Salt
1 1/2 C Filtered Water
4 T Almond Meal
1 1/2 T Dried Fenugreek Leaves
1 tsp Smoked Spanish Hot Paprika
1 1/2 tsp Garam Masala
1 T Sambar Curry Powder
1/4 tsp Ground Nutmeg
1/4 C Carrot Greens with stems, trimmed
1/4 C Cilantro Leaves with stems, trimmed*
1 T Extra Virgin Olive Oil
2 tsp Cumin Seeds
1 T Coriander Seeds
1 1/2 tsp Fenugreek Seeds
1/2 T Grains of Paradise
16 – 24 oz Choice Protein, prepared

Kale

Directions
Chop the kale, onion and ginger in a Vitamix (high speed blender) or food processor. Set aside.

Soak the almond meal, fenugreek leaves, paprika, garam masala, curry powder, nutmeg in 1 cup of water for 15 to 20 minutes. Blend them in the Vitamix with the carrot tops and cilantro.

Toast the seeds over medium heat for 30 seconds in a dry pan, stirring constantly. At this point, I recommend grinding the seeds until fine in a spice grinder.

Saute the garlic over low heat for about a minute. Add the onions, kale, ginger, ground seeds, turmeric and salt and saute for 5 minutes over medium heat, stirring occasionally. Mix in half a cup of water. Cover and cook over low heat for 10 minutes. Add the spiced almonds, greens and herbs. Cover and stir occasionally for next 10 to 15 minutes. Stir and adjust the consistency by adding more water if necessary.

If you want a more velvety texture, puree half of the saag in the Vitamix until smooth and stir it back into the chunkier spiced greens. At this point, mix in your desired source of protein. Serve and enjoy.

Creamy Kale Saag

Optional Ingredients and Directions
You can chop a medium to large seeded heirloom yellow or orange tomato (about 1 cup) to cook with the other vegetables and fresh herbs.

To make the dish more creamy, mix 1 cup unsweetened coconut milk, almond cream or cultured coconut or almond milk (like the “yogurts” by Almond Dream, Amande or So Delicious) with the cilantro, fenugreek, almonds and spices.

*if you are using dried cilantro leaves, measure 3 tablespoons, soak them with the spiced almond-fenugreek mixture.

Kale Saag and Eggs

Red-Label Curry no Ohji-Sama

I finally made S & B’s red box of Curry no Ohji-sama with chicken and mixed vegetables. It tasted so good! This variety is a Japanese sweet curry roux mix that was originally intended for children, but I don’t see why adults shouldn’t enjoy it, too. S & B also makes a blue-box version of this curry, too, which has a different flavor (from what I can tell based on the listed ingredients). What exactly the blue-labelled box mix is supposed to taste like is still a mystery to me, but it looks good. For more information, please read the sections I wrote on both varieties here  or here.

Thankfully, both flavors are gluten-free, as they include corn starch and white sorghum as thickeners in lieu of wheat. The directions call for the addition of meat, but you can substitute it with beans, tofu, nuts, seeds or whatever protein you prefer. The package instructions also call for potatoes and carrots (two sources of carbohydrates), which I felt were not inclusive enough. I didn’t just want to use a boring brown or yellow potatoes and a red onion (the sweet yellow and white cultivars carry less sulfur), and I decided not to serve the curry with rice but to add more colorful vegetables instead. I felt as though that the more colors I included, the healthier and tastier the meal would be, so my curry was a rainbow of yellows, orange, purple, red, whites and greens.

Each box comes with two curry roux blocks, enough to either make the curry twice or cook a double batch. The bricks are sealed individually, so you can cook one and save the other for later, preserving the flavor and moisture and preventing spoilage. As soon as I pealed back the wrapper on the roux, I knew I was in for a treat from the pleasant aromas and yellow curry color of the savory spices and slight sweetness of fruits and vegetables. I could already smell the wonderfully enticing scents of cumin, coriander and turmeric, and for some reason my mind went to cinnamon as a complimentary flavor. Maybe next time I should make a cinnamon infused dessert.

Cooking the Chicken & Vegetables

As usual, I made many of alterations to the recipe, but the dish turned out quite scrumptious, much to my delight and satisfaction. My husband liked it so much, he went back for seconds. He’s a pretty picky eater, so that’s certainly saying something. Please keep in mind that this is a sweet mild curry, so you may have to adjust the flavors to more of your liking; check out Sadie’s blog entry on the blue-box curry roux for some suggestions. Surprisingly with all of the extra meat and vegetables, the curry sauce was still rather thin in consistency. I used the same cooking techniques as described in the directions and decided not to add a thickener (like corn or arrowroot starch) on the first try, since the mix already contained some. Another option is to let some of the water evaporate rather than cooking the meat and vegetables so long with the cover on. Regardless of the outcome, the meal was a success and a learning experience.

Red-Label Curry no Ohji-Sama with Chicken & Mixed Vegetables
Adapted from the instructions on the back of the package
As stated above, this dish already includes enough carbohydrates, so do not serve this with a white rice. If you want to serve it along side or over something, I suggest something with fiber, for instance more vegetables (broccoli or cauliflower) or a seed-like “grain” (quinoa, millet or buckwheat) as a side.

Serves 6Curry no Ohji-Sama With Chicken & Vegetables

Ingredients
Extra Virgin Olive Oil
1 Medium Yellow Sweet Onion, peeled, trimmed, coarsely chopped
1 Head Garlic, peeled, trimmed, coarsely chopped
2 Medium Boneless, Skinless Chicken Breasts, cut into 1″ cubes
2 Medium Carrots, trimmed, sliced into 1/2″ pieces
2 Purple Potatoes (any variety), coarsely chopped
1 – 2 Chioggia or Red Beets, trimmed, coarsely chopped
2 Stalks Celery, diagonally sliced into 1/2″ pieces
1 Broccoli Head and Stem, trimmed, coarsely chopped
2 C Baby or Dinosaur Kale, stemmed, torn into bite-size pieces
2 C Carrot Greens, stemmed, optional
1/4 – 1/2 C Enoki Mushrooms, trimmed, left long or quartered
2 1/2 C Filtered Water
1/2 pkg Red Label Curry no Ohji-Sama Roux, finely chopped
Rice Wine Vinegar, optional
Sweet Paprika, to taste, optional

Directions
Saute the onions and garlic until the onions are soft and translucent in a large lightly oiled pan over medium heat (I used my Misto to spray on the olive oil). Mix in the carrots, beets and potatoes, stirring occasionally. Cook this mixture until the carrots are slightly soft.  Add the water, broccoli and celery. Bring the liquid to a boil. Cover and reduce the heat to a simmer. Cook the mixture for about 15 minutes or until the vegetables become tender. Remove the pan from the heat. Add the kale, greens and mushrooms. Fold in the curry roux, half at a time. Cover and return the pan to the heat. Simmer the curry for 5 minutes, stirring occasionally until the roux is evenly distributed. Taste the dish, add more paprika (and or other spices) to taste. Serve the curry either on top of an accompanying vegetable in bowl. Be sure to ladle on some extra sauce if you like.

I served this dish along side a tossed green side salad drizzled with a tasty miso sesame dressing.

Cooking the Chicken & Vegetables

Elderberry Balsamic Lamb Chops

It is so nice to have had the opportunity to enjoy lamb two weeks in a row. What a rare treat! In this recipe, my husband cooked up the last of the lamb that I lucky to get on the cheap at the San Francisco Basque Club‘s annual picnic this year. I am so glad that our tastes are diverse; he picked out a more European-centric recipe. It was rather gourmet in my mind and very tasty.

Elderberry Balsamic Lamb Chops

Elderberry Balsamic Lamb Chops
Adapted from the recipe, Fresh Herb Balsamic Lamb Chops, found at Cooking in Sens
Yields: 6 Servings

Ingredients
2 Racks of 8 lamb chops
2 1/2 T Fresh Rosemary, chopped
2 1/2 T Fresh Thyme, chopped
2 1/2 T Fresh Basil, chopped
Sea Salt, to taste
Peppercorns, fresh ground, to taste
3 T Extra Virgin Olive Oil
5 – 6 Scallions, trimmed, chopped
2 Cloves Garlic, peeled, trimmed, chopped
3/4 C Elderberry White Balsamic Vinegar*
1 3/4 C Chicken Broth or Stock
2 1/2 T Earth Balance Spread or Extra Virgin Olive Oil, room temperature

Directions
Rub the lamb chops with herbs, salt and pepper. Let the meat rest 30 minutes.

With the olive oil in a medium pan, sear the meat for 2 minutes per side over medium heat in order to add color and release flavor. It is alright if the meat blackens a little. Set aside.

Add the scallions and/or garlic to the pan to saute until softened. Add the vinegar and broth, boiling and stirring until the liquid is reduced by half. Remove from the heat, and stir in the spread or oil. Return the lamb to the pan. Coat the lamb chops in the reduction. Serve and enjoy.

*You can use aged balsamic or another gourmet balsamic vinegar of your choosing, keeping the flavors in mind.

Note: If possible, try to get local lamb to ensure freshness. Although these were a steal and rather tasty, I wish they were not flown in all the way from New Zealand to become our dinner in California. The money did, however, go towards a good cause and local organization.

Curried Lamb Chops with Persian-Inspired Quinoa

Curred Lamb & Persian QuinoaOne of the wonderful events at the San Francisco Basque Club’s Annual Picnic is the txorizo (or chorizo) auction; this year there was so much uncooked txorizo and lamb (left over from the barbeque lunch), the club held a big sale. I scored four racks for half price! Huzzah! I was eager to try the lamb but froze them for later; I still had to figure out how I wanted to cook them for two different dinners. Ultimately, I found a handful of recipes and let my husband pick one, leaving me to choose the other.

Below is an adaption of the recipe I chose, not all surprising with my tendency for well-spiced foods. I chose quinoa in lieu of rice, since it has more vitamins, mineral, fiber and protein. According to my copy of Quinoa 365, one cup of cooked quinoa contains 5 grams of fiber and 8 grams of protein, whereas 1 cup of raw quinoa has 12 grams of fiber and 24 grams of protein (the seeds triple in size as they cook and absorb water). The nutritional value also depends on which variety you eat. The folks over at Living Strong said one cup of raw red quinoa has 5 grams of fiber and 10 percent of your daily value (DV) iron, and the same amount of the white variety contains 3 grams of fiber and 20 percent DV iron. To balance it out, I use a 50-50 mixture.

Since the original recipe required the meat to marinate for at least eight hours, I went ahead and marinated mine in the refrigerator for about 24 hours. Milli’s recipe also recommended that I make lots (enough for 12 people, depending on serving size) to use as an accompaniment to other entrees later, since it was so yummy. I decided to make the quinoa the night before to allow more time for the flavors to meld together.

Curried Lamb Chops with Persian-Inspired Quinoa
Adapted from “Spiced rack of Lamb with Persian Rice” at Milli’s Kitchen.
I served the lamb with the quinoa (see the recipe below) and steamed broccoli, pouring more of the sauce over the top.

Yields: 4 – 6 Servings

Curried Lamp Chops
Curred LambIngredients
1 Lime, juice of
2 Limes, zest of OR 2 Big Pinches Dried Lime Zest
4 Cloves Garlic, peeled, trimmed, minced
1 Inch Thumb Fresh Ginger, peeled, minced
1/2 tsp Dried Ground Sumac Berries
1/2 tsp Ground Cayenne Chili Peppers
1 Heaping tsp Garam Masala Spice Mix
1 tsp Cumin Seeds, fresh ground
1 tsp Coriander Seeds, fresh ground
3 Green Coriander Pods, fresh ground, shells removed
2 Pinches Sea Salt of Choice
Peppercorns, fresh ground, to taste
1 tsp Unprocessed Sugar (optional)
OR 2 tsp Raw Blue Agave Nectar (optional)
2 – 3 T Filtered Water
2 Racks of 8 Lamb Chops
Extra Virgin Olive Oil
1 Lime, juice of
1/4 – 1/2 C Filtered Water, as needed

Directions
Preheat the oven to 375 degrees F.

Mix the marinade ingredients in a small bowl, adjusting the amount of water as needed to make a marinade sauce instead of a paste.

Score the lamb fat with a sharp knife. Place the lamb in a baking dish. Pour the marinade over the ribs, rubbing it into the fat. Coat both sides. Cover the dish to prevent cross-contamination. Chill in the refrigerator overnight.

Coat the lamb with oil, and bring it to room temperature. Sear the racks one at a time, turning with a pair of tongs, in a medium-sized pan to add color and flavor. It is alright to blacken the meat a bit.

Remove the meat from the pan and set aside. Deglaze the pan with the remaining lime juice, water and the rest of the marinade. Scrape up the burned-on bits and heat the sauce through. Place the lamb in a baking dish and pour on the sauce.

Bake in the oven for 15 minutes or until internal temperature reaches 140 degrees F. Let the meat rest covered in the baking dish for 30 to 40 minutes. Serve.

Persian-Inspired Quinoa
Adapted from “Persian Rice” at Milli’s Kitchen.
I found the quinoa rather bland, so I increased the nut, fruit and seasoning amounts.

Yields: 12 Servings

Ingredients
4 C Filtered Water
1 T Extra Virgin Olive Oil
Persian Quinoa 0011/4 tsp Sea Salt of Choice
1 C Red Quinoa Seeds
1 C White Quinoa Seeds
1/4 C Pinches Mexican Safflower
1 C Dried Apricots, chopped
2 C Filtered Water
1/4 C Food Grade Rose Petals, chopped
1/2 C Prepared or Toasted Almonds, chopped
1/2 C Prepared or Toasted Pistachios, chopped
OR 1/2 C Pumpkin Seeds, chopped
2 tsp Ground Cinnamon
1 T Coriander Seeds, fresh ground
1 tsp Unprocessed Sugar
1 Large Sweet Yellow Onion, peeled, minced
2 Lemons, zest of
1 T Extra Virgin Olive Oil or Earth Balance Spread

Directions
In a small to medium bowl, soak the dried fruit and safflower in water, adding more if necessary.

In a large pot, bring the water, oil and salt to boil. Pour in the quinoa. Reduce the heat to low. Cover and simmer 10 minutes. Turn off the heat. Stir in the petals, fruit, soaking water, nuts, seasonings, onion, zest and remaining oil. Recover and cook another 4 to 7 minutes. If there is too much water at this point, keep the lid on for another 5 minutes. If there is still too much water, drain off the excess.

Note: The original recipe called fresh chopped cilantro leaves, which I didn’t have, so I added dried fenugreek leaves after the quinoa finished cooking, but you can mix in the leaves within the last five minutes of cooking. You can also use fresh or dried cilantro or parsley instead.

Basque Cold-Poached Salmon

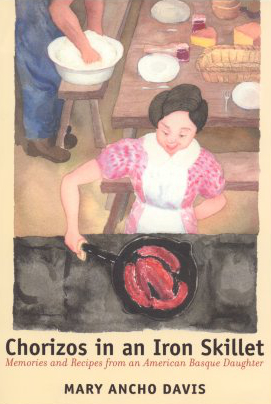
Earlier this year I got racks of lamb lamb from the Annual Basque Picnic here in town. I had a great time gathering together with my brother and cousins to celebrate the culture of out ancestors, listening to the language and songs, smelling amazing food being grilled, watching folk dances and seeing lots of people of similar descent (we are French-Basque) enjoy the all-day festivities. In addition to my cousin’s birthday, the day was absolutely filled with awesome activities. I started by perusing the Etcheverry Basque Imports booth, buying some great folk music and Chorizos in an Iron Skillet; I was not at all surprised to find The Basque Kitchen, which I already owned, amongst their selection. They had all sorts of amazing stuff! There was an American Basque guide book and an intriguing book on myths and legends that I added to my list to read later.

Annual Basque Picnic

Several months ago (sorry for the delay) during one of my grocery store quests for fish, I found salmon on sale and bought three pounds of it. I decided to try something different and flipped open my new Basque cookbook to the fish section. I had never poached salmon before but the recipe looked pretty easy and tasty, especially with the garlic aioli. My husband is usually not a sauce-on-the-side kind of guy but loved the aioli. They also went well with the side of steamed asparagus.

Cold-Poached Salmon with Garlic Aioli
Adapted from Mary Ancho Davis’ “Cold Poached Salmon” recipe published in “Chorizos in an Iron Skillet
 You can of course eat the fish cold, as suggested, but we decided not to wait and ate ours still hot.ChorizosIronSkillet
Yield: 4-6 Servings

Cold-Poached Salmon
Ingredients

1 qt Filtered Water
1 Sweet Yellow Onion, peeled, quartered
3 Celery Stalks with leaves
2 tsp Sea Salt, any variety
1/2 tsp Peppercorns, fresh ground
Marjoram, 1 T fresh or 1 tsp dried
Tarragon, 1 T fresh or 1 tsp dried
Basil, 1 T fresh or 1 tsp dried
1 Dried Bay Leaf
3 lbs Salmon Steaks, rinsed, boned

Directions
Boil all of the herbs and spices in the water in a large pot for 20 minutes over medium-high heat.

Wrap the salmon in cheesecloth to prevent them from falling apart as they cook and carefully place in the boiling broth. Simmer 15 minutes or until the fish is firm. Carefully remove the fish from the broth. Untie cloth and unwrap the fish, being careful not to burn your fingers.

Chill the fish in a covered container for at least two hours.

Serve with garlic aioli.

Garlic Aioli
Adapted from Mary Ancho Davis’ “No Fail Ali-Oli” recipes published in “Chorizos in an Iron Skillet.” According to Ms. Ancho Davis, the sauce gets better with times as the flavors meld together, so if possible, make this sauce A day or two ahead.
Yields: 8 Servings

Ingredients
1 C Prepared Mayonnaise (preferably homemade)
4 – 6 Cloves Garlic, peeled, trimmed, minced*
1 T Cold-Pressed Extra Virgin Olive Oil
1/4 tsp Lemon Juice, to taste
1/8 Sea Salt, any
Peppercorns, fresh ground, to taste (optional)

Directions
Mix the sauce ingredients together in a small bowl. Adjust the flavors as necessary. Chill until ready to serve with the fish.

*Keep in mind that this is raw garlic. You can roast the garlic first if you like. If you choose to use a food processor to mix the ingredients, you do not need to mince the garlic.

National Heirloom Exposition, Day 2

As I stated before, there were tons of exhibits to see at the exposition. It was great to see so many people, especially the school kids, come in to the expo and have such a great time. I found out some neat tidbits! People from all over the USA can participate in the festival displays by submitting their heirloom produce. In addition, all of the proceeds are donated to local school garden and food education programs.

It was pretty interesting to work at the sampling station, especially since I am not well acquainted with all of the watermelon varieties. I didn’t know know which colors to expect, so it was always a lovely surprise to behold the beauty hidden within the rinds whenever I sliced into the fruit. It was great to hear people’s responses to the melon colors, sweetness and flavors. They were as surprised as I was, many disbelieving at first that we were only serving watermelon. Interestingly, some of the tasters compared trying the melons to wine tasting, as the flavors varied in subtleties, sweetness; it helped greatly to start with the mellower flavors and work your way up.

Unfortunately, I didn’t have time to see any of the 100 plus lectures, but I heard that many people were interested in hearing Vanda Shiva, one of the keynote speakers, an anti-GMO and environmental activist and renowned author. The Wednesday lectures I wanted to hear were “Fermentation” with Luke Regalbuto & Maggie Levinger of Wild West Ferments and “Seaweeds for Food and Health” by Heidi Herrmann of Strong Arm Farm.  Thursday’s “Herbal Kitchen” by Kami McBride from Living Awareness Institute also sounds interesting. There was a “Livestock Barn” lecture series, with topics such as “Rabbit: Another White Meat” and “How to Cut Up a Chicken”.

As I explored the expo, I got to see all sorts of fruit and vegetable displays, including competitions for giant tomatoes and pumpkins. Sadly, I found the pumpkin contest a little disappointing with generally lower weight results; the contest is nation wide The Great Pumpkin Commonwealth  with results of up to 1480 pounds this year. Chef Ray L. Duey, the culinary artist, carved fruits and vegetables into intricate and awe-inspiring displays. There was also flower show, and I got several pictures of Aztec Dahlias‘ gorgeous specimens. Betty Finch’s incredibly detailed gourd sculptures were on display in the art exhibit; certain pieces of the sculptures were molded into shape as they grew. The only large mammals this year were llamas and hogs, but there were also sheep, goats, cute kunekune pigs and adorable bunnies!

On to the food! So in addition to all of this excitement, I visited many, many food vendors and tried my share of tasty samples. Not only were Mama Baretta and Lydia’s Organics there with gluten-free delicious goodies but there were several other companies with scrumptious bites, too. I finally tried Bloomfield Bees Honey’s liquid gold and particularly enjoyed their blackberry and orange-chocolate honeys. Byerbri and Good Faith Farms had really great olive oils with smooth and delicate flavors. Crofter’s Organic’s (the South American Super Fruit Spread was my favorite) and Lisa’s Luscious Kitchen‘s (loved every spoonful) jams and chutney’s were so delectable. The Hue De Laroque Family Farm’s and Sonomic’s vinegars were very nice, and I can just imagine using them in salads, reduction sauces and marinades. WholeVine Cookies was very impressive for it’s agricultural sustainability, charity and rich flavors; as a one of the sister companies of Jackson Family Wines (parent company for Kendall Jackson Wines), it reuses the seeds and skins left over from crushing the grapes, drying and grinding them into flours to make soft moist gluten-free cookies, like the oatmeal raisin and the peanut butter ones I tried. I was astounded by the texture and complexity of the flavors; they tasted and felt like “normal” homemade cookies but without the commonly present icky wheat aftertaste. WholeVine also had their cooking oils, seed flours and skin flours (yes, they differ in flavor) for purchase in eight grape varieties. RW Garcia demoed their “MixtBag” of yellow and blue corn chips, “English Cheddar Dippers” and “Curry Mango Dippers” (my absolute favorite), which all had delightful flavor and crunch. Real McCoy’s also gave out gluten-free and yummy samples of “Sweet & Spicy Rice Chips,” “Baked Vermont White Cheddar Rice Puffs” and “Baked Jalapeno Cheddar Rice Puffs.” My absolute favorite snacks were Saffron Road‘s crunchy roasted chickpeas in “Bombay Spice” and “Falafel” flavors. Andy’s Farm Culinary Alchemy had some of their “Phyto-Liscious Foods” out, including Carob “Chi Force Energy Bars,” “Spicy East Indian Popcorn Seasoning,” pear and peach spiced chutneys and Andy’s 60 Ingredient 4 Seasons Super Sour Kraut, which were all very tasty (especially the bars and chutneys). Amy’s Kitchen was there with samples again, this time with tomato bisque, red curry with vegetables and rice and minestrone vegetable soup. Now they make gluten-free brownies! I’m really looking forward to trying those.

Please view the gallery below for more pictures of colorful fruits and vegetables and cute animals. Enjoy!

Raw Nut Preparation: Soaking & Dehydrating


Whenever I purchase seeds and nuts from the local organic stores, like Whole Foods, Community Market or Oliver’s Market, I try to always buy pounds at a time from the bulk bin section to save money. I also like to reuse the bags I pour them into in order to reduce waste; if you decide to reuse yours, make sure you clean them really well first to avoid contamination. Some stores even give you a discounts for reusing bags. One cashier even gave me a discount for each reused bag I put my produce and nuts into, too, in addition to the discounts for bring in my own fabric shopping bags. I saved a lot of money that trip! At Community Market for each fabric shopping bag you use to take your purchases home in, you receive a token to donate towards a charity of your choice; each token represents a either a dime or nickle (I can’t remember which) that the store will donate on your behalf; Whole Foods has a similar program for donating to a charity of your choice in exchange for bringing in your own fabric shopping bags (or you can choose to keep your nickle). Either way, many many people bring in their bags to shop, that’s a significant amount of money donations. Giving back always makes me feel warm and fuzzy. 🙂


Anyway, back to the nuts. (I will talk about seed sprouting in a future post.) Before I start, I always turn to my books by Ani Phyo and Sarma Melngailis, who have fantastic healthy recipes, present readers with nutrition facts and are both very inspiring wome. It is very important to soak your nuts before you eat them if you want them raw, which is healthier for you than eating them straight or cooked due to all of the great amino acids and vitamins within the raw nut “meat”. Some vitamins are also fragile and break down when exposed to high heat that they are therefore no longer available to you after they are cooked. Soaking the nuts is like soaking beans; it helps get rid of bad stuff, including dust, residues and acids. In this case, you want to use salted water to speed up the process of leaching out the tannic and phytic acids, which in turn improves flavor and allows more efficient nutrient absorption and digestion.

Make sure that you shell your nuts or buy pre-shelled nuts before soaking. Always use a covered airtight (to prevent bacterial contamination) glass bowl and other non-reactive tools (plastic or stainless steel fine mesh strainer and wooden or plastic spoon to prevent oxidation) when preparing raw food. You also want to use at least twice as much water than nuts, since they will double in size. Keep an eye on your water level, and add more water to the bowl if necessary.


The amount of time required to soak the nuts is directly related to their hardness. Harder nuts take longer, some 8 to 12 hours, whereas the softer ones, only need 20 minutes to 4 hours. Visit Raw Food Living for a helpful soaking and sprouting chart. The range in soaking times depends on the ambient room temperature, so if you are using a warmer kitchen, your soaking times is lessened. Be careful though; your nuts should not get above about 72 degrees F. I always soak mine at room temperature, but some other people soak theirs in the refrigerator. If you are unsure of your nut’s leaching progress, just rinse one off and taste it. If it’s still acidic, put it back in the water. Any time after the midway point, you can change out the cloudy water for fresh water; just make sure to only use filtered water and more salt. (Filtered is best, but water that has sat out about for 20 to 30 minutes to release chlorine, other gases or even sediment is better than straight from the tap.) If you soak your nuts past the maximum time limit, they can ferment and turn sour. Trust me. If that’s not your intent, fermented nuts are a waste of time, money and food. I probably could have made nut cheese or something, but I didn’t know about that option at the time and threw all of my brand new nuts away, which was very sad and frustrating.


The nuts I eat the most often are cashews, almonds and sunflower seeds. Unfortunately due to several salmonella contamination incidents in 2001 and 2004 at non-organic almond farms, all almonds grown in the US and sold in American stores are either pasteurized with steam (which cooks the nuts) or propylene oxide (a former insecticide and racing fuel and a probable carcinogen) according to federal law since 2007. Hurray. 😦 I was recently very confused and shocked to see Oliver’s “raw” organic almonds now relabeled as steam-pasteurized. Bummer. I’m glad the shoppers are now better informed though. I still soak mine anyway to get rid of the acids to prevent heartburn and to aid digestion; I’m in trouble if I don’t. Thankfully, many farmers who sell almonds at US farmers markets are not required to pasteurize with either method, which may explain why they are always more expensive. Almond growers in Europe are also not required to pasteurize their almonds.


Let’s look at soaking cashews.

Cashews for Snacking (& Adding to Other Recipes)

Ingredients
2 lbs Whole Cashew Nuts, shelled
Filtered Water
1 T Sea Salt, ground

Directions
Sort your cashews, discarding any that are discolored. Try to remove bits of remaining skin from the nuts, otherwise they will cause dark discolorations. Sprinkle the salt into your soaking container. Pour in the nuts. Add twice as much water than nuts to the bowl. Stir them together to dissolve the salt. Cover your bowl with an airtight lid. Soak your cashews for two to four hours. Drain your nuts into a fine mesh colander, so you don’t loose any bits. Rise the cashews with cold water until it turns clear.


Place your flexible sheets or parchment paper onto the dehydrator trays. Transfer your nuts onto the trays.* Set your dehydrator temperature to either 105 or 115 degrees F. Dehydrate your nuts for at least 6 hours or longer, depending on ambient humidity. The nut meat is sufficiently dry when it makes a slight snapping sound as you break a piece in half and the color of the flesh of the nuts is a consistent shade of beige all the way through along the broken edge.

*On sunny days, you can use a solar oven or food dehydrator with a built-in fan and thermometer. You don’t want your food to get too hot. Here is a neat website that shows you how to build your own dehydrator, and this site has even more great design options. As another option for those of you who live in a climate region with dry summers, like my parents do, you can leave your nuts out in a baking sheet or jelly roll pan covered with a few paper towels in a warm place in the kitchen to dry for 8 to 12 hours or overnight. If I tried this where I live the nut’s would ferment or start to mold. Yuck. 😦

Visit to Japantown with My Brother, Part 1


After a couple of weeks visiting my folks, my brother and I had a perfect opportunity to hang out for few days without Mom and Dad (they went on vacation in Yosemite National Park near the end of my visit to celebrate Mom’s official retirement). My brother and I spoke about Japanese food quite a lot during my stay,  and we had even tried to track down some authentic ingredients for the beef and shrimp donabe and beef curry dishes we made, but the only Asian market was clear on the other side of town, which is kind of strange with a significant number of the Chinese, Japanese, Loatian and Vietnamese restaurants in town….

Anyway, we decided to make a stop at Japantown in San Francisco on the way back to my house instead, since it was actually more convenient, believe it or not. We had a great time, which is funny to say, since we basically went grocery shopping. We also did not get along when we were younger, I am feel very fortunate that he and I have become more mature. Not only can we tolerate each other, we actually want spend time together. What a relief!

Daiso is a big discount store in Japantown that sells most of their merchandise for $1.50 (online their items are sold only in bulk). They have all sorts of stuff, from dishes and figurines to fedoras and beauty products, including some items I thought were a bit odd, like disposable underwear; on the other hand, the store also had a ton of cute and useful things, too. I was totally surprised the store had so many sushi-making tools  and bento box lunch making tools (like 1, 2, 3, 4, 5). I bought a table-side purse hook, bamboo crochet hook, LED flashlight, knee-high and toe socks, skinny metal chopsticks, calligraphy brushes, and fruit chew and herbal hard candies. It’s a great little department store with a wide variety of items that periodically changes by the season. If you are in Japantown, stop by and visit; you should really take the time to look through all of the aisles. Who knows what amazing deals and treasures you’ll find tucked away.

Ichiban Kan is also a discount department store, but sadly they have raised their prices dramatically since my last visit and are now more of a general store. Like Daiso, they have a wide assortment of items, which is impressive, since they are less than half the size. They do carry some nice, useful and cute items though. I bought my favorite three-tiered bunny bento box, blue ceramic sushi dishes and adorable large kitty throw pillow there. By brother found a big package of S & B medium-hot Japanese curry roux, the same kind we used in our beef curry dinner, but it was twice as big for the same price.

Sanko Cooking Supplies is a great store. When we went, most everything (at least in the front half) was on sale, plus another 10% off. The prices were rather amazing! I’ve been thinking of getting a sushi oko (the round wooden rice cooling tub for making sushi rice), but when I saw the the kit, I realized I don’t really need one or have the space for such a big thing that I’d probably barely use. It was nice to see so many donabe there in various sizes. They had quite a selection of fine quality stainless steel food preparation knives; I was looking for a ceramic chef’s knife or cleaver though. Ceramic blades are better for cutting fruit and vegetables, like this one, since they discourage oxidation, unlike metal knives and utensils. Their whole back room is absolutely lovely and filled with gorgeous tableware, tea cups and pots, furniture, clothing, figurines, and amazingly realistic resin-cast food sets (I think they are placed at ancestral shrines).

Kippu is a brand new wonderful restaurant with great prices, friendly service, delicious food, and an inviting family atmosphere. My brother and I received so many complimentary side dishes that I’m surprised we didn’t have any leftovers; to be fair, we had a rather late lunch while we were there, which means we were two very hungry people. The waiters gave us extra salad with a tasty dressing, colorful mild chili in-the-pod edamame  (I’ve never seen them served that way before), soothing jasmine green tea and comforting miso soup, and those free foods were in addition to the dishes we already requested! I ordered futomaki (a vegetarian sushi roll with sweet scrambled eggs, Japanese pickles and fresh vegetables) and a three-item bento box lunch of seaweed salad (I thought about ordering a two-item bento….), vegetable tempura and avocado maki, which came with a dressed green salad (so that was two of green salads in reality), white rice and miso soup. My brother ordered beef soba soup (so two soups for him and a dressed salad on the house). The diners at the table next to ours ordered the Flaming Dragon specialty sushi rolls, which contained tempura shrimp, crab, spicy tuna, salmon, yellow tail, tuna and tobiko (flying fish roe) “with fire”. It certainly was exciting! The sushi roll was a wrapped in foil, set on a plate over a highly combustible alcohol set alight. Everything we had tasted amazing! We were both very impressed and stuffed full of delicious foods. I’m surprised they didn’t have to roll us out the door! It’s a good thing we didn’t have any “wafer-thin mints.” 😉 I will definitely go back the next time I’m in Japantown; I highly recommend this restaurant!

Hang in there for more of our Japantown adventure! I’ll post the second half very soon. Enjoy!

Vegetable Pesto Pizza


With my plans to make cornbread, I knew I would have a bunch of the gluten-free baking mix left. I also had a bunch of vegetables left over from a ham and vegetable medley my brother and I made. I had been talking to him about making pizza for dinner one night, which is a rare treat for me. It was difficult to choose a pesto sauce. I have so many good recipes, but I chose a vegan Italian pesto sauce. Although the original plan was to also put Italian chicken sausage on the top, we forgot about prepping it sprinkle on top, so we just had some sausages on the side, saving the rest of them for making the tamale pie later.

I have never worked with a pizza stone before but have seen one of my friends use one before. I had heard they are really great to have and rather convenient, as well. The flat stone helps cook the crust evenly by distributing heat.

Vegetable Pizza with Pesto Sauce Adapted from Flaky GF Pie Crust, Rose’s GF Curry Pizza and Garlic Herb Pizza Crust
Serves 12

Crust Ingredients
Extra Virgin Olive Oil
2 C Gluten-Free Biscuit Mix
8 T Filtered Water
OR Unsweetened Almond Milk
2 – 3 Large Garlic Cloves, finely chopped
1/4 tsp Crushed Dried Thyme
1/4 tsp Crushed Dried Basil
1/3 C Earth Balance Spread with Olive Oil
Cornstarch or Rice Flour

Directions
Lightly oil the pizza stone. Dab off the excess with a paper towel. Set aside.

In a mixing bowl, combine the biscuit mix and spread with a fork or pastry cutter. Gradually mix the water, 1 to 2 tablespoons at a time, until the dough sticks together. Work in the dried herbs and garlic. Form the dough into a ball.

Cover your flat work surface with cling wrap. Flour the plastic wrap and a rolling pin with either cornstarch or rice flour. Roll out the dough from the center into roughly a 12-inch circle with a uniform to 1/4 to 1/2-inch thickness. Add more starch to the top of the dough and rolling pin as necessary to prevent the dough from sticking to the pin and tearing the dough. If your dough tears, reconnect the torn edges and smooth them together with your fingers. Place the baking stone, oiled side down, on top of the dough. Invert them together, making sure the dough doesn’t slip off, so the dough now rests on top of the stone. Reshape the dough if necessary so the dough does not hang over the edge of the stone.

Topping Ingredients*
1 – 2 T Extra Virgin Olive Oil
2 tsp Cumin Seeds, fresh ground
2 tsp Garlic Sea Salt
1/4 – 1/3 C Vegan Italian Pesto Sauce
1/2 Large Red or Orange Bell Pepper, cored, seeded, sliced
1/2 Large Bunch Kale, stemmed, torn into bite-size pieces
3 Scallions, trimmed, sliced
1/2 – 1 C Golden Cherry Tomatoes, sliced
3.8 oz Can Lindsay Naturals Sliced Black Olives
1/2 – 1 C Mushrooms, stemmed, sliced or chopped
1/2 – 1 C Broccoli Florets, chopped
2 – 4 oz Daiya Mozzarella Cheese

*The amount of veggies you want to use as pizza toppings is really up to you. It all depends on how messy you want your pizza to be.

Directions
Place the oven rack in the middle of the oven. Preheat the oven to 450 degrees F.

Oil the top of the dough evenly with the flat of your hand until the dough feels smooth and does not not crumb apart. Spread on the sauce. Sprinkle on the cumin and garlic salt across the surface. Layer on your vegetable toppings. Sprinkle with cheese. Bake your pizza for 25 minutes or until the crust cooks through and the edges turn brown and crispy. Let the pizza rest 5 to 10 minutes. Cut the pizza into 12 pieces with a sharp-edged pie cutter, pizza cutter or large chopping knife. Serve with a side vegetable or green salad. Enjoy!

Pesto!

I love pesto! If a restaurant has a dish that includes pesto, I often have a difficult time resisting the urge to order it (unless the meal has lots of gluten or dairy in it, like cheesy pasta). Like curry, it’s a mixture. Although Italian basil pine nut pesto with Parmesan or Romano cheese is the most popular, there are several different varieties consisting of all kind of herb and spice combinations, however unlike curry, the flavorful mixtures are much simpler. Pesto recipes are rather adjustable, too; you can make them however you like. They can be oil-based, cream-based, oil-free and made into sauces or spreads. Most recipes either include nuts, cheese or both with leafy herbs and oil. You can put them on vegetables, bread, crackers, pasta, grains, salads, etc.

My favorite way to make pesto that’s healthier for you is with lots of soaked nuts and greens, a bit of oil and sometimes nutritional yeast. It’s easy to make. You just soak and rinse the nuts, trim the greens, add a couple more ingredients, and grind it all up in a food processor or blender. That’s it. Here’s the cashew-based basil pesto recipe I posted earlier, which also Includes carrot greens. I used to make it without carrot greens until I learned that they are so nutritious, containing lots of vitamins and minerals, like potassium and vitamin K to name a few. Carrot greens are also a good source of chlorophyll.

Here are some other pesto recipes that I’m eager to try out. You can “veganize” the recipes that have cheese by substituting with nutritional yeast or leaving out the cheese and yeast.

Cashew Basil Pesto With VeggiesVegan Pesto Recipes
Pine Nut Pesto

Kale Walnut Meyer Lemon Pesto

Kale Chickpea and Asparagus Pesto

Kale Basil Pesto with Nutritional Yeast

Broccoli Stem Pesto

Asian Pesto Sauce

Swiss Chard Pesto

Roasted Eggplant & Almond Pesto

Mixed Herb Pesto

Sage Pesto

Thai Lemongrass Pesto

Red Pepper Pesto

Sweet Pea Pesto

Spirulina Pesto with White Miso

Vegetarian Pesto Recipes (contain cheese)
Almond & Thyme Pesto

Lemon Thyme Chive Spinach Pesto

Watercress Pesto

Avocado Spinach Pesto

Garlic Scape & Sorrel Pesto

Artichoke Lemon Pesto

Three Basil Pesto

Arugula Pesto

Lemon Verbena Pesto

Roasted Shallot and Tarragon Pesto

Collard Green Olive Pesto

Dill Pesto

Carrot Pesto

Other Pesto Recipes
Coriander Pesto (contains fish sauce)

Which kind of pesto do you make? What do you eat it with?