I initially found this recipe on the back of an Arrowhead Mills puffed millet package I bought for my gingerbread marshmillets. Using the millet in a savory dish sounded interesting, and I was wondering how else I could use puffed milled beyond cereal and bird seed. The original recipe called for sharp cheddar cheese and wheat-based pastry flour, so I had to alter the recipe. Since I was making substitutions to the recipe anyway, I opted for a “chia egg” rather than the standard chicken variety and thyme rather than dill.
Honestly, replacing the sharp cheddar with cheddar-style shreds was a mistake. I have discovered I do not actually like Daiya’s cheddar; they taste is very strong and rather off. I do hope they change their recipe soon. The only recognizably cheddar-like property of these shreds is the color; otherwise, they taste like mildly cheesy peas. It was very hard to mask the pea flavor even after I added more spices. The only way I was able to mellow the flavor was to add sliced avocado on top; hummus or chicken salad might also work. I’m sure including real cheddar cheese would taste lovely. Maybe I will try Daiya’s Pepper Jack-Style Shreds in the future to improve my dairy-free version of the squares.
Cheesy Thyme Millet Squares These can accompany entrees in lieu of bread or can be used as appetizers topped with various spreads, like hummus, tempenade, or bruschetta.
Yields 9 servings
Ingredients
1 C Daiya Cheese-Style Shreds
1 tsp Fresh Thyme Leaves
1 Pinch Fine Grain Sea Salt
1/2 tsp Fresh Minced Garlic
Dash Sweet California Paprika
1/4 tsp Smoked Spanish Paprika, more to taste
1/8 tsp Ground Mixed Peppercorns
3 T Earth Balance Spread, melted
1/2 C Fine Ground Buckwheat Flour
1 Chia Egg (1 T Ground Chia Seeds + 4-6 T Filtered Water)
1/4 tsp Baking Soda
1 Lemon, juice of
2 C Puffed Millet Cereal
Topping (see description above), optional
Directions
Preheat oven to 375F. Grease an 8″ square baking dish.
In large mixing bowl, combine the cheese, thyme, seasonings, spread, flour and baking soda. Stir in the lemon juice. Fold in the millet. Bake for 25 or until the top starts to brown. Cut into squares. Decorate as desired. Serve warm.
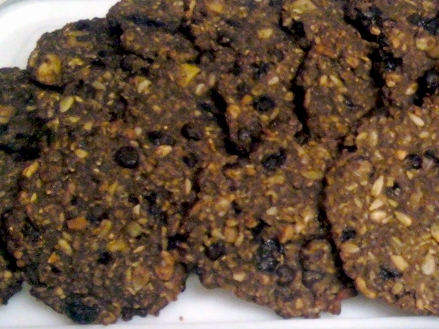
I absolutely love oatmeal cookies! These have nuts, dried fruit, and oats with lots of fiber, protein, and other nutrients, and since the dough is low in fat and sugar, these cookies are also great any time of the day. You can also warm up a small bowl full to eat like regular oatmeal. As these cookies are completely vegan (and therefore eggless), you can safely eat the dough raw. If you like, you can even makes these cookies raw vegan (with raw oats, apples, and almonds) by dehydrating them instead of baking in the oven.
This recipe is so neat! As the dough does not spread out during baking, you can shape the cookies however you like, even into bars, which makes it easier to take them on trips or to work or school. You can completely customize the ingredients too with eggs, milk, and whatever fruit and seed/nut combination you want. If you have problems with fiber, you can choose to leave out the bran entirely or add more, just make sure you adjust the amount of liquids you add. This recipe is 4 5/8 cups of liquid, 4 7/8 cups of oatmeal cookie dough, and 6 3/4 cups of mix-ins, so you will need a very, very large mixing bowl. You can, of course, reduce the amounts to create a smaller batch. There are so many options.
Gluten-Free Cosmic Cookies
Adapted from Cosmic Cookies on Wellsphere. I like these cookies so much that I doubled the recipe to add a greater variety of ingredients.
Yields about 60 cookies
Ingredients
1 1/4 C Warm Filtered Water
1/4 C Chia or Flax Seeds, course ground
1 C + 2 T Hulled Oats
1 C + 2 T Oat Bran
1 C Bob’s Red Mill Gluten-Free All-Purpose Flour
1 C Almond Flour
1/2 C Sucanat
1/2 C Evaporated Cane Juice
1 T Ground Cinnamon
2 1/4 tsp Sea Salt
1 tsp Xanthan Gum
1/2 C Sunflower Seeds
1/2 C Pumpkin Seeds
1/4 C Hemp Seeds
1/2 C Chopped Walnuts or Pecans, shelled, chopped
1 C Dark Chocolate Chips
1 C Dairy-Free Malted or Regular Carob Chips
1/2 C Sulfur-Free Unsweetened Finely Shredded Coconut
1/2 C Dried Cranberries
1/2 C Golden Raisins
1/2 C Chopped Dried Figs
1/2 C Chopped Apricots
5 T + 1/8 tsp Blue Agave Nectar
1/4 C Sulfur-Free Blackstrap Molasses
1/4 C Filtered Water
1 C Unsweetened Apple Sauce
1 C Almond or Other Dairy-Free Milk
Directions
In a small bowl with a fork, beat ground chia or flax seeds together with 1 1/4 cup water. Set aside for 15 to 20 minutes to allow seeds to gel and soak up the liquid, stirring about every five minutes to avoid clumps.
Preheat oven to 350°F. Line 2-3 baking trays with parchment paper.
Combine the dry ingredients in a large bowl.
In a medium bowl, combine the wet ingredients, including remaining 1/4 cup water. Stir the wet ingredients into the dry.
Use a 1/3 measuring cup to portion out the dough about two inches apart onto baking sheets. Gently flatten cookies with your fingers or a spoon, as this dough will not spread out as it cooks. Bake for 25 minutes or until lightly browned.
February 22, 2016 noelnomsComments Off on Anytime Oatmeal Cookies
I was craving rice crispy treats for a while, as well as warm spice mixes, such as clove, cinnamon and ginger. Thankfully, the local overstock grocery store was selling leftover holiday marshmallows for cheap. The marshmallows smelled amazing through the bag and were in the shape of adorable little gingerbread people. I could not resist buying them; I bought vanilla snowmen marshmallows, too. (If you want to use other marshmallows, please read my gingerbread spice-infused butter.) The overstock store, however, did not have any puffed rice, so next I stopped at Sprouts to see how much their bulk puffed brown rice was. The price was more than I expected, so I looked around for other puffed cereal options. I cannot eat puffed wheat of any variety, so those grains were right out. I was rather curious about the bags of millet, which happened to be on sale, especially since I had never eaten it before.
Puffed Millet
The texture of millet was surprising, but I thought this cereal would work well with my desire to make gooier treats by adding extra mallows. These are not crispy. At all. Puffed millet grains are much, much softer than puffed rice. I actually added one third more marshmallows than the original recipe called for. I also halved the amount of mixed in oil, but greased my hands repeatedly to cut down on the stickiness.
Ingredients
2 8-oz bags Kraft Jet-Puffed Gingerbread Men Mallows
2 T Earth Balance Spread, plus more for greasing
6 C Puffed Millet Cereal
Directions
Line a 9 x 13-inch baking dish with either baking parchment paper. Set aside.
Grease a large glass mixing bowl with buttery spread. Pour the cereal into a large measuring cup or clean dry bowl. Set aside.
Coated Gingerbread Marshmallow People
Melt the spread and marshmallows in a large pan or medium pot over low heat, stirring constantly to prevent the sugar from burning to the bottom. Remove the melted mallows from the heat.
Melted Gingerbread Marshmallow People
Transfer the cereal into the greased bowl. Fold the melted marshmallows into the millet. I mixed the marshmallow and millet together with my hands. If you use this method, grease up your hands first with a bit of the butter or spread to prevent the marshmallow from sticking to you so much. My hands became sticky marshmillet treats themselves as I was mixing. As the mixture cools, it will harden and become more difficult to mix, so work fast.
Mix the millet into the melted mallows.
Once thoroughly combined, quickly press the mixture into the pan, spreading evenly and flattening the surface. Use a knife to cut the marshmillets into bars.
I first tried out cooking hand pies with this method several years ago while car camping with Adriann and a bunch of other friends. I tested out hers to make a very yummy snack and have wanted a set ever since, especially now that we have a fire pit on our back patio. Unfortunately, other than on Amazon or other online stores, pie irons are rather challenging to find. So when I saw them in one of our local overstock stores, I bought two right away as an early Valentine’s Day gift for my husband. Pie irons are fantastic usually long-handled cast iron hand-pie makers (like a waffle irons) for cooking over an open flame or camp fire. You can either use dough or slices of bread to make the piecrust, but keep in mind that thinner crusts will allow more room for fillings. They are easy to make in these irons and are an incredibly simple comfort food. The outside is nice and toasty, while the fillings are warm and gooey on the inside. Since you get to choose your own toppings, you can make the pies meaty, cheesy, vegan, gluten free, healthy, or however you like.
To make a hand pies, put a slice oil or butter-side down (to prevent it from sticking to the iron) onto the bottom half of the iron. Place your fillings, like fruit preserves, chocolate, nut butter, meat, eggs, cheese, etc., in the center of the bottom bread slice; make sure you include an ingredient that acts as a binding agent, otherwise the pie will not stay together as well. Lay a second slice of bread over the top of the fillings with the oiled side up. Close the the iron, so the top bread slice covers the filling. Clamp the iron closed. Trim off any excess bread sticking out from the sides of the iron. Place the cast iron over the fire, holding onto the wooden (or otherwise insulated) handles. Bake the hand pie for about four to six minutes rotating occasionally.
There are all sorts of recipes you can try. Richard O’Russa wrote a great looking cookbook and you can find even more recipes from Rome’s online shop, which features more information about the devices. I am sure you can find other hand pie recipes for baking with pie irons elsewhere on the the internet, as well, like here. You can also check out Pudgy Revolution’s Pudgy Pie Test Kitchen You Tube series, and if you really like their recipe ideas, you can support their pudgie pie cookbook Kickstarter.
The other day while browsing Facebook, I ran across Lauren’s paleo cornbread muffins. The muffins looked really good from their description, and the title seamed rather interesting. I mean, what are cornless cornbread muffins anyway? Well, these tasty treats are actually cornbread-style coconut muffins. I know that may sound strange, but the muffins are very tasty. The flavors blended nicely, covering up any potential coconut flavor almost entirely (if you want a more pronounced coconut taste, I’m sure it’s not too hard to adjust the flavors).
These muffins looked like they would go perfectly with the chili from the recipe I recently posted, but they also taste great on their own. The muffins contain honey without being overly sweet, especially since I swapped the originally listed apple sauce with carrot puree. I was bothered by the amount of oil that the recipe called for, which was equal to the flour measurement. My stomach doesn’t usually handle oily foods very well (it just sinks to the bottom of my stomach and lingers). I halved the oil, substituting it with more carrots. If you want, you can lower the fat even more by completely substituting the oil with puree; I plan to do this next time as an experiment.
To increase savoriness, I added Daiya pepperjack cheese to half of the muffins by sprinkling it on top, but later realized that I should have put the cheese in the middle (I did include instructions for that below) to prevent it from so firmly sticking to the liners.
What do you put in your cornbread muffins? What do you eat them with?
Carrot Coconut Muffins Adapted from Lauren’s Paleo Cornbread Muffins at Empowered Sustenance
The recipe below is a doubled adaptation of the original version. I have also included vegan options.
Yields 1 Dozen Muffins
Ingredients
1/2 C Coconut Flour
1/4 C Coconut Oil, melted
1/4 C + 2 T Raw Pureed Carrot, room temperature
4 Eggs, room temperature
OR 4 Chia Eggs (1/4 C Chia Seeds + 3/4 C Filtered Water)*
2 T Creamed Cinnamon Honey or Wildflower Honey**
1/2 tsp Baking Soda
2 tsp Unfiltered Apple Cider Vinegar
Filtered Water, as needed, room temperature
Daiya Pepperjack Style Shreds, optional
Directions
For vegan muffins, finely grind the seeds in a spice grinder. Mix the chia egg ingredients together with a fork in a medium bowl, adding up to 4 more tablespoons of filtered water if necessary to create an even egg-like consistency. Set aside for 20 minutes, stirring occasionally.
Preheat the oven to 350 degrees F. Grease or line the muffin tin with muffin papers. Set aside.
In a large food processor, combine the flour, oil and 1/4 cup puree until well combined. Incorporate the eggs fully until the batter no longer has any lumps. Mix in the remaining puree, sweetener, baking soda and vinegar. Add more water as needed to achieve proper muffin batter thickness.
Pour about 1 tablespoon of batter into the muffin cups. Sprinkle about 1 to 2 teaspoons of cheese on top if desired. Pour another spoonful of batter over the cheese.
Bake for 30 to 40 minutes or until a toothpick inserted in the center comes out clean. Cool the muffins on a wire rack for 15 minutes. Turn out the tin onto a rack or plate. Cool until they are warm to touch and ready to eat.
Store in an airtight container. They will last longer if chilled.
*You can make flax “eggs” instead of chia ones with the same seed to water ratio and instructions.
**For lower sugar content, use 1 tablespoon blue agave nectar or about 6 to 9 drops of liquid stevia in lieu of honey.
Note: If you want to leave out the sweetener entirely, just add more carrots. You can also add minced bacon, red bell pepper, chiles or scallions.
As I stated before, there were tons of exhibits to see at the exposition. It was great to see so many people, especially the school kids, come in to the expo and have such a great time. I found out some neat tidbits! People from all over the USA can participate in the festival displays by submitting their heirloom produce. In addition, all of the proceeds are donated to local school garden and food education programs.
It was pretty interesting to work at the sampling station, especially since I am not well acquainted with all of the watermelon varieties. I didn’t know know which colors to expect, so it was always a lovely surprise to behold the beauty hidden within the rinds whenever I sliced into the fruit. It was great to hear people’s responses to the melon colors, sweetness and flavors. They were as surprised as I was, many disbelieving at first that we were only serving watermelon. Interestingly, some of the tasters compared trying the melons to wine tasting, as the flavors varied in subtleties, sweetness; it helped greatly to start with the mellower flavors and work your way up.
Unfortunately, I didn’t have time to see any of the 100 plus lectures, but I heard that many people were interested in hearing Vanda Shiva, one of the keynote speakers, an anti-GMO and environmental activist and renowned author. The Wednesday lectures I wanted to hear were “Fermentation” with Luke Regalbuto & Maggie Levinger of Wild West Ferments and “Seaweeds for Food and Health” by Heidi Herrmann of Strong Arm Farm. Thursday’s “Herbal Kitchen” by Kami McBride from Living Awareness Institute also sounds interesting. There was a “Livestock Barn” lecture series, with topics such as “Rabbit: Another White Meat” and “How to Cut Up a Chicken”.
As I explored the expo, I got to see all sorts of fruit and vegetable displays, including competitions for giant tomatoes and pumpkins. Sadly, I found the pumpkin contest a little disappointing with generally lower weight results; the contest is nation wide The Great Pumpkin Commonwealth with results of up to 1480 pounds this year. Chef Ray L. Duey, the culinary artist, carved fruits and vegetables into intricate and awe-inspiring displays. There was also flower show, and I got several pictures of Aztec Dahlias‘ gorgeous specimens. Betty Finch’s incredibly detailed gourd sculptures were on display in the art exhibit; certain pieces of the sculptures were molded into shape as they grew. The only large mammals this year were llamas and hogs, but there were also sheep, goats, cute kunekune pigs and adorablebunnies!
On to the food! So in addition to all of this excitement, I visited many, many food vendors and tried my share of tasty samples. Not only were Mama Baretta and Lydia’s Organics there with gluten-free delicious goodies but there were several other companies with scrumptious bites, too. I finally tried Bloomfield Bees Honey’s liquid gold and particularly enjoyed their blackberry and orange-chocolate honeys. Byerbri and Good Faith Farms had really great olive oils with smooth and delicate flavors. Crofter’s Organic’s (the South American Super Fruit Spread was my favorite) and Lisa’s Luscious Kitchen‘s (loved every spoonful) jams and chutney’s were so delectable. The Hue De Laroque Family Farm’s and Sonomic’s vinegars were very nice, and I can just imagine using them in salads, reduction sauces and marinades. WholeVine Cookies was very impressive for it’s agricultural sustainability, charity and rich flavors; as a one of the sister companies of Jackson Family Wines (parent company for Kendall Jackson Wines), it reuses the seeds and skins left over from crushing the grapes, drying and grinding them into flours to make soft moist gluten-free cookies, like the oatmeal raisin and the peanut butter ones I tried. I was astounded by the texture and complexity of the flavors; they tasted and felt like “normal” homemade cookies but without the commonly present icky wheat aftertaste. WholeVine also had their cooking oils, seed flours and skin flours (yes, they differ in flavor) for purchase in eight grape varieties. RW Garcia demoed their “MixtBag” of yellow and blue corn chips, “English Cheddar Dippers” and “Curry Mango Dippers” (my absolute favorite), which all had delightful flavor and crunch. Real McCoy’s also gave out gluten-free and yummy samples of “Sweet & Spicy Rice Chips,” “Baked Vermont White Cheddar Rice Puffs” and “Baked Jalapeno Cheddar Rice Puffs.” My absolute favorite snacks were Saffron Road‘s crunchy roasted chickpeas in “Bombay Spice” and “Falafel” flavors. Andy’s Farm Culinary Alchemy had some of their “Phyto-Liscious Foods” out, including Carob “Chi Force Energy Bars,” “Spicy East Indian Popcorn Seasoning,” pear and peach spiced chutneys and Andy’s 60 Ingredient 4 Seasons Super Sour Kraut, which were all very tasty (especially the bars and chutneys). Amy’s Kitchen was there with samples again, this time with tomato bisque, red curry with vegetables and rice and minestrone vegetable soup. Now they make gluten-free brownies! I’m really looking forward to trying those.
Please view the gallery below for more pictures of colorful fruits and vegetables and cute animals. Enjoy!
I’m just joking and being punny. Beets are a nutritious root vegetable that is entirely edible (greens and roots), like carrots, and are used in many different cuisines. You can eat them raw in salads or juiced, roasted, steamed, as chips (dehydrated or baked), pickled or canned, in soups, and more. You can always try an Eastern European dish of brightly hued hot or chilled borscht, which can also include sour cream, onions, potatoes, cabbage, sorrel, tomatoes, or carrots, depending on where the recipe is from. There are also many varieties of beets that best prepared in various ways. Some have tough or tender greens, while others have have rather sweet or bitter roots. Tender greens and sweet beetroots can be eaten raw, but tough greens and bitter roots are best cooked so to ease digestion and improve flavor. Which ever beet variety you choose, make sure to rinse and scrub them all over with a vegetable brush to get rid of dirt hidden in crevices and bring out the natural color. Here’s a helpful website that has more ideas and factoids mostly regarding red beets.
Beets have practical uses, too. You may have noticed their deep or bright colors caused buy flavinoids (anti-oxidants), especially while cutting them up. Watch out! The darker cultivars will stain anything and everything. Many people choose to wear gloves when working with them. Whether you do or do not enjoy eating beetroots or their greens, you can use them to dye paper, yarn and fabric. Just make sure to perform a sample test run, since the colors may not turn out as you expect.
Red beets range in size and color, from pink to dark, dark red and are of your most commonly found varieties in grocery stores. They are generally juicy, tender, sweet and vividly colored. There are lots of heirloom and hybrid cultivars to choose from that are a bit different, some of which have tasty greens. For the kind that are best cooked, here are some methods to prepare them. Red beets are high in nutrients and are very good for you.
Chioggia beets are a nice visual treat of a beet that come in red, purple or pink with white rings in a series of circles that form a bulls eye target when they are sliced horizontally; it you cut them vertically in half, the flesh appears striped with alternating striations. These beetroots have a sweet overall flavor but very sharp bitter aftertaste when eaten raw; their alkalinity made my throat kind of itchy and irritated. I drank lots of water and had to consume something slightly acidic to get rid of the sensation and taste. The other option is to thinly slice the beets and marinate them in either vinegar or citrus juice, like in this recipe. Needless to say, these beetroots are best eaten cooked or marinated. Baby candy cane beets are similar in pattern with bright red and white radiating circles but are smaller, can be eaten raw and are the sweetest type of beet.
Golden beets have a mild and sweet flavor with another full collection of nutrients. They also have a bulls eye pattern but in orange and yellow when sliced horizontally. Since golden beets are a bit rough skinned, it’s best to peel them first. One of the great things about golden beets is that when you peel them, you don’t have to wear gloves or worry about your hands staining. I have yet to try them, but I hear they taste fantastic oven-roasted, especially whole. There are several cultivars to choose from, such as Burpee goldens, yellow Detroits and yellow Mangels.
The Dutch blankoma or albino beets, are also a bit different. These beets are also non-staining, so no gloves are necessary. Blankoma beets have a mild flavor and a potato-like texture. Lightly steam them to bring out their delicate sweetness that is easy to mask if you aren’t careful in adding the right amount of seasoning. Just add a little extra flavor from spices and herbs at a time; it’s also best to start simple, maybe with some salt and pepper. Keep a close watch over them as they cook to prevent them from overcooking and turning gray, which can also diminish the natural flavor. Here’s some more information about them, including how to prepare them.
Collard greens are really healthy for you. They are full of iron, vitamin C, calcium, fiber and lots of other important nutrients. You can eat them raw in salad, wraps or make dehydrated chips out of them (like kale chips) in numerous flavors, or you can eat them cooked. These greens are much like spinach in this way. Honestly, I prefer to eat them raw. When you cook them you have to be really careful to not degrade the fiber and vitamins, which is completely unavoidable for some nutrients, especially amino acids, which our bodies need for many basic chemical processes.
Anyway, of course there are many ways to eat and enjoy cooked collards, too. Cooking also makes the insoluble fibers more digestible and affects the flavor. Many people prefer to eat collards cooked, since the raw leaves can have a metallic or alkaline taste that is unpalatable to some. Whatever you do, don’t overcook it into a bland mushy slimy mess that holds very little nutritional value at all. I hope this site on collard green preparation proves helpful. It also details collard green’s nutritional benefits.
Collard green and lettuce wraps are great and very versatile. Yes, they are often messy, but that’s part of the fun. They are generally lower in calories than wraps made with tortillas or sandwiches made with bread. You can fill them with most any thing and dress them any way you like. You can even eat them with an accompanying dip, if you like. They are easy to make with or without meat and are a perfect finger food type meal that is easy to assemble an d completely customizable for those with certain food dislikes, allergies and or digestive issues.
Carianne over at Good Likes Girls made a curry lettuce wrap, which I think would also taste good with cashews and Bragg’s Aminos if you need it “veganized”. I would also have to play with the balance of the herb flavors, since I’d have to exclude mint. Here’s a Chinese chicken wrap posted by Chris Perrin that may be interesting. It’s made with rainbow chard, which I initially thought would taste to irony and alkaline…. It was posted on Food Fab, so people must like it.
Collard Greens Wrap
Serves 1 to 2
Ingredients
2 Collard Leaves, halved, center spine and stems reserved *
1/4 – 1/2 tsp Chopped Garlic
1 tsp Hummus, optional
1 tsp Favorite Savory Nut Butter, optional
1/2 – 1 tsp Dijon or Spicy Brown Mustard, optional
1 tsp Salsa Verde or Tomatillo Salsa, optional
4 – 8 Large Basil Leaves
2 Large Kale Leaves, torn into bite-size pieces, center spine and stems reserved
1 Carrot, trimmed, julienned or shredded
1 Small to Medium Beet, trimmed, cut into matchsticks
1 Stalk Celery, trimmed, cut into matchsticks, optional
1 Scallion, trimmed, cut into 4″ lengths
1/4 – 1/2″ Bunch Enoki Mushrooms, trimmed, separated, optional
1/2 Medium Avocado, skinned, pitted, sliced
1″ cube (1oz) Daiya Jalapeno Garlic Havarti or Jack Style Wedge, sliced
OR 1oz Daiya Pepper Jack Style Shreds
1 Tomatillo, halved, sliced in small rounds or thin wedges
1/4 Red Bell Pepper, cored, seeded, sliced into spears
1/4 Heirloom Yellow Tomato, sliced into thin wedges
1/4 C Cashew Nuts, prepared
1/2 Lime, juice of
OR 1 T Lime Juice
Dry Flake-Type Garnish, Grated Cheese* or Salad Toppings, optional
*I love Parma!, which is a vegan cheese alternative that consists of Himalayan sea salt, nutritional yeast and raw organic walnuts and comes in original, chipotle cayenne, and garlic. It’s amazing.
Directions
Lay the collard leaves down next to each other or one at a time on your work surface, like a medium to large chopping board. Of one of your leaves has a hole on one end, make sure to roll from that side so the ragged areas get tucked inside your wrap. Spoon on and spread the wet ingredients of your choice perpendicularly across the middle of the leaves to add flavor and or protein.
Start layering your fillings, starting with your greens. If you have small pieces, like nuts or seeds, that might potentially to fall out, place them as close together and as flat as possible but about a quarter of an inch away from the leaf edges. Add your layers of long and bundled vegetables, like the carrots, 4-inch long sliced stems. Press them firmly into the stack to prevent sliding. Carefully stack the bulkier fillings and then the wider flat fillings. Dress with lime other dressing. Sprinkle on salad topping, Shichimi Togarashi, furikake, ground spices or herbs, etc.
Here is where you may have some unruly pieces try to escape and most likely make a mess. (This is why working on a larger space, like a chopping board, is better than trying to roll everything together on a plate.) You will probably get your hands wet and dirty; the tasty wrap is worth it! Personally, I don’t mind little messes when handling wet ingredients to make finger food, since I figure my hands are going to get food and sauce on them anyway. Just be patient and try not to tear the leaves, which would cause a bigger mess. Not all of your fillings have to fit in the wraps. If your stacks get to high or you were a bit overzealous with your choices, put some of them aside; we will deal with those in a bit. Carefully roll up your leaves around the filling as tight as you can, kind of like rolling sushi. You can use a sushi rolling mat if you prefer, but I didn’t need one. If anything starts to slip out, push it back in. Teach it who’s boss! The wraps do not have to be sliced, since the leaves were already cut in half when you removed the center collard stems.Transfer your little wraps to a plate with a lip edge or shallow bowl, since they will drip at least a little bit. Make sure there is enough room on the dish to pile on your extra fillings that didn’t fit in the wraps previously. Treat them as a side salad, maybe even drizzling on dressing if you want. Enjoy!
*If you don’t like the taste of collards or you don’t have any, you can use large red or green curly kale leaves, romaine, red or green leaf, butter lettuce or iceberg (which is poor in nutrients and fiber but full of water). The kale stems should be removed but can be rolled in with the other fillings after they are cut into manageable lengths. The long lettuce leaves have much thinner spines that do not require complete removal, only trimming. Just make sure to remove the white stems near the base of the long lettuce leaves. Gently fold the leaves in half along the spine (being careful not to break the leaves), so it sticks out. Carefully shave off the part of the spine that protrudes outward (careful not to slice or pierce the green part of the leaf on either side of the spine), so that it is flat and thin when you unfold the leaf. The lettuce leaf should be much more pliable and not break as easily when you roll it up. Lay the leaves in order to fill their natural cup or bowl shape. Once your have all of the toppings on, roll up the leaves from the more leafy pliable side opposite from the stem just in case the stem is vengeful and decides to spite you and breaks anyway. Round lettuce leaves do not need trimming or stem removal. Make sure to use leaves that aren’t too thick and crispy, or they will fall apart when you roll or pick them up.
Here’s another example of a raw vegetarian wrap made by Diana Stobo. She uses butter lettuce (which is more expensive than other lettuce varieties but my grandma’s favorite) to make sweet and spicy Thai lettuce wrap with great ingredients, like carrots, garlic, ginger, celery, walnuts, scallions and cilantro.
I really like Trader Joe’s Thai Lime & Chili Cashews, but they are kind of on the expensive side, especially if I bought them as often as I’d like to. I decided to make them for Father’s Day, since my dad really enjoyed eating them last Thanksgiving. Unfortunately, I couldn’t find any recipes online that include all of the ingredients listed on the package, only some of them, so I’ve looked at several to try to figure out the amounts. Regardless, this recipe creation required repeated taste testing as I mixed ingredients in and adjusted the proportions. The ingredient list is as follows: cashew nuts, Thai lime leaves, chile, lemongrass, lime powder, chili powder, sugar, salt, canola oil, rice bran oil. I often have raw cashews in my pantry, since I frequently buy them at Oliver’s, Community Market or Whole Foods to add extra protein into my diet. It kind of figures that I finally found Thai lime leaves (also commonly known as kaffir lime but kaffir is derogatory) and Thai chilis at the Thai Lao Market after visiting a few other Asian markets in Cotati and Santa Rosa, who really didn’t carry many (if any) Thai food items in stock. I also bought some pandan for making some other exotic dessert recipes later. I bought all of my other dry spices and herbs at Savory Spice Shop, including the lemongrass and California sweet paprika (which I’m using instead of chili powder), which I also use to make herbal tea. I’m going to use lime juice in lieu of lime powder, and I’m not going to worry about the rice bran oil but will substitute it with extra virgin olive oil.
Sometimes in life even though we are warned about potentially harmful or painful things by numerous people, we do not approach those dangers with sufficient caution. I chalk this up to stubbornness and inexperience. Well, this is what happened to me and the chilis. Although they are small, cute and colorful, do not let them fool you! They contain oils in their flesh and seeds that are very irritating to non-calloused skin, like lips and under fingernails, and mucus membranes, such as those in your eyes, mouth and nose. These oils cause burning sensations, itching and tingling, which are no fun. Trust me. I have already rather sensitive skin, and I had an eye itch. Ouch! I was really careful not to touch anything at all while I was cutting up the chilis, too, and also washed my hands at least five times with anti-bacterial soap. Those precautions were not enough! The oils stayed on my fingers, especially under and around my nails.
Before even thinking about handling Thai chili peppers, buy yourself a pair of non-porous gloves made out of latex or silicone or a finger nail brush and some really, really good oil-dissolving or oil-stripping dish soap. If you do touch anything, consider it contaminated with the irritating oils. I touched hand towels with each hand washing, so I’m sure that didn’t help either. Once I realized that the soap I used was not working as much as I needed it to, I set them aside to be washed alone (as if I had touched them after getting poison oak or poison ivy, which both contain common allergens). I tried our cheap dish soap, and dried my hands with a paper towel; that didn’t work. I switched to Castile soap and scrubbed my hands thoroughly with my nail brush, rinsing with hot water. This worked only a little bit with each repeated washing, but at least it worked to get the oils off eventually. Don’t just be careful with the chilis, be overly prepared and overly cautious, otherwise you may find yourself in an uncomfortable situation unable eat finger foods without utensils, scratch your nose, rub your eyes, etc. I think you get the idea.
Anyway, just to be on the safe side, I tried to be conservative with the spices. I only added one chili at a time to the mixture before adding in the nuts. Once you have too much any ingredient, you can’t go back and remove it; you can only start over from step one. I even gradually added the garlic, too, which I usually add more of whenever a recipe includes it. Be careful of the citrus-related ingredients, too. You don’t want to only taste lime and hardly anything else. My dad has to closely monitor his sugar and salt intakes due to health reasons, so I eased up on those amounts, too, and used raw blue agave nectar instead of refined sugar.
*You can grind and add in some some of the excluded chili seeds for extra spiciness but do so with caution and gradually, tasting often. Once the sauce is too spicy, there’s no way to fix it without much difficulty.
Directions
In a spice grinder, mix together the chia, lemongrass** and paprika in about 4 5-second intervals or until they are mostly powdered. Empty the contents into a small mixing bowl. Gradually stir in 5 tablespoons of water with a fork. Set aside for 5 minutes. Stir again;set aside. Repeat.
Separately in a food processor, puree the garlic, salt, cilantro, lime leaves and 1 to 2 chili peppers with the oil, lime juice, water and 1 teaspoon of agave. Combine the puree with the chia mixture. Cover the bowl. Chill the sauce for six hours to let the flavors meld together. Adjust the flavors to your preference.
With a large spoon in a large glass bowl, thoroughly coat the cashews with the sauce. Cover the bowl. Chill over night to let the flavors sink in. Adjust the flavors again if necessary.
Transfer the nuts onto parchment paper-lined dehydrator trays. Spread out the nuts on the paper to prevent clumping; this also helps promote faster drying. Set the dehydrator to 105 degrees F. Dehydrate the nuts for about 48 to 60 hours. Yes, I know this is a long time to wait, but it’s worth it. You might want to check on the drying progress as time elapses by feeling how crunchy they are when you taste one. This is also a way to judge spiciness and flavor intensity.
If you decide after dehydrating your cashews that they are still not spicy or salty enough, you can add ground sea salt and ground mixed pepper as needed when the nuts are still hot. Mix the spices in with a large spoon until they are incorporated; don’t worry if some granules will still fall off. When the cashews are completely cool, store them in an airtight container, like a lidded glass mason jar.
**If you use fresh lemongrass leaves, puree them with the other fresh sauce herbs and spices.
Whenever I purchase seeds and nuts from the local organic stores, like Whole Foods, Community Market or Oliver’s Market, I try to always buy pounds at a time from the bulk bin section to save money. I also like to reuse the bags I pour them into in order to reduce waste; if you decide to reuse yours, make sure you clean them really well first to avoid contamination. Some stores even give you a discounts for reusing bags. One cashier even gave me a discount for each reused bag I put my produce and nuts into, too, in addition to the discounts for bring in my own fabric shopping bags. I saved a lot of money that trip! At Community Market for each fabric shopping bag you use to take your purchases home in, you receive a token to donate towards a charity of your choice; each token represents a either a dime or nickle (I can’t remember which) that the store will donate on your behalf; Whole Foods has a similar program for donating to a charity of your choice in exchange for bringing in your own fabric shopping bags (or you can choose to keep your nickle). Either way, many many people bring in their bags to shop, that’s a significant amount of money donations. Giving back always makes me feel warm and fuzzy. 🙂
Anyway, back to the nuts. (I will talk about seed sprouting in a future post.) Before I start, I always turn to my books by Ani Phyo and Sarma Melngailis, who have fantastic healthy recipes, present readers with nutrition facts and are both very inspiring wome. It is very important to soak your nuts before you eat them if you want them raw, which is healthier for you than eating them straight or cooked due to all of the great amino acids and vitamins within the raw nut “meat”. Some vitamins are also fragile and break down when exposed to high heat that they are therefore no longer available to you after they are cooked. Soaking the nuts is like soaking beans; it helps get rid of bad stuff, including dust, residues and acids. In this case, you want to use salted water to speed up the process of leaching out the tannic and phytic acids, which in turn improves flavor and allows more efficient nutrient absorption and digestion.
Make sure that you shell your nuts or buy pre-shelled nuts before soaking. Always use a covered airtight (to prevent bacterial contamination) glass bowl and other non-reactive tools (plastic or stainless steel fine mesh strainer and wooden or plastic spoon to prevent oxidation) when preparing raw food. You also want to use at least twice as much water than nuts, since they will double in size. Keep an eye on your water level, and add more water to the bowl if necessary.
The amount of time required to soak the nuts is directly related to their hardness. Harder nuts take longer, some 8 to 12 hours, whereas the softer ones, only need 20 minutes to 4 hours. Visit Raw Food Living for a helpful soaking and sprouting chart. The range in soaking times depends on the ambient room temperature, so if you are using a warmer kitchen, your soaking times is lessened. Be careful though; your nuts should not get above about 72 degrees F. I always soak mine at room temperature, but some other people soak theirs in the refrigerator. If you are unsure of your nut’s leaching progress, just rinse one off and taste it. If it’s still acidic, put it back in the water. Any time after the midway point, you can change out the cloudy water for fresh water; just make sure to only use filtered water and more salt. (Filtered is best, but water that has sat out about for 20 to 30 minutes to release chlorine, other gases or even sediment is better than straight from the tap.) If you soak your nuts past the maximum time limit, they can ferment and turn sour. Trust me. If that’s not your intent, fermented nuts are a waste of time, money and food. I probably could have made nut cheese or something, but I didn’t know about that option at the time and threw all of my brand new nuts away, which was very sad and frustrating.
The nuts I eat the most often are cashews, almonds and sunflower seeds. Unfortunately due to several salmonella contamination incidents in 2001 and 2004 at non-organic almond farms, all almonds grown in the US and sold in American stores are either pasteurized with steam (which cooks the nuts) or propylene oxide (a former insecticide and racing fuel and a probable carcinogen) according to federal law since 2007. Hurray. 😦 I was recently very confused and shocked to see Oliver’s “raw” organic almonds now relabeled as steam-pasteurized. Bummer. I’m glad the shoppers are now better informed though. I still soak mine anyway to get rid of the acids to prevent heartburn and to aid digestion; I’m in trouble if I don’t. Thankfully, many farmers who sell almonds at US farmers markets are not required to pasteurize with either method, which may explain why they are always more expensive. Almond growers in Europe are also not required to pasteurize their almonds.
Let’s look at soaking cashews.
Cashews for Snacking (& Adding to Other Recipes)
Ingredients
2 lbs Whole Cashew Nuts, shelled
Filtered Water
1 T Sea Salt, ground
Directions
Sort your cashews, discarding any that are discolored. Try to remove bits of remaining skin from the nuts, otherwise they will cause dark discolorations. Sprinkle the salt into your soaking container. Pour in the nuts. Add twice as much water than nuts to the bowl. Stir them together to dissolve the salt. Cover your bowl with an airtight lid. Soak your cashews for two to four hours. Drain your nuts into a fine mesh colander, so you don’t loose any bits. Rise the cashews with cold water until it turns clear.
Place your flexible sheets or parchment paper onto the dehydrator trays. Transfer your nuts onto the trays.* Set your dehydrator temperature to either 105 or 115 degrees F. Dehydrate your nuts for at least 6 hours or longer, depending on ambient humidity. The nut meat is sufficiently dry when it makes a slight snapping sound as you break a piece in half and the color of the flesh of the nuts is a consistent shade of beige all the way through along the broken edge.
*On sunny days, you can use a solar oven or food dehydrator with a built-in fan and thermometer. You don’t want your food to get too hot. Here is a neat website that shows you how to build your own dehydrator, and this site has even more great design options. As another option for those of you who live in a climate region with dry summers, like my parents do, you can leave your nuts out in a baking sheet or jelly roll pan covered with a few paper towels in a warm place in the kitchen to dry for 8 to 12 hours or overnight. If I tried this where I live the nut’s would ferment or start to mold. Yuck. 😦

 March 31, 2016
 noelnoms
 Leave a comment