Posts from the ‘Soup’ Category

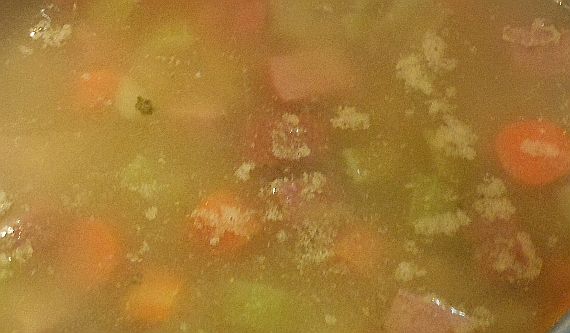
Split Pea and Ham Soup

Split Pea and Ham

A bit ago my husband and I received Pea Soup Andersen’s dried split peas from the Saslows; the peas were packaged in a cute little cotton drawstring bag with the soup recipe printed on the back. What a wonderful winter gift! If you have not visited one of Pea Soup Andersen’s locations before, I highly recommend that you go. They have all sorts of tasty, tasty dishes beyond pea soup, ranging from sandwiches and salads to steak and chicken. I have visited both of the California restaurants, one in Santa Nella and the other in Buellton, while on roadtrips with family and friends. Each time I found it difficult to decide what I wanted to order (other than the famous soup, of course), since their menus are so big!

The split pea and ham soup provided several great satisfying meals; sometimes I even had a few small bowls as snacks on they days that the weather was particularly chilly. Making this soup also allowed the perfect opportunity to incorporate some of the leftover ham from my earlier post into yet another delicious dish. The meat and spices really added to the soup’s over all flavor, making it even more hearty.

Andersen's premium selected split peas

Andersen’s premium selected split peas

Split Pea and Ham Soup
Adapted from the Pea Soup Andersen’s “Soup-in-a-Bag” instructions.

Yields 12 Servings

Ingredients
3 C Dried Split Green Peas*
4 qt Filtered Water, divided
1 Large Stalk Celery, trimmed, coarsely chopped
1 Large Carrot, trimmed, Chopped
1 Large Sweet Yellow Onion, skinned, trimmed, chopped
2 – 3 T Minced Garlic Cloves
1 lb Ham, cubed
1 tsp Dried Thyme Leaves
2 Pinches Ground Cayenne Pepper
1 Large Bay Leaf
Sea Salt, to taste
Ground Mixed Peppercorns, to taste

Directions
Thoroughly rinse the peas under cool water in a fine mesh strainer. Pour into large stock pot. Cook at a rolling boil with two quarts water for 20 minutes or until peas are tender. Strain through fine mesh strainer.

Return peas to stock pot with two more quarts water. Add vegetables, herbs, ham. Bring to boil. Reduce heat to medium-low. Simmer 10 minutes or until ham is heated through and flavors are blended. Salt and pepper to taste. Serve.

*For a more colorful soup, you can use a mixture of split peas with half green and half yellow.

Garlic Pepper Pork Nabe

I have intended to make another hot pot style soup for a long while now and actually have not made any since the time I cooked the shrimp & vegetable nabe for my folks during the summer of 2012. Recently, the pork tenderloins were on sale at our local grocery store, and I was trying to think of another way to cook the meat beyond sauteing, grilling or roasting. Why not cook it in a nabe dish? Though I love my cute donabe, which I was luckily able to buy at Shiki, Inc., an amazing pottery shop in San Francisco Japantown’s West Mall (I absolutely love that store) where I bought my mom’s. I actually had not used my hot pot in who-knows-how-long and was feeling quite guilty for letting it just collect dust. I was got the idea of cooking the pork in my glazed clay donabe at when my husband and I decided to have dinner at Honey BBQ in Rohnert Park (check out my review from last week). The pork bibimbop was very inspirational; I will have to try my hand at making it in my pot later.

Fishy Donabe

Whole Grain Red and Black Rice

Adapted from “Japanese Rice for Shime” from Japanese Hot Pots by Tadashi Ono and Harris Salat.

Yields 2 cups of rice

Ingredients
2 C Filtered Water
1 tsp Gluten-Free Tamari Soy Sauce
OR 1 tsp Bragg’s Liquid Aminos
1/2 C Himalayan or Bhutanese Red Rice, uncooked
1/2 C Wild or Chinese Black Rice, uncooked
1 C Hot Filtered Water

Directions
Rinse the rice in cool water. Strain the rice through a fine mesh and set it aside. Bring two cups of water to boil with the tamari in the donabe. Stir in the rice and cover. Reduce the heat to low and cook for 40 minutes. Add a cup of hot water to prevent the rice from burning to the bottom of the pot. Cook another 20 minutes or until tender. Remove from the heat. Drain off the excess liquid, reserving it for later. Set the rice aside in a covered dish.

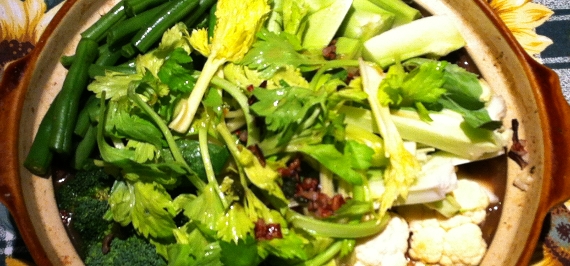
First arrangement of the nabe.

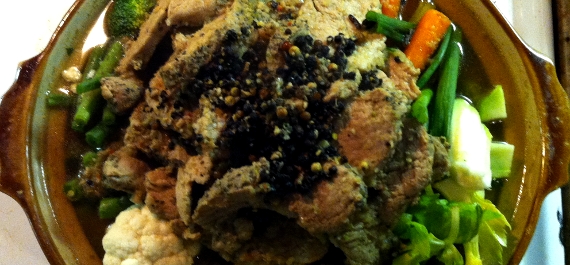
Garlic Pepper Pork Nabe
Adapted from my Shrimp & Vegetable Nabe recipe. This recipe makes a lot of soup, so you may want to use a larger pot. Keep in mind that not everything may fit in the pot; add the vegetables, broth and rice in batches. Include more meat if desired; my husband wished there was a greater amount in the meat to vegetable ratio.

Yields About 25 Servings

Broth Ingredients
5 C Filtered Water
2 T Minced Garlic
1 tsp Black Peppercorns
1 – 2 tsp Grains of Paradise
1 T Dried White or Yellow Chopped Onion
Remaining Rice Water
Meat and Vegetable Ingredients
Marinated Garlic and Peppercorn Pork Tenderloin
2 C Coarsely Chopped Collard Greens
2 C Coarsely Chopped Mustard Greens
3 Scallions, trimmed, cut into 4″ lengths
6 Inner Leafy Celery Stalks, cut into 1/2″ thick 3″ lengths
2 Large Carrots, cut into 1/2″ thick 3″ lengths
2 Medium or 1 Large Head(s) Broccoli, cut into bite sizes
1 – 2 Broccoli Stalk(s), cut into 1/2″ thick 3″ lengths
1 Small Head Cauliflower, trimmed, cut into bite sizes
Cauliflower Leaves, stems cut into 1/2″ thick 3″ lengths
1 C String or Green Beans, trimmed, cut into 3″ lengths
Cooked Whole Grain Rice (See Above)
1 C Enoki Mushrooms, separated from roots, cut into 3″ lengths, optional
1 C Bean Sprouts, cut into 3″ lengths, optional

Directions
Bring the broth ingredients to a boil in the donabe for 5 minutes over medium high heat.

Meanwhile, drain the marinade from the pork, reserving up to half a cup, and set aside. Thinly slice the pork about 1/8 to 1/4 inch thick rounds with a very sharp knife. Be careful not to cut yourself. Add the marinade and pork to the broth. Cook covered for about 5 minutes or until the meat is no longer pink. Transfer the broth and meat to another covered dish.

Arrange the cut vegetables on a large platter in groups in order to add them to the soup easily.

Inside the donabe, cover the bottom with the dark greens. On top of the greens, arrange about 1/3 of the vegetables in clustered groups around in a circle, leaving the middle open. Spoon about half of the rice into the center, piling the meat on top. Make sure not to stack it above the lower lip of the pot. Pour in the broth up to the lower lip of the donabe. Cover and cook the soup for 5 minutes on medium heat. The greens should wilt a bit, providing more room. Add more vegetables and meat into their designated sections, pushing them under the broth with a large wooden spoon. Cook another 5 minutes and repeat. When adding the last of the broth, I made sure to pour the grains of paradise and peppercorns onto the center on top of the meat instead of garnishing the each bowl of soup as I would with a shichimi togarashi or furikake. Do not over fill the pot; you do not want it to over flow during cooking.

Carefully bring the pot to the table with hot pan holders or oven mitts to rest it on a trivet set on top of a thick towel if you are serving the soup tableside. Serve the soup in bowls, making sure to get a bit of everything. Garnish if desired.

Remaining vegetables added to the nabe.

There is now more room in the donabe. Add leftover vegetables, meat, rice and or hot broth to the soup. Recover the pot to preserve the heat and allow the fresh ingredients to cook.

Honey Cuisine Korean BBQ

Recently my husband and I decided to have dinner recently at Honey BBQ in Rohnert Park. It was so satisfyingly tasty. I am very glad they are now open on Sundays, especially since the many diners are Sonoma State University students and staff. My husband and I were both particularly craving hearty soup and sushi. We shared a delicious “Crazy Spicy,” which was a delectable sushi roll with tempura shrimp, spicy tuna, salmon, slices of unagi, tuna and snapper, albacore tuna and a drizzle of spicy chili sauce; the roll actually was not too spicy for our palates. Roll in total had roughly a medium heat level. My husband really enjoyed his beef udon soup (the broth was delicious), and I found my pork dolsot (claypot) bibimbop quite inspiring. I substituted out the brown rice with their organic wild rice, which went wonderfully with the seasoned pork, carrots, spinach, mushrooms, white onion, egg, soy beans and Napa cabbage; all of the ingredients provided a delightful combination of flavors and textures. I will definitely order that again! I think next time I will have to try the “Sexy Mango” sushi roll. I am a big fan of mango, so the roll sounds rather enticing with its tempura shrimp, avocado, cucumber, and more shrimp on top with the mango.

Image Credit

This is not the first time that I tried out Honey BBQ’s food. The last time my husband and I went was for lunch years ago, not long after the restaurant first opened. At that time, I ordered a few sushi rolls, while my hubby ordered the BBQ beef. The caterpillar roll was really good and looked extremely cute as it decorated to look like a cartoonish caterpillar (its appearance has since changed). I also had their fantasy roll, which was amazing with the crunchy garlic and tasty sauce on top. The BBQ beef dish came with rice and vegetables, too, I think; either way, my husband greatly enjoyed it.

Black and Red Turkey Chili

My husband likes really meaty chili, whereas I like more beans and vegetables. This recipe was a compromise between the two differing preferences as well as an adaption of my previously posted chili recipe. It’s also getting colder at night as we move further into autumn, so this makes a rather comforting evening meal. There’s really nothing like a warm bowl of hearty chili to make you feel warm and cozy.

Black and Red Chili Beans

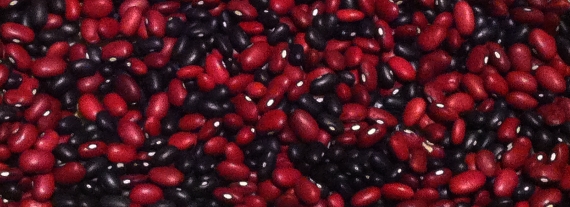
As my tummy has been extra sensitive lately, I made sure that this chili was as “Noel-friendly” and easy to digest as possible. I soaked the beans for a full day, changing out the water half way through. I added baking soda to cut down on the beans’ required cooking time. I skimmed the foam full of “impurities” (such as indigestible sugars and bitter compounds), which can cause bloating and affect the over-all flavor. I added a bunch of turmeric (I thought about adding asafoetida, as well, but didn’t want to stink up the house) and a strip of dried kombu seaweed (contains good bean-digesting enzymes). The spice mix I used contains cayenne pepper, but I added a little extra for more kick. I waited until the beans were tender to add in the salty and acidic ingredients. Just in case, I took a digestive pill, as well. If your stomach is not as touchy as mine is, you do not have to take all of these precautionary steps. All of them were definitely worth the hastle for me though. The chili turned out very tasty indeed. Besides, this chili is filled with protein, which is great, since my husband and I work out at our local gym.

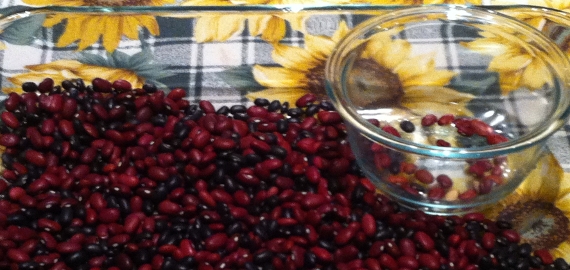
Bean Sorting

Black and Red Chili Bean Turkey Chili
Adapted from my Turkey Black Bean Chili recipe.
Serve the chili with Paleo Carrot Coconut Muffins (made with cinnamon wildflower honey) and salad with fennel greens to further assist with digestion.

Yields about 30 servings

Ingredients
3 C Dried Red Chili Beans or Kidney Beans
3 C Dried Black Beans
3 to 3 1/2 qt Filtered Water
Extra Virgin Olive Oil
1/2 C + 1 T Minced Garlic
1 1/2 C Chopped Yellow or White Onion
1 1/2 lbs 80% Lean Ground Turkey
3 qt Filtered Water
2 tsp Baking Soda
1 Large Piece Dried Kombu Seaweed
3 T Bean Roundup Spice Mix
3 T Dried Ground Turmeric
2 tsp Dried Ground Cayenne Pepper
1 16-oz Jar Balakain Farms Blended Organic Green Zebra Heirloom Tomatoes
1 C Mild or Medium Salsa Verde or Tomatillo Salsa
2 T Lime Juice
2 T Unfiltered Apple Cider Vinegar
8 T Chicken Better than Bouillon, dissolved in 1 qt Hot Filtered Water
Filtered Water

Optional Garnishes
Cilantro Springs
Scallions, sliced
Avocado, skinned, pitted, thinly sliced
Vegan Sour Cream or Vegan Plain Yogurt
Daiya Cheddar Style Shreds
Daiya Pepperjack Style Shreds

Directions
Sort your beans. Discard any beans that are discolored, under developed, malformed or broken, as well as, any rocks. Rinse the beans with water. Soak the beans for at least 8 to 12 hours or overnight in a large non-reactive bowl with 12 to 14 cups of water, changing out the water about half way through. Rinse with fresh water.

In a large oiled stock pot, saute the garlic and onions until they are tender and clear with a long-handled wooden spoon. Add in and brown the turkey. Stir in the water, baking soda, seaweed, beans and spices. Bring to a boil. With a long-handled ladle or wire mesh, remove any foam that forms on the surface for about 2 to 3 minutes or until the beans stop foaming; I like to keep a little bowl handy to put the foam into. Lower the heat to medium-low and cook covered for 1 hour or until the beans are tender, stirring occasionally. Mix in the tomatoes, salsa, lime, vinegar and diluted bouillon. Cover. Return chili to a boil. Stir. Reduce the heat to low. Cook covered for 1 hour, stirring often to prevent the beans and meat from sticking to the bottom of the pot. Add more water as necessary. Turn off the heat.

Serve and garnish as desired. Enjoy!

Red Lentil Curry

Red lentils

Red lentils (Photo credit: Wikipedia)

So as you may be able to tell from my blog posts, I haven’t made lentils in quite a while and had actually never worked with red lentils before, just brown, yellow and green. Whenever I opened my cabinet, the red lentils stared at me, looking rather forlorn in their jar. I did however make a post a long while back about lentils, including preparation and recipes, and within it I had included a link to Ashley Adams’ Spicy Lentil Dahl recipe over in About.com in the “Dairy Free Cooking” section of the classic recipes. Her dahl really looked amazing, and I’ve been craving dahl for a while now. It was about time I made some, especially since I have everything I need to make such a delicious and rather inexpensive dish.

I have made some changes to her recipe, of course, but it all stirred up marvelously with a perfect blend of flavors and textures that left me quite sated. I can’t get over how well it turned out, especially as I thought some of the flavor combinations a bit odd for a curry. Surprise! Curry does just mean mixture after all. Feel free to boost the heat with chile peppers and  if you like; just make sure the spiciness doesn’t detract from the aromatics. Please keep in mind that I doubled the original recipe to make the dish more complex in flavor on purpose; feel free to simplify your own version as you see fit.

Rather than boring tomato paste, I decided to break out the jar of green zebra heirloom tomatoes that I had been saving. Surprisingly enough I bought them on clearance at Sur la Tabl and only found out recently that they were grown at relatively local in the San Francisco Bay Area by Balakian Farms, which is now a fourth generation Armenian family-owned organic business. Balakian Farms also sells their tomatoes online and at local farmers markets in Fairfax, Marin (at the Civic Center), Mill Valley and San Francisco (at the Ferry Plaza); check out their schedule on the website.

Red Lentil Curry
Despite the strong flavors, the dahl can accompany several different sides. I served mine with mixed vegetables, salad and quinoa.
Yields: 12+ Servings

Red Lentil Curry 1Ingredients
1 T Sesame Oil
1 T Garlic-Infused Extra Virgin Olive Oil
1 Medium Sweet Yellow or White Onion, peeled, diced
2 C Scallions, trimmed, sliced into 1/4″ pieces
6 Cloves Garlic, peeled, minced
3 T fresh ginger, peeled, minced or grated
6 C Salt-Free Vegetable Broth
1 C Dried Red Lentils, sorted, rinsed
1 C Dried Split Pigeon Peas (Arhar or Toor Daal), sorted, rinsed*
1 tsp Baking Soda
2 – 3 tsp Cumin Seeds
2 – 3 tsp Coriander Seeds
4 – 6 Green or Black Cardamon Pods
1/2 tsp Ground Cinnamon Bark
2 tsp Ground Turmeric Root**
1/2 – 1 tsp Ground Cayenne Chili Pepper
1 16-oz Jar Balakain Farms Blended Organic Green Zebra Heirloom Tomatoes
Filtered Water, as necessary
3 tsp Sea Salt of Your Choice, to taste

Directions
In a large stock pot, saute the onions, garlic and ginger oil over medium heat until the yellow or white onion is translucent.

Grind the seeds together with a mortar and pestle. Remove the pod shells.

Stir the broth, lentils into the pot. Keeping an eye on the lentils, remove the starch foam as it comes to the broth’s surface. Once no more foam forms, mix in the ground spices except for the salt. Bring the dahl to a boil. Reduce the heat to low. Cover and simmer for 10 to 15 minutes. Once the lentils are tender, stir in the salt to taste, adding a teaspoon at a time. Stir in tomatoes. Adjust the flavors as needed. If necessary, add more water to achieve the desired consistency. Turn off the heat and let the curry cook on its own for a few minutes with the lid on to let the flavors meld a bit more.

Red Lentil Curry Close-UpServe hot with flat bread, such as naan, whole-wheat roti (chapati), paratha or (naturally gluten-free) pappadum.

*If you cannot find yellow lentils (not yellow split peas), you can double the amount of red ones.
**If you are substituting fresh peeled turmeric root for the dried ground turmeric, make sure to adjust the amounts accordingly.

Notes: For variety, you can also add in your favorite dark greens, such as carrot tops, chard, kale, collards, mustard greens or spinach. As this recipe makes big amount, I store mine in large mason jars in the coldest part of my refrigerator.

Indian Inspired Lentils

I love lentils! I especially like eating Indian and Himalayan spiced dhal (daal or dal), usually made into a very comforting thick lentil pottage or soup. Not all dal varieties are the same; many differ in size, shape, flavor and nutrition. Some types of dal are not even lentils but different kinds of legumes, like peas, chickpeas or beans. They contain less insoluble fiber than beans and are not as irritating to finicky digestive systems, which means they cause very little gas, if any, depending how much you eat; keep in mind I am not suggesting you eat dhal three times a day, even though they taste really good.

These lentils aren’t restricted to soup. You can dish them over other vegetables,  quinoa, rice, buckwheat or green salad. Commonly daal is non-vegan and includes ghee, or clarified butter, but it is delicious either way. Another way to westernize this dish is to treat it like split pea or lentil soup by adding meat, like ham or sausage, but i prefer mine vegan. Sometimes if I haven’t eaten daal in a while, I crave it.

Chana dal are baby chickpeas or skinned and split black chickpeas (or kala chana if still in their skins), so don’t confuse them for yellow split peas even though they are the same exact color but flatter. They are low on the glycemic index, which means they are good for diabetics and are low in bad carbohydrates, have lots of fiber and protein and a significant amount of zinc, folate and calcium. Here is the listing for Bob’s Red Mill chana dal. Chickpea flour or besan is often made from this variety. These chickpeas require soaking in water at room temperature for two to three hours. If you add in half a teaspoon of baking soda, the chickpeas soften much quicker and then only need to cook 10 to 15 minutes, depending on your desired texture. Adding baking soda makes the water more alkaline, allowing beans to cook to doneness in only half the time; you can add the soda to any harder beans that require cooking for longer periods of time.

Masoor dal are red lentils, which contain significant amounts of fiber, flavonoids, complex carbohydrates, iron, folate, magnesium, phosphorous and vitamin E. Click here for more nutritional benefits. Red lentils do not require soaking; just cook it for about 25 to 30 minutes. Here is Ashley Skabar’s spicy daal recipe made with red lentils that looks great.

Toor dal or arhar dal are yellow pigeon peas and the same color as chana dal and yellow split peas, however they are not low in glycemic value but contain healthy complex carbs. They are high in protein, vitamin A and C, folate and fiber. Toor dal need to soak for 30 minutes and then cooked for 50 minutes. Check out Jacqueline Pham’s recipe on her blog and Karen Mintzias’ recipe over at Big Oven.

There are three types of urad dal, which is black beluga lentils. You can get them whole, like I did, split or split and soaked, which removes their skins. They are rich in protein, fiber, calcium, iron, folate, magnesium and zinc. Beluga lentils also do not require soaking, only cook them at a low boil for 30 minutes.  Check out this recipe over at Indian Food Forever.

French green lentils or lentilles du Puy are olive green lentils with black speckles. They are a longer cooking lentil, needing about two to four hours of soaking and 45 minutes of low boiling, due to all of the insoluble fiber they contain. Check out this recipe by Caroline Russock for some more inspiration. Green lentils a nutritious amount of complex carbs, protein and are fat free; they contain good amounts of your daily calcium and iron.

As per usual, most of the herbs and spices that I used to make this dish are from Savory Spice Shop in Santa Rosa. A while back, I decided to flesh-out my spice cabinet, throwing away stale seasonings and combining duplicates to make more room. I wanted to expand my flavor palate and try something new, exciting and exotic. I was feeling incredibly adventurous and did quite a bit of research first, focusing on recipes from cuisines that knew I adored but had never cooked with at home, which was extremely helpful when I went to explore the shelves in the shop. I must have examined at all of the jars and canisters they had for absolutely hours. I had a great time asking questions, smelling, tasting and making new discoveries. I ran back and forth from the shelves to the counter several times. The garlic and onion came from the farmers market in Cotati, and I bought the mugwort (an uncommon culinary herb used in medicinal teas) at Rosemary’s Garden.

Indian Inspired Dhal

Ingredients
1 C Petite or Regular French Green Lentils*
1 C Urad Dhal
1/2 tsp Fenugreek Seeds
1/2 – 1 tsp Cumin Seeds
1/4 tsp Ajowan Seeds
2 – 3 tsp Olive Oil**
3 – 4 Large Garlic Cloves, grated or minced
1 – 2 Medium Sweet Yellow Onion, peeled, trimmed, minced
1 Inch Fresh Ginger, grated or minced, optional
4 C Filtered Water
2 Bay Laurel Leaves
1 T Cilantro Leaves
1 T Mugwort Leaves
OR 1 T Parsley Leaves
Mixed Peppercorns, ground to taste
1 tsp Sea Salt, to taste

*If you really want to stay with an Indian theme and add more color contrast, substitute the green lentils with channa dhal, toor dhal or masoor dhal. These lentils all have various cooking times, so adjust your preparation accordingly.

**If you want to make dhal without oil, skip the step of sauteing, and add the garlic, onion and ginger in with the other spices near the end of cooking the lentils.

Directions
Always sort your legumes and discard any broken or discolored ones along with any rocks you may find. Rinse your dal under cool water until the strained off water becomes clear to remove any dust or dirt. Put the lentils into a large mixing bowl or other vessel. Pour in enough water so that the level reaches about an two to three above the lentils. Remove the ones that float to the top. Soak the green lentils for two to four hours.

Dry roast the spice seeds in a small pan to intensify their flavor and get rid of any bitterness. Grind the seeds as small as possible in a spice grinder.

Saute the garlic, onion and ginger in a large oiled soup pot until the onion turns translucent, stirring often.

Rinse the lentils. Add them with the water to the pot, and bring it to a boil. Reduce the heat to medium to prevent the water from boiling over. Cook the French lentils for 15 minutes, stirring occasionally. Stir in the black lentils. Continue to cook the lentils for 25 minutes, occasionally adding more water if needed and stirring. During the last five minutes add the powdered spices. Stir the mixture and cook five more minutes. Remove the pot from the heat completely, and stir in the herbs. After 15 minutes of cooling,taste test the lentils and adjust the flavors as needed. Serve the lentils on a salad, on toast, over or mixed into rice or noodles or as soup or really anywhere you would use beans. I mixed mine in with marinated vegetable noodles.

Kelp Noodles with Marinated Carrots & Daikon Radish


First of all, I love Ani Phyo’s raw food recipes! She’s a super talented chef, and she makes creating raw food dishes really easy. All of her recipes in her books are super simple, and many of them don’t even require any dehydrating, which means you can enjoy your dishes right away. She has lots of actual experience in cooking and catering. All of her books have full-color mouth-watering pictures that always make me immediately hungry whenever I flip through the glossy pages, as well as lots of hard facts about nutrition.


Kelp Noodles with Marinated Carrots & Daikon Radish
Adapted from many of Ani Phyo’s kelp noodle dishes in Ani’s Raw Food Asia
This is recipe is mostly raw, but can be completely raw if you use raw unprocessed oil instead of toasted sesame oil and agave in lieu of maple syrup.
Serves 6


Ingredients
Broth Marinade
4 C Filtered Water
1/4 C Liquid Aminos
3 T Apple Cider Vinegar
1 T Blue Agave Nectar or Maple Syrup
1 tsp Toasted Sesame Oil
1/2 tsp Mixed Peppercorns, fresh ground
2 tsp Chopped or Minced Garlic, more to taste
1/3 C Dried Wakame Seaweed, torn into 1/2″ pieces
1/3 C Dried Dulse Seaweed, torn into 1/2″ pieces

Vegetables to Marinate
1 pkg Kelp Noodles, rinsed, cut to desired length (4 C)
3 Celery Stalks, thinly cut on diagonal
2 Medium-Large Carrots, cleaned with vegetable brush, trimmed, cut into matchsticks (1 – 1 1/2 C)
4″ Daikon Radish, cleaned with vegetable brush, trimmed, cut into matchsticks (1 – 1 1/2 C)
3 – 4 Scallions, trimmed, cut thinly into 3″ sections

Salad Greens
4 – 5 Large Red Leaf Lettuce Leaves, torn into bite-size pieces
1/3 – 1/2 C Fresh Cilantro Leaves, stemmed

Shichimi Togarashi or Garnish
Almonds or Other Favorite Nut or Seed, garnish
Yasai Fumi Furikake or Nori Komi Furikake, garnish


Directions
Mix all of the broth ingredients together with a wooden spoon in a large glass mixing bowl; I used a  lidded 2-quart measuring cup. Add the vegetables into the marinade, making sure to push the vegetables down into the broth. Set aside for 30 to 40 minutes, stirring once after 15 to 20 minutes so the harder root vegetables are on the bottom and have more time to fully marinate.

To serve, fill each bowl half way with salad greens. With a slotted spoon or serving chopsticks, place some of the marinated vegetables on top to fill the bowl the rest of the way up. Garnish with about 15 to 20 almonds or a serving of your favorite nuts or seeds. Pour some of the broth onto each serving, or fill up the bowls to make each serving into a cold soup. Shake on your favorite furikake, shichimi togarashi or other shake-on salad toppings. Enjoy!

Shrimp & Vegetable Nabe with Shichimi Togarashi

With the donabe, I also wanted to give Mom a hot pot cookbook as a gift for Christmas last year, so she could learn about authentic ingredients and cooking methods, as well as gain some inspiration for cooking different dishes. When Anise and I went to Japantown, the bookstore was closed, so I looked at the local new and used bookstores in Petaluma and Santa Rosa. Nothing.

I also poked around online looking for hot pot recipes and found Harris Salat’s Japanese food blog, which has entries featuring some of the recipes (or similar ones) from the book that he and Tadashi Ono wrote, called Japanese Hot Pots: Comforting One-Pot Meals. It’s the best donabe and hot pot cookbook I found; it has lots of inspiring, colorful pictures and descriptions of the recipes and ingredients that will make you hungry. I highly recommend this book as a wonderful resource.

Shrimp & Vegetable Nabe with Wild Rice and Shichimi Togarashi
Adapted from “‘Strawberry’ Hot Pot” or
“Ichigo Nabe” from Japanese Hot Pots
by Tadashi Ono and Harris Salat
Serves 8 to 10

Whole Grain Gohan Ingredients
Adapted from “Japanese Rice for Shime” from Japanese Hot Pots

Ingredients
2 + 1 C Filtered Water
1 tsp San-J Gluten-Free Tamari Soy Sauce
OR Bragg’s Liquid Aminos
1/2 C Brown Rice, uncooked
1/2 C Wild Rice, uncooked

Directions
In the donabe, bring the 2 cups of water and tamari to a boil. Stir in the rice. Reduce the heat to low. Cover the pot, and cook the rice for 40 minutes. Check the water level, and add about a cup of water as needed. Return the lid. Cook the rice for 20 more minutes or until tender. Drain the rice, and set it aside in a large bowl.

I also used Ming Tsai’s instructional video on You Tube to make sure I knew how to cook the rice in the donabe without burning the grains to the bottom. His video is for sushi rice, which normally has to be rinsed to get rid of excess starch. I did not soak my rices, since they are a completely different variety. I also didn’t really worry about excess starch, since starch adds a slight sweetness to broths naturally when they are included. As you may have noticed I do not have a special rice cooking donabe, but my rice turned out perfect with the book’s recipe. I just added a little more water than the package directions called for, which did not adversely affect the grains, since the rice had to stay in the pot to lend to the other soup flavors.

Shrimp & Vegetable Nabe
Sauce Ingredients
4 C Filtered Water
1 tsp Ajinomoto Hon-Dashi
1/4 C San-J Gluten-Free Tamari Soy Sauce or Bragg’s Liquid Aminos
1/2 C Kikkoman Aji-Mirin
1 T Sake
1 Fresh Lemon, juice of

Meat & Vegetable Ingredients
1 tsp Grated Fresh Ginger
1 T Minced Garlic
1 Fresh Lemon, zest of
1/2 tsp Sea Salt
1 lb Large Prawns, shelled, deveined, uncooked
1 – 1/2 lb Kale, stemmed, torn into bite-size pieces
5 oz Shiitake Mushrooms, stemmed, sliced
5 oz Baby Bella Mushrooms, stemmed, sliced
6 Stalks Celery, sliced into 1/2″ by 4″ sticks
4 Medium Carrots, sliced into 1/2″ by 4″ sticks
6 Scallions, trimmed, halved
1 – 1/2 lb Spinach, stemmed
Whole Grain Gohan (see above)
Shichimi Togarashi, optional garnish (see below)

Directions
In a medium pot, dissolve dashi in boiling water. Stir in the tamari or Bragg’s, aji-mirin, sake and lemon juice. Heat the sauce ingredients through. Set aside.

In the donabe, saute the ginger, garlic, zest, salt and prawns over medium heat until the flesh turns pink and white and is no longer translucent. Move the meat aside in the pot.

Cover the bottom of the donabe with the kale. In separate sections over the kale, arrange the shrimp, mushrooms, celery, carrots, onions, spinach and rice. Pour the sauce on top. Cover and cook the soup for 7 to 10 minutes over medium-high heat, pressing the top ingredients into the broth after 5 minutes. Turn off heat.

With an oven mitten or hot pan holder for each of your hands, transfer the hot pot to a trivet set on half of a plush towel (so that there’s also room to set the lid while serving) at the dining table. Ladle the soup into bowls, making sure to get a bit of each soup section of meat and vegetables. Garnish each bowl of soup with shichimi togarashi. Make sure you keep a hot pan holder or oven mitten at the table with the donabe in case you have to lift the lid and anyone wants a second helping of soup. When you are done serving your bowls of soup and have more room in the donabe, you can add more vegetables that you couldn’t wedge in before. As long as the lid stays on, the remaining broth and other soup ingredients will cook the newly added vegetables.

Shichimi Togarashi Inspired by “Shichimi Togarashi” in Japanese Hot Pots
This is a customizable garnish made from seeds and minced dried spices and herbs that can be sprinkled onto most anything, like furikake. Just pick ingredients to match the soup flavors. Get creative.
Serves 8 to 10

Ingredients
1/2 tsp Poppy Seeds
1/2 tsp Mustard Seeds
1/2 tsp White or Black Sesame Seeds
1/2 tsp Italian Seasoning Mix
1/2 tsp Lemon Pepper
1/2 tsp Mrs. Dash Tomato Basil Garlic Blend
1/2 tsp Mrs. Dash Original Blend
1/2 tsp Whole Cumin Seeds, roasted

Directions
You can mix together any or all of these ingredients into a small seasonings shaker container.

Make sure you smell or taste your seeds and seasonings first before mixing them in to make sure they are not stale or rancid; if they are, throw them away. I threw away poppy seeds, sesame seeds and fennel seeds. Also when shopping for ingredients you know you may not use very often, purchase small containers of them so you don’t end up wasting money.

Turkey Black Bean Chili with Green Salad

Chili is a nice simple meal with not much prep work involved. Mostly you just have to wait for the beans to soak and then become tender. The chili is always worth the waiting though, since it is a good comforting that can be eaten throughout the year, no matter the season. There are always leftovers that you can enjoy later or use in other recipes, too, like tacos or a hearty soup with vegetables. Chili with beans and turkey is also full of vitamins and minerals and low in fat, but you you can make vegan chili, too. Chili is also a rather diverse and flexible food; you can use lentils, different kinds of meat, beans, and add vegetables. Here’s even a raw vegan chili recipe made with marinated vegetables over at Golubka. Each of your vegetable, protein and seasoning inclusions can vastly change the overall flavor of the dish. You can make your chili sweet, spicy, salty, thin, hearty, smooth or chunky.

Turkey Black Bean Chili
Adapted from Fantastic Black Bean Chili and Sizzling Black Beans Chili
Serves 16 or more

Ingredients
1 17-oz. pkg Sizzling Black Bean Chili (3 C dried beans)
1 T Extra Virgin Olive Oil
1 Large Yellow Sweet Onion, peeled, chopped
1 Large Red Onion, peeled, chopped
7 to 9 Garlic Cloves, chopped
1 lb. Ground Turkey Meat
Dried Vegetable Mixture
Spice Packet
1 T Napa Valley Naturals Red Wine Vinegar or Bragg’s Apple Cider Vinegar
1 T Lime Juice
1 + 1 qts Filtered Water
2/3 C Medium Salsa Verde
1/2 to 2/3 C Salsa Fresca
2 Handfuls Red Fingerling Tomatoes, crushed
2 Handfuls Golden Cherry Tomatoes, crushed
1 – 1 1/2 C Fresh or Frozen Corn Kernels
4 T Better Than Bouillon Organic Reduced Sodium Chicken Base, dissolved in 1 qt hot water
Daiya Pepper Jack Cheese Shreds, optional garnish
Daiya Cheddar Cheese Shreds, optional garnish
Queso Fresco Cheese, crumbled optional garnish
Follow Your Heart Vegan Gourmet Sour Cream OR So Delicious Plain Greek Cultured Coconut Milk, optional garnish
Cilantro Springs, optional garnish
Scallions, sliced optional garnish
Lime, sliced optional garnish

Directions
Sort the chili bag contents to separate the dried vegetables from the beans. Discard any wrinkled, discolored, broken beans, and rocks. Even though the package directions does not call for soaking the beans, always, always, always soak your beans (unless they were pre-soaked and then dried) to get rid of the indigestible oligosaccharides that cause boating and gas. Pour in at least twice as much unsalted water as beans into a large pot, since beans double in size. Do not add any salt until near the very end of cooking; salt prevents the release of the indigestible sugars and the bean fiber from softening. Soak the beans overnight or at least between 8 to 12 hours. Bubbles will float to the top as the sugars are released. If you add salt to early or don’t soak the beans before cooking, they will take much longer and be harder to digest.

In an oiled stock pot or Dutch oven, saute the garlic and onions over medium heat until the onions become tender and translucent. Add in and brown the ground turkey, stirring with a long-handled spoon. Mix in the spices, beans, dried vegetables, vinegar, lime juice, and 1 quart of water. Cover and simmer for 1 hour on medium-low heat, stirring occasionally. Stir in the corn, tomatoes, salsas, dissolved bouillon, and 1 quart of water. Return the chili to a boil for at least two hours or until the beans are tender and the flavors are blended. Once the beans are soft, turn off the stove. Serve and garnish the chili in bowls to your liking.

We had our chili with a refreshing side salad, topped with red radishes and avocados in lime. You may have noticed that I included many garnish options. What do you like on your chili? I also thought about making gluten-free honey cornbread muffins with gluten-free cornmeal and gluten-free baking mix but ran out of time. Bob’s Redmill also makes a gluten-free cornbread mix, but the store we visited doesn’t carry it. A cornbread muffin recipe may be in a future post soon. 😉 How do you make your chili? Which garnishes do you use?

Beef Sukiyaki Hot Pot

I love sukiyaki! It’s so delicious with the rice noodles, but I think my favorite part is the broth. The only other great sukiyaki that I have ever had was at Kyoto, a small local family-own, family-run Japanese restaurant in Rohnert Park, which also has tasty, tasty sushi. I also love their dobin mushi, another soup I must make. Kyoto is the only restaurant where I have seen it served. I highly recommend their food! I like all Kyoto’s sukiyaki soups (chicken, seafood, beef and combination) so much, I went to Japantown in San Franciso to buy the special ceramic clay pot to make this great soup for myself at home.

Last year my mom asked for a new ceramic casserole dish for Christmas. So when Anise and I went to San Francisco last December to visit the Ferry Building Farmers Market and Japantown,  I knew exactly what I wanted to get my mom. A ceramic donabe or Japanese hot pot. It was my understanding that you can cook with them on the stove and in the oven, so I thought it would act as a two-in-one. That way she could make hot pot soups and oven-baked casseroles. Alas, I didn’t realize glazed ceramic pots will crack and break if you bake them; the unglazed ones can go in the oven after soaking in water for two to three hours. (The soaked up water prevents cracking in the oven; the walls of the glazed pots can’t absorb water, which is why glazed ones can’t go in the oven.) I got the wrong kind. Oh well. No big deal, since the off-white pot I got her has beautiful blue flowers on the lid. Thankfully this type of pot is still usable on the stove and easily cleaned with boiling salted water (kind of like cleaning cast iron pots with oil and salt to preserve seasoning and remove food bits).

Beef Sukiyaki Hot Pot
Adapted from Setsuko Yoshizuka’ Beef Sukiyaki and Beef Sukiyaki from Japanese Hot Pots by Tadashi Ono and Harris Salat
Serves 4 to 6

Sukiyaki Sauce Ingredients
3/4 + 3 1/4 C Filtered Water
1/3 C San-J Gluten-Free Tamari Soy Sauce or Bragg’s Liquid Aminos
3 T Hakutsuru Junmai Sake
5 T Sugar, Turbinado or Sucanat
2 tsp Better Than Bouillon Beef Bouillon
2 T Kikkoman Aji-Mirin

1 lb Sliced Beef Rib Roast, cut into 1″ squares*

Hot Pot Ingredients
1 Bunch Chinese Cabbage or Bock Choy, cut into 2″ lengths
1 Bag Wild or Spring Mix Salad Greens
1 Leek, ends trimmed, cut into 2″ lengths
8 Shiitake Mushrooms, stemmed, sliced**
6 3″ wide Portobello Mushrooms, sliced**
1 pkg Maifun Rice Noodles, soaked, rinsed, cut into 3″ lengths or kelp noodles, rinsed

*Cutting the meat slices so small is not necessary, but they shouldn’t be bigger than 4″ across.
**If your mushrooms are small enough, you don’t have to slice them; I just wanted ours bite-size. You can use Enoki, like the original recipe called for, but we couldn’t find them at the store.

Directions
Arrange your cut-up vegetables on a large platter into separate piles in order to make organizing your ingredients easier later on when it’s time to add them to the donabe.

In a small sauce pan, combine 3/4 cup of water, the tamari, sake and sugar. Heat the sauce through on the stove over medium.

Warm up some of the sauce over medium heat in the donabe. Add the meat, and saute it until it reaches medium doneness. Dissolve the bouillon in the remaining water, sauce and mirin on medium-high heat. Deglaze the pot with a bit of sauce, scraping off any meat stuck to the bottom if needed.

Push the meat aside, and add the bok choy. (Cabbage always goes on the bottom of the donabe when you are adding your groups of soup goodies.) Arrange the other vegetables and noodles in separate sections in the pot on top of the cabbage. It may not look like they will all fit, but just wedge them in. Pour in the rest of the sauce. Remember the lid is domed, but if you have to, wait a few minutes for some of the greens to wilt before you add more. (If there still isn’t room, add more after the first four bowls of soup are served.)

Cover the pot with the lid, and cook the sukiyaki over medium-high heat for 5 minutes. Remove the lid to check on the ingredients. Push any ingredients down that are sticking up out of the broth, so everything cooks evenly. Return the lid, and cook the soup for another 3 minutes. If necessary, press the ingredients down again. Recover the pot again. Bring the soup to a boil over high heat; cook it for 30 seconds. Turn the off the burner.

With hot pan holders or oven mittens, transfer the hot pot to the dining table, placing it on a trivet. Under the trivet I spread out a thick towel (or you can use an absorbent placemat, in case of spillage while ladling the servings). The trivet only covered half of the towel, so that I had room to put down the very hot donabe lid. Make sure you keep a hot pan holder or oven mitten at the table with the hot pot, so you don’t burn your hands.

Serve the soup into bowls with a ladle and cooking or plating chopsticks or tongs. Make sure you get a bit of everything in each bowl. If you have any additional vegetables that are still uncooked and didn’t fit in the pot before, you can add them now to the still hot broth. Returning the lid to maintain the heat in the donabe and keep the steam in.

Here’s a video of “The Aimless Cook” on Youtube that I also used as a reference for cooking the meat directly in the donabe. It also has some nice vegetable preparation ideas to make your vegetables look prettier.

Donabe recipes are so flexible, that you can really be creative when putting your soup together.  Treat the recipes like guidelines when coming up with flavor combinations; you can add or omit most any ingredients you like. Just make sure you pay attention to the amounts each type of ingredient. An overstuffed pot can boil over during cooking, and you want to make sure the piled in meat and vegetable piles are so high that they lift the lid away from the pot. The lid needs to  completely close. Remember that you can add more ingredients to the hot remaining broth and other soup bits after you make some room by serving portions to your dinner mates.

If you are concerned about sodium and sugar, those are adjustable, too. You can use low-sodium or sodium-free tamari and omit the mirin or use less sugar, adjusting the flavors afterward. Also If you want to add a garnish, you can sprinkle on furikake or shichimi togarashi, both of which come in several different seasoning mixes, as shime or garnish. You can even make your own, like I did; stay ‘tooned for my upcoming Shrimp & Vegetable Nabe post.