Posts from the ‘Ingredients’ Category

Gingerbread-Infused Butter

I was thinking about the marshmillets from the other day, and I realized that I need to offer an alternative to holiday marshmallows made by Kraft. If possible, I recommend making the marshmillets more from scratch. I used the the flavored marshmallows out of convenience, but you can use other regular or vegan marshmallows. Even better, you can make your own marshmallows, like these, and I even found David Soleil’s ebook of vegan marshmallows.  If you are using plain marshmallows, substitute the Earth Balance spread with gingerbread spice-infused Earth Balance instead.

The only problem with using the recipe below is that it is missing molasses, but you can add between 1 to 2 cups of molasses (depending on your preference) when melting the marshmallows. In addition to adding molasses, if you want to use this as a butter spread on toast or the like, try adding some agave or honey for a little more sweetness.

Gingerbread-Spiced Butter
I have used Nicole Harris’ gingerbread spice mix and Leanne Vogel’s Gingerbread Cookies as guides to create my spice mixes, and I used André Baranowski‘s Ethiopian Spiced Butter as an inspiration for the infusion method.

Ingredients
2 Sticks or 1 C Earth Balance Spread or Salted Butter
2 tsp Ground Cloves
2 tsp Ground Nutmeg
2 T + 2 tsp Ground Cinnamon
1/4 C + 2 T Ground Ginger

Directions
Combine the spices in a bowl. In a large saucepan, melt the spread over low heat. Pour in the spices. Stir with frequently with a wooden spoon for 30 minutes to fully infuse the flavors. Transfer the mixture into a small glass bowl or storage container. Cool until solid.

Note
If you are using real butter, you can use this opportunity to clarify it of impurities by removing the foam that forms at the surface during spice infusion. Foam no longer forms, strain the melted butter through a fine mesh colander or cheesecloth into a bowl to remove the milk solids.

Candy-Sprinkled Gingerbread Cookies

Candy Cane-Topped Gingerbread Cookies

Gingerbread is one of my absolute types of cookies. Gingerbread cookies are perfect for the winter harvest and festival season, but sadly the winter season is over. Of course now that we are officially in spring, I am craving those warm homey spiced flavors, like gingerbread, pumpkin pie, chai and curry. At least gingersnaps, chai, and numerous curries are popular enough that they are available throughout the year. I really enjoy cooking with spices beyond salt and pepper. Spices, liven up dishes and make foods so much more interesting. As an added bonus, they also contain trace minerals, vitamins and anti-oxidants.

Spiced treats after holiday meals (and spices in your entrees) are actually quite helpful. The spices increase digestion for eating meat and other heavy foods as well as boost metabolism, which helps increase the burning of calories and body temperature, so it makes sense to me that gingerbread is a traditional winter holiday treat. In addition, ginger acts as an anti-inflammatory. I know it is strange to mention in an entry about cookies, but cinnamon regulates blood sugar, reduces LDL cholesterol levels and is anti-microbial (and therefore a natural preservative). Cinnamon also reduces arthritic and menstrual pain. Blackstrap molasses is high in iron, calcium and magnesium (with a serving size of two tablespoons dissolved in warm water) as well as significant amounts of manganese, potassium, vitamin B6, and selenium.

Gingerbread has historically been so popular, it is available in many different forms, textures and flavors from across the world. There are dry or moist cakes and hard and soft cookies, for instance, not to mention all of the other gingerbread flavored desserts. German lebkuchen are glazed flattened cookies, whereas the German Sankt Nikolaus spekulatius are very large cookies, which are made by pressing the  dough into a highly detailed design (usually St. Nick or other religious shapes) cut into a large wooden cookie presses (really a cookie board). For the Dutch and Belgian versions (speculaas and speculoos) the cookies are pressed into wooden molds of all sorts of religious  and secular shapes, even chickens and windmills. Pfeffernuesse are also German cookies but are made with peppercorns. For more gingerbread information and various cultures’ recipes, visit the St. Nicholas Center; they even have a gluten-free recipe for making speculoos. Check out Chef Petrus Hermanni Kurppa’s great collection of wooden cookie molds over on his blog, Turku Gingerbread.

Image Credit: Chef Petrus Hermanni Kurppa of Turku Gingerbread

Image Credit: Chef Petrus Hermanni Kurppa of Turku Gingerbread

Of course, you can always make crispy gingerbread cookies with a stiff dough by rolling it out thin, and then cutting the cookies into small shapes with either preformed cutters or cutting them into larger shapes by cutting the dough with a knife while following the outline drawn onto a piece of butcher or parchment paper. Making the pieces for constructing gingerbread houses (or lebkuchenhause) are also cut this way. Decorate with colorful frosting, sanding sugars and dragees to your heart’s content!

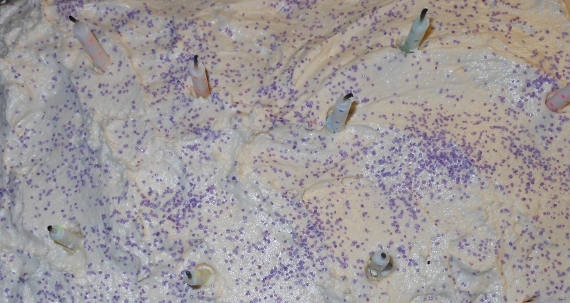
Candy Cane Gingerbread Cookies
These cookies are not specifically based on any one recipe but a couple from The Great American Cookie Cookbook.

Gluten-Free Gingerbread Cookie Dough
This cookie dough recipe is adapted from The Great American Cookie Cookbook’s Gingerbread Cookie Dough.

Yields 1 to 2 Dozen Cookies

Ingredients
1 T Chia Seeds, course ground
1/4 C Warm Filtered Water
1/4 C Unsweetened Apple Sauce or pureed pears
1/4 C Earth Balance Spread, softened
1/3 C Powdered Sucanat
1/4 C Unsulfured Blackstrap Molasses
1/2 tsp Vanilla Extract
1 1/2 C Gluten-Free All-Purpose Flour
1 tsp Xanthan Gum
1/2 tsp Baking Soda
1/4 tsp Baking Powder
1/2 tsp Sea Salt
1 tsp Ground Cinnamon
1/2 tsp Ground Ginger
Icing (see below)
Fruit Flavored Candy Canes, crushed

Directions
In a small bowl, beat the seeds and water together with a fork. Set aside for 15 to 20 minutes, stirring every five minutes or so to prevent the seeds from clumping.

Preheat oven to 350 degrees F. Line two baking sheets with silpats or parchment paper. Set aside.

In a large bowl, cream the apple sauce, spread, sucanat, molasses, “egg” and vanilla with an electric mixer until smooth.

In a medium bowl, combine the flour, gum, baking soda, baking powder, salt and spices. Add wet ingredients and mix until fully incorporated.

Spoon dough onto the baking sheets in one-tablespoon portions. Flatten slightly to spread the cookies to at least a two-inch diameter size. This dough is really sticky and difficult to work with, but try your best. Space the flattened cookies about inch apart.

Bake for eight to ten minutes or until the edges start browning. The cookies will harden as they cool, so do not worry if they are still soft. Cool the cookies for five minutes on the baking sheets. Transfer the cookies to wire racks to cool completely.

Once cool, drizzle or spoon the icing on the cookies. Immediately sprinkle the crushed candy on top and press larger pieces into the icing to ensure that it sticks. Let the icing dry for up to ten minutes.

Golden Apple Powered Sugar Icing
The Powdered Sugar Icing recipe is also from The Great American Cookie Cookbook’s.

Yields 2 1/4 Cup Icing

Ingredients
2 C Powdered Sugar
2 tsp Unfiltered Apple Juice
5 tsp Filtered Water
Yellow Food Coloring

Directions
Sift the sugar into a medium to large bowl to get rid of lumps. Mix the juice, water and sugar together with a fork.* Add more juice to increase flavor and thin the icing as necessary. Slowly stir in the yellow food coloring until you reach the medium shade of your choice.

*Increase the icing’s apple flavor by adjusting the ratio amounts of juice to water.

Glazed Clove-Studded Ham

Ham and String Beans

The other day at work, someone brought home-baked ham from lunch, which of course only made me crave it, so as soon as I clocked out for the day, I went to the store on a quest. A quest for ham! Well, the first store did not have what I wanted, and the second store did not either. As it was getting later though, I settled on a mostly unflavored precooked spiral-sliced hunk of ham, since that’s all the store carried. Honestly, I was too hungry to make dinner from scratch and bake the ham for several hours. I made sure to check the ingredients on the ham label first to make sure the meat did not contain any allergens or gross chemicals.

Once it was out of the packaging, I studded it with all of my whole cloves at about one-inch intervals. As per the directions, I placed the ham on a foil-lined baking sheet and then covered the ham tightly with more foil. I baked the ham at 350 degrees F for about an hour, which was about 8 minutes per pound.

During the last few minutes of the baking time, I prepared the glaze. To reduce the sugar, I opted to only use half of the sugary spiced glaze mixture, stirring it into 3 tablespoons of water in a sauce pan on low heat until the sugar crystals fully dissolved. I simmered the glaze on low for about two minutes and then brought the glaze up to a boil over medium heat, stirring frequently.

While the glaze was still hot, I removed the ham from the oven and increased the temperature to 400 degrees F. I carefully spooned the glaze onto the ham, making sure to glaze all whole cut of meat. I set the foil covering aside for post-dinner ham storage, as it was no longer needed for roasting. Once the oven reached the desired temperature, I popped the meat back in the oven to roast for another hour, when the center of the roast reached 120 degrees F. (Remember the ham was precooked, so I was just reheating it and allowing the flavors to meld.) It was nice that the ham was spiral-sliced, so all I had to do was cut the meat in sections from around the bone.

Glazed Clove-Studded Baked Ham

I was so relieved that preparing the ham was so easy. Although I wish I cooked the ham and made the glaze from scratch, this was a nice alternative. I am very glad that there was plenty of leftovers for my husband and I to incorporate into later dishes, such as soup, salad and sandwiches. Most importantly, it was rather healthy and delicious.

Red Velvet Beet Cake

This is attempt number two in efforts to create a more cake-like red velvet made with beets. The first attempt of making this cake was a failure that actually turned into tasty dark chocolate brownies. My adaption was a big success! The confection had a nice cake consistency and sweet flavor. The folks at my work greatly enjoyed it (despite that most of them are not accustomed to gluten-free or vegan specialty foods; some even asked for my recipe). Unlike the brownies, the cake batter has more fruit puree, no chocolate chunks, and less cacao powder and beet puree, so it is not as dense. I used the same frosting recipe as with the brownies.

Red Velvet Slice 01

Red Velvet Beet Cake
Adapted recipe from Jen Cafferty’s recipe on the Gluten-Free Food Examiner.

Yields 15 to 20 Servings

Ingredients
2 T Chia or Flax Seeds, course ground
6 T Warm Filtered Water
1 C Cacao Powder
1/2 C Unsweetened Apple Sauce
1 1/2 C Unsweetened Pureed Pears
2 tsp Vanilla Extract
1 – 1 1/2 C Evaporated Cane Juice or Turbinado Sugar
1 3/4 C Gluten-Free All-Purpose Flour
1 1/4 tsp Xanthan Gum
1 1/2 tsp Baking Soda
1/2 tsp Sea Salt
2 Medium Beets, scrubbed, trimmed
1 T Fresh Lemon Juice
2 oz Gel or Liquid Red Food Coloring
Vegan Cream Cheese Frosting
Red Sanding Sugar, optional*

Red Beets

Directions
Preheat oven to 400 degrees F. Scrub the beets clean with a vegetable cleaning brush under cool water. Trim off the end of the tail and the top. Foil-wrap beets and place on foil-lined baking sheet. Roast 45 minutes. Cool slightly on wire racks away from heat. Unwrap and quarter. Puree in food processor with lemon juice. Set aside.

Foil-Wrapped Beets

In a small bowl, beat chia or flax seeds and water with a fork until smooth to create “egg” substitute. Set aside for 15 to 20 minutes, stirring occasionally to prevent clumping.

Preheat oven to 350 degrees F. Grease and flour-dust a glass 9″ x 13″** baking dish. Set aside.

In a large bowl, mix cacao, apple and pear sauces and vanilla. Set aside.

Into a medium bowl, sift flour, xanthan gum, 1 cup sugar, soda and salt. With an electric mixer, gradually add in cacao-apple mixture. Blend in “eggs,” beets, and food coloring. Beat until fully incorporated. Adjust batter to desired level of sweetness with remaining sugar, mixing in a quarter cup at a time.

Red Velvet Beet Cake

Bake for at least 30 minutes (mine took 70) or until toothpick inserted in center comes out clean. Cool thoroughly on wire rack.


Frost and decorate as desired. If you are using frosting that was prepared ahead of time and chilled, let it soften at room temperature to prevent separation. Make sure to stir it well before applying it to the cake. Serve and enjoy!

Decorated Cake 01

*To include a colorful decoration without adding extra sugar, even out the cake with a long serrated knife, carefully slicing off the top and trimming the sides to make them flat and level. Crumb the cut-off potion in a food processor. Use the crumbs in lieu of sanding sugar to decorate the cake after frosting.

Red Velvet Slice 02

**If desired, bake the cake in two round cake pans. Use the frosting as the cake topping and filling.

Chocolate Chip Beet Brownies and Cream Cheese Frosting

I really enjoy red velvet cake and buy a gluten-free vegan piece whenever I find it at a store, bakery or restaurant, so I decided to treat myself for my birthday when my folks came to celebrate with me. I made my adaption from a recipe I found at the Gluten-Free Food Examiner, which looked really intriguing, but I wanted to make a healthier version. I was a bit leery of the recipe’s large amount of beets and was unsure how potent the the red color or earthy root flavor would work in this cake compared to the small amount of chocolate. The cake batter of this first attempt ended up tasting too much like beets but had a great raspberry shade. The chocolate lacked flavor intensity, but the batter was at least sweet. It needed more chocolate, so I quadrupled the amount of cacao when doubling was not enough. Unfortunately, adding this much chocolate made the batter much thicker and a very dark shade of brown. As bright red coloring faded a significant amount as while baking, it came out not looking red at all, so left out the red dye in the recipe listed below. Although the the concoction was tasty to me, they were not to everyone’s liking, as some changes to the recipe resulted in rather an intense dark chocolate flavor. (I prefer my chocolate very dark and bitter, sometimes eating dried cacao beans or 89 percent to 100 percent dark chocolate bars.)

The vegan cream cheese frosting that I made is AMAZING! It tastes and feels like REAL cream cheese frosting! It is sweet, tart, light and fluffy. It’s not healthy enough to eat by the spoonful but provides a perfect accompaniment to red velvet, various spice cakes or really in any other recipe that calls for cream cheese frosting. The original recipe called for too much sugar, and the frosting made from it appeared too sweet for my brownies. I listed the reduced powdered sugar measurement (see the recipe below), which prevented the frosting from overpowering the brownies. Feel free to experiment with other dry sweeteners, but I’m not sure how the recipe will turn our if you do. I do not recommend using liquid sweeteners, as the powdered sugar seemed to absorb some of the oils in the cream cheese and prevented the frosting from becoming too greasy.

I used Daiya’s new non-dairy plain cream cheese, which already has an incredible taste and texture by itself; it even has that classic cheesy tartness that is usually so difficult to simulate without fermentation. I first stumbled upon their cream cheese when I was perusing their non-dairy cheese selection on the Daiya website. I thought to myself, “With all of the recent progress in the foodie world with gluten-free, dairy-free and vegan foods, someone has to have a created a not only decent but good dairy-free cream cheese by now. I wonder if Daiya has one yet….” Lo’ and behold (and luckily for me), they do! I really like their other non-dairy cheeses, so I thought I might as well try it. Why not?

Roast Beet Purée
Adapted from the roasting instructions for Jessica’s red velvet cake at Desserts with Benefits.

Ingredients
2 Large Beets, scrubbed, trimmed
1 1/2 tsp Fresh Lemon Juice

Directions
Preheat the oven to 400 degrees F. Wrap the beats in aluminum foil. Place on a foil-lined lipped baking sheet due to a tendency for the beet juice to bubble over through the wrapping. Roast for an hour or until a fork easily pierces through the flesh. Cool slightly on a wire rack. Unwrap the beets. Be careful not to burn your hands. Quarter them before pureeing in a food processor or high-speed blender with the lemon juice.

Birthday Brownies

Gluten-Free Chocolate Chip Beet Brownies
Adapted recipe from Jen Cafferty’s recipe on the Gluten-Free Food Examiner.

Yields 15 to 20 Servings

Ingredients
3 T Chia or Flax Seeds, course ground
8 T Warm Filtered Water
2 C Cacao Powder
1 1/2 C Unsweetened Apple Sauce
2 tsp Vanilla Extract
1 – 2 C Evaporated Cane Juice or Turbinado Sugar
1 3/4 C Gluten-Free All-Purpose Flour
1 1/4 tsp Xanthan Gum
1 1/2 tsp Baking Soda
1/2 tsp Sea Salt
1 C Roast Beet Puree (see above)
20 oz Vegan Chocolate Chunks or Chips
Vegan Cream Cheese Frosting (see below)
Red Sanding Sugar, optional

Directions
In a small bowl, beat chia or flax seeds and water with a fork until smooth to create “egg” substitute. Set aside for 15 to 20 minutes, stirring occasionally to prevent clumping.

Preheat oven to 350 degrees F. Grease and flour-dust a glass 9″ x 13″ baking dish. Set aside.

In a large bowl, mix cacao, apple sauce and vanilla. Set aside.

Into a medium bowl, sift flour, xanthan gum, 1 cup sugar, soda and salt. With an electric mixer, gradually add in cacao-apple mixture. Blend in “eggs” and beets. Stir until fully incorporated. Adjust batter to desired level of sweetness with remaining sugar, mixing in a quarter cup at a time. Fold in chocolate pieces.

Bake for at least 30 minutes (mine took 70) or until toothpick inserted in center comes out clean. Cool thoroughly on wire rack. Frost and decorate as desired.* Serve and enjoy!

*If you do not want to frost the brownies, they would also taste great accompanied by vanilla ice cream or whipped cream.

Frosted Red Velvet Beet Cake

Vegan Cream Cheese Frosting
I adapted this cream cheese frosting made by Rachel Young of Gladly Gluten Free.
I doubled this recipe from the original, since I planned to make cakes for two different occasions.

Yields 40 to 48 Servings.

Ingredients
16 oz Daiya Plain Cream Cheese, softened
2 C Earth Balance Spread, softened
2 tsp Vanilla Extract
4 C Powdered Sugar, to taste

Directions
Combine the cream cheese and spread in a large bowl until fluffy.Thoroughly incorporate the vanilla. Sift the sugar to get rid of lumps, gradually adding four cups of sugar to the cream, using an electric mixer. Adjust the frosting to your level of desired sweetness by slowly adding up to another cup of sugar. Store leftover frosting in a large airtight container, like a glass canning jar, for up to a week; just make sure you let it soften it a bit before attempting to spread it on a cake.

Autumn Buckwheat Pancakes

I had wanted to make buckwheat pancakes for a while now, since I had never eaten them before.  I usually eat buckwheat as cereal and have only otherwise eaten buckwheat in noodle form. I have heard that buckwheat pancakes are generally akin to rather dense, dry and heavy sponges-like griddlecakes, soaking up all traces of butter and syrup slathered onto them. Either you like them or you do not. Well, challenge accepted! I thought, “Why not give them a try? I bet I can make them taste great.” I was rather impressed with my little pancakes, as they came out thin, light and delicious.

The original recipe called for banana, which I would normally replace with apple sauce, but as I did not have either of these ingredients when I made the pancakes, I used pumpkin puree instead. Thankfully autumn is pumpkin season, so I can buy them at the farmers market. Although bananas are available all year long in grocery stores, they are not even remotely local and have more carbohydrates than I want, especially sugar. It really does not matter what kind of puree you use. If you want to make savory pancakes instead, you can add any myriad of vegetable purees.

Image Source:

Image Source: Chris and Jenni on Flickr

Sprouting Buckwheat
Surprisingly, buckwheat is not actually part of the wheat family, but is still considered a grain by some people due to its use as fine flour in making many baked goods. Soak the seeds (as in my previous nut preparation entry); the process is the same as with other seeds. I generally use Ani Phyo’s suggestion of soaking the seeds for about 6 hours from her book, but it is perfectly fine to soak them overnight. Rinse in a large fine mesh non-reactive (stainless steel, fabric or plastic) strainer. Rest the strainer over a bowl or container that is deep enough for the bottom of the strainer does not touch the container. Daily rinse the buckwheat groats. Mix them from the bottom to the top with a large spoon or clean hands in the strainer to provide even light and air distribution and prevent molding. Reset the strainer over the container. Repeat this process over the next two to three days or until the seeds sprout, and the “tails” grow between a 1/4 and an 1/2 inch in length. Dehydrate the seeds at 105 degrees Fahrenheit until they are crunchy. Store them in an airtight glass container, like a canning jar.

Pumpkin Buckwheat Pancakes
Adapted from Kelly E. Keough’s gluten-free baking cookbook.
This makes lots of pancakes, so cook them in a larger pan to speed up the over-all cooking time.

Yields 20 to 24 pancakes

Ingredients
3/4 C Rooibos Chai Tea, cooled*
1 T Flax Meal
1 C Sprouted Buckwheat Groats (see above)
1 C Egg Whites (from about 8 large eggs)
1/2 C Pumpkin Puree
1 T Blue Agave Nectar
2 tsp Ground Cinnamon
2 tsp Ground Ginger
Extra Virgin Olive Oil

Optional Toppings
Grade B Maple Syrup
Flavored Blue Agave Nectar
Spiced Creamed Honey
Coconut Oil
Cranberries
Apple Compote
Bee Pollen
Peanut Butter Chips
Chocolate Chips
Carob Chips

Directions
For better consistency, pre-soak the flax meal in the tea for about 15 minutes, occasionally stirring.

In a food processor or high speed blender, like my Vitamix dry grain mill, grind the buckwheat into a fine meal. Add in the tea-flax mixture, egg, pumpkin, agave and spices. Blend until the ingredients are evenly distributed.

Cooking Pancakes

In an oiled pan over low heat, pour in about 2 to 3 tsp (1 tablespoon) of batter for each pancake. Spread out the batter into thin round pools of about four to six inches in diameter. Cook for several minutes on the first side. Carefully flip the pancakes over with a spatula when you can easily loosen all of the edges from the pan without scrunching the cakes into heaped messes. Cook on the second side until the edges are golden brown. Adjust the stove temperature accordingly to avoid burning your cakes during cooking. Serve warm. Decorate with your desired toppings. Enjoy!

Pumpkin Pancakes with Cranberries

Note: I included rooibos chai to aid my digestion, but you can use black or green tea versions or any spiced teas, like Good Earth’s herbal tea.
When eating leftovers during breakfast the following day, I realized these would also taste rather scrumptious with chopped pecans or walnuts added to the batter or scattered on top.

Spiced Apple Compote

Photo credit: kthread on Flicker

Earlier this autumn, I visited the organic sustainable golden delicious apple orchard at my university alma mater with some friends. We went home with several pounds of golden beauties. Three large cloth shopping bags worth! As no one tends the trees, not even to trim them, many of the apples were already spotted, buggy or on the ground. We picked the best ones that we could find. I spent absolutely hours picking over and chopping the apples once I got them home.

Stir the spices into the apples.

Stir the spices into the apples.

I pretty much knew from the start how I wanted to prepare them, either in a pie or as spiced compote. Since my stomach is so fussy, I cannot eat raw apples anymore, only cooked ones. When the time came to cook the apples, I decided that I did not want to bother making a gluten-free pie crust, so I just made compote instead. I had so many apples that I had to dived them into four batches, altering the recipe as I went along. I have included my favorite version below.

After 4 hours on low heat, add in the vanilla extract.

After 4 hours on low heat, add in the vanilla extract.

Spiced Apple Compote
Adapted from Alyssa Brantley’s Crockpot Apple Pear Sauce.
This compote goes very well with hot cereal, in a pie or on top of ice cream, pancakes or waffles.

Yields 10 to 12 servings

Ingredients
4 – 6 lbs Apples, cored
1 tsp Citric Acid or Sour Salt
1 T Orange Juice
Filtered Water
2 tsp Ground Cinnamon
1 tsp Ground Ginger
1/2 tsp Ground Allspice
1/4 tsp Ground Nutmeg
2 T Blue Agave Nectar
1 tsp Vanilla Extract

Directions
As you chop the apples to roughly bite size, put them into a non-reactive (glass or plastic) container filled about half way up with water and the citric acid. Make sure the apples are mostly submerged, occasionally mixing and pushing the apples down into the water. Add more water as necessary.

Place the apples, spices, agave, and 1 cup of the apple soaking liquid into a slow cooker. Cover and cook for four hours on low. When the apples are tender and reduced, turn off the heat. Stir in the vanilla before serving. Serve hot or cold. Store in clean canning jars.

Note:
You can save the remaining apple infused water for making smoothies and other sweet recipes in place of filtered water.
In lieu of measuring all of the spices listed above, you can use an equivalent amount of apple or pumpkin pie spice mix, adjusting the flavor to your liking.

Almond Milk

There are generally several types of nuts and seeds that you can buy in the grocery store bulk section, including unsalted, salted, organic, non-organic, gourmet flavors and candied. Due to a law made in response to few years of harmful bacteria contaminated produce, regular raw almonds are illegal to sell in stores, which forced businesses to sell only chemical or high-heat treated almonds. This makes raw almond availability rather scarce, and now raw almonds have to be bought directly from the growers. For some odd reason, this law only pertains to almonds, seeds, grains or other nuts.

I made the strange observation earlier this year that some grocers are selling organic sprouted almonds; I am guessing that this is due to the additional processes that the nuts must go through before they are sold to stores (someone please correct me if I am wrong). Maybe no one thought to sell them this way before, or maybe there was too much speculated financial risk of the projected cost. I am not sure, but these days people are definitely willing to pay for the convenience and availability of store-bought raw almonds. Let me tell you, sprouted almonds are more expensive and have a stronger flavor; a rare few tasted as intense as alcohol-free extract. It might be possible due to their increased nutrients and flavor from sprouting that fewer almonds are needed to make nut milk with the same amount of flavor, which may also help to balance out the price. As these almonds are already prepared through sprouting, they do not have to be soaked, which saves a bit of time and labor. Personally I still like purchasing raw almonds directly from the growers at the farmers market during peak season, since I don’t mind soaking and dehydrating the nuts myself.

Please see my previous cashew milk blog entry for general directions for making non-dairy milk. I have included some suggestions for sweeteners and spices.

Plain Almond Milk
My husband and I prefer to make lots of plain unflavored milk at once, so we can use it in a wide variety of foods, from smoothies to soups. Adjust the milk proportions and flavors as you like.

Yields 6 Cups

Ingredients
2 C Prepared Almonds
6 C Filtered Water
1 Pinch Sea Salt

Directions
Process the almonds, salt and water until the nut pulp is fine and the liquid turns white; the nuts can’t be over-blended. Strain the mixture through fabric, like cheese cloth or a nut milk bag, making sure to squeeze the ground almonds within the fabric to release more liquid without letting the pulp squish through. Set the pulp aside. Store the milk in a sealed jug or jar(s) in the refrigerator for up to 3 to 4 days.

Notes:
Reserve the pulp for another batch of milk, or dehydrate it into almond meal to later use.
You can also freeze the milk into cubes to melt into hot tea or coffee or make into ice cream.

Cashew Nut Milk

For those of us who have an allergy or an intolerance to milk, eating or drinking many tasty creamy delights that normal people can have can prove difficult to consume, even with allergy and digestive pills. This means, no cheese, yogurt, ice cream, milkshakes, cheesecake,…. You get the idea. As more people are discovering their own digestive intolerance and allergies, more options are becoming available in grocery stores and restaurants. At the same time, recipes for dairy alternatives are being perfected with improved colors, flavors and textures. Thank goodness there are so many food enthusiasts excited about experimenting with ingredients! For instance, I have seen all sorts of non-dairy milk and cheese alternatives in stores and online, such as various cultured and non-cultured goodies made from hazelnuts, hemp seeds, coconuts, oats, rice, sweet potatoes, etc. The process of making special milk is pretty easy and is usually much cheaper and more environmentally friendly to make your own than buy it (processed with bonus additives) from the store, even if you buy organic ingredients. Making and drinking milk alternatives is so popular, the comedy television show, “Portlandia” (which is on Netflix right now), has even featured several hilarious spoof PSAs by the “Portland Milk Advisory Board” regarding different types of milk, including zucchini milk and berry seed milk (jam).

You can make the milks as thick or as concentrated as you like, although the methods depend on the ingredients used. Also depending on the nut and how you process it, like cashew milk can turn purple and pumpkin seed milk will turn green if they have their inner skins still attached. You can also flavor or sweeten them however you like. Some nuts, like almonds are naturally sweet, so they don’t require a lot of sugar. Others, however, may need a bit of help if they have a natural bitterness, like walnuts do. I like rice milk, but it’s very low in nutrients and is not raw (none of the store-bought milks are). Sweetened rice milk is fine and dandy for horchata, but I would rather make something with more protein and less sugar (I like to dilute restaurant-style horchata by half usually or at least wait until the ice melts, so I don’t feel like I’m drinking liquid candy). What I don’t want to do though is destroy the proteins in the nut milk by boiling water to concentrate it. I did read somewhere that milk concentration in a dehydrator is the preferred method to preserve the proteins and amino acids, but excess water can also be steamed off by simmering the milk in a pan over the stove, constantly stirring and frequently measuring the temperature to prevent the milk from reaching over 105 degrees Fahrenheit.

The method of making alternative milks is pretty much the same no matter what you use. From what I gather, the first step is to prepare the seed (grain, nut or otherwise) into an edible form. See my blog entry on preparing nuts and seeds. (If you are working with grains or root vegetables, you have to cook them first). Blend the nuts, seeds, etc. with water; I recommend a high speed blender, like my Vitamix. Generally you want a ratio between a one to two and a one to four parts of nuts to water. According to Sarma Melngailis in her book, “Living Raw Food,” if you do not have nuts, seeds or what-have-you to grind up with the water, you can mix the water with nut or seed butter instead; Amanda Mercer’s alternative recipe uses 1/16 or 1/48 to 1 parts ratio (for instance one tablespoon almond butter to one cup water for thick milk or one teaspoon nut butter to one cup water for thin milk). Strain the milk through a fine mesh, like cheese cloth or a special nut milk bag; I bought mine at the Santa Rosa Community Market. Some nut pulp can be blended and strained to make a couple more milk batches, depending on the desired flavor intensity and thickness.

At this point, you can sweeten the milk (with stevia, agave, honey or dates just to name a few); there’s a wide variety to choose from depending on what flavor profile you want. You can flavor the milk with alcohol-free extracts (vanilla or almond), spices (such as ginger, chai spices, pie spices, cinnamon or cacao nibs) or cooled infusions (like herbal tea). Adjust the richness of the milk if you like by adding oils or butters, like those of coconut.

Cashew Milk
Cashew milk is great not only for cereals and smoothies and other normal milk uses, but is also great in making desserts, sauces and cultured non-dairy cheeses. This milk has a pleasing rich creaminess from the natural oils contained in the nuts.

Yields 6 cups

Ingredients
2 C Prepared Cashews
6 C Filtered Water
1 Pinch Sea Salt

Directions
Process the nuts, salt and water until the nut meal is fine and the milk opaque; the nuts can’t be over-blended. Place the nut milk bag or filtering fabric over a large clean container, like spouted glass measuring cup. Strain the mixture through fabric into the container, making sure to carefully squeeze the pulp within the fabric to release more liquid but without letting the pulp squish through. (Cashews can grind down to a very fine meal, and silty cashew milk is an unwanted and unpleasant surprise. So be careful not to squeeze too hard.) Set the pulp aside.

Notes:
Store the milk in clean, sealed non-reactive jugs or jars in the refrigerator for up to 3 to 4 days.
Reserve the pulp for another batch of milk soon, or dehydrate the almond meal to use later.
You can also freeze the milk into cubes to melt in hot tea or coffee or make into ice cream.

Fruit and Vegetable Presents!

I’m so excited! We just got our CSA (community supported agriculture) box of fresh fruits and vegetables! I made high pitched girly squeals or excitement, and then I unpacked the box, carefully removing each all of the items one at time. We received all sorts of fruits and vegetables! I laid them out on the dinning room table and took a few pictures. I know I’m silly, but each item seemed equally precious to me as I took in each marvel’s colors and shape. I carefully piled most of the fruit in my big fruit bowl. Next, I cut the hearts out of the lettuce, chopped the bottom end of the celery and separated the greens from the root vegetables to help them last longer and preserve flavor. I carefully wrapped the vegetables in reusable plastic bags to preserve their moisture in the refrigerator.

While at the National Heirloom Exposition, I met up with an old college classmate. I had been contemplating signing up with a local CSA program for years. Generally it’s much more cost effective and more environmentally responsible to buy your produce in season this way than driving to the store, and sometimes who knows how far those items are trucked, flown or shipped in from. Besides with a CSA box, I get to pay the farmers more directly. I felt rather conflicted though in choosing a local program; there are so many local farms in our area. How was I supposed to narrow them down to pick just one? Capay Organic Family Farm not only grows their own seasonal foods year round but also swaps fruits and vegetables with other Northern California organic farms in their co-op, which allows for greater variety due to the wide variety of climates and soils in this part of the state.

Capay has several different subscriptions so you pick the amount, types of produce you need and frequency of delivery. You can even get eggs, nuts and trail mix. On the next delivery day, the delivery guy can pick up your old box for reuse and recycling. Just make sure you remember to put your boxes out beforehand, otherwise you might amass quite a collection.

With my utter glee not yet diminished, I happily danced around the kitchen for a bit before reading the accompanying newsletter, which was this time focused on mangoes. Typically the newsletters feature upcoming events, articles, seasonal produce information, cooking ideas and recipes. As an added bonus, the accompanying packing list includes variety names, which is really helpful if you like to save your seeds for your garden or local seed exchanges, like with a gardening club or seed bank.