I have intended to make another hot pot style soup for a long while now and actually have not made any since the time I cooked the shrimp & vegetable nabe for my folks during the summer of 2012. Recently, the pork tenderloins were on sale at our local grocery store, and I was trying to think of another way to cook the meat beyond sauteing, grilling or roasting. Why not cook it in a nabe dish? Though I love my cute donabe, which I was luckily able to buy at Shiki, Inc., an amazing pottery shop in San Francisco Japantown’s West Mall (I absolutely love that store) where I bought my mom’s. I actually had not used my hot pot in who-knows-how-long and was feeling quite guilty for letting it just collect dust. I was got the idea of cooking the pork in my glazed clay donabe at when my husband and I decided to have dinner at Honey BBQ in Rohnert Park (check out my review from last week). The pork bibimbop was very inspirational; I will have to try my hand at making it in my pot later.

Whole Grain Red and Black Rice
Adapted from “Japanese Rice for Shime” from Japanese Hot Pots by Tadashi Ono and Harris Salat.
Yields 2 cups of rice
Ingredients
2 C Filtered Water
1 tsp Gluten-Free Tamari Soy Sauce
OR 1 tsp Bragg’s Liquid Aminos
1/2 C Himalayan or Bhutanese Red Rice, uncooked
1/2 C Wild or Chinese Black Rice, uncooked
1 C Hot Filtered Water
Directions
Rinse the rice in cool water. Strain the rice through a fine mesh and set it aside. Bring two cups of water to boil with the tamari in the donabe. Stir in the rice and cover. Reduce the heat to low and cook for 40 minutes. Add a cup of hot water to prevent the rice from burning to the bottom of the pot. Cook another 20 minutes or until tender. Remove from the heat. Drain off the excess liquid, reserving it for later. Set the rice aside in a covered dish.
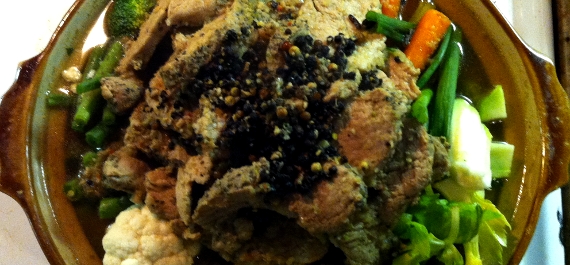
Garlic Pepper Pork Nabe
Adapted from my Shrimp & Vegetable Nabe recipe. This recipe makes a lot of soup, so you may want to use a larger pot. Keep in mind that not everything may fit in the pot; add the vegetables, broth and rice in batches. Include more meat if desired; my husband wished there was a greater amount in the meat to vegetable ratio.
Yields About 25 Servings
Broth Ingredients
5 C Filtered Water
2 T Minced Garlic
1 tsp Black Peppercorns
1 – 2 tsp Grains of Paradise
1 T Dried White or Yellow Chopped Onion
Remaining Rice Water
Meat and Vegetable Ingredients
Marinated Garlic and Peppercorn Pork Tenderloin
2 C Coarsely Chopped Collard Greens
2 C Coarsely Chopped Mustard Greens
3 Scallions, trimmed, cut into 4″ lengths
6 Inner Leafy Celery Stalks, cut into 1/2″ thick 3″ lengths
2 Large Carrots, cut into 1/2″ thick 3″ lengths
2 Medium or 1 Large Head(s) Broccoli, cut into bite sizes
1 – 2 Broccoli Stalk(s), cut into 1/2″ thick 3″ lengths
1 Small Head Cauliflower, trimmed, cut into bite sizes
Cauliflower Leaves, stems cut into 1/2″ thick 3″ lengths
1 C String or Green Beans, trimmed, cut into 3″ lengths
Cooked Whole Grain Rice (See Above)
1 C Enoki Mushrooms, separated from roots, cut into 3″ lengths, optional
1 C Bean Sprouts, cut into 3″ lengths, optional
Directions
Bring the broth ingredients to a boil in the donabe for 5 minutes over medium high heat.
Meanwhile, drain the marinade from the pork, reserving up to half a cup, and set aside. Thinly slice the pork about 1/8 to 1/4 inch thick rounds with a very sharp knife. Be careful not to cut yourself. Add the marinade and pork to the broth. Cook covered for about 5 minutes or until the meat is no longer pink. Transfer the broth and meat to another covered dish.
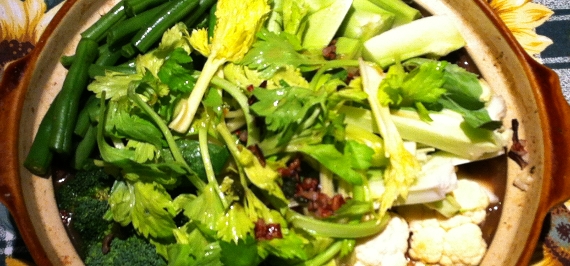
Arrange the cut vegetables on a large platter in groups in order to add them to the soup easily.
Inside the donabe, cover the bottom with the dark greens. On top of the greens, arrange about 1/3 of the vegetables in clustered groups around in a circle, leaving the middle open. Spoon about half of the rice into the center, piling the meat on top. Make sure not to stack it above the lower lip of the pot. Pour in the broth up to the lower lip of the donabe. Cover and cook the soup for 5 minutes on medium heat. The greens should wilt a bit, providing more room. Add more vegetables and meat into their designated sections, pushing them under the broth with a large wooden spoon. Cook another 5 minutes and repeat. When adding the last of the broth, I made sure to pour the grains of paradise and peppercorns onto the center on top of the meat instead of garnishing the each bowl of soup as I would with a shichimi togarashi or furikake. Do not over fill the pot; you do not want it to over flow during cooking.
Carefully bring the pot to the table with hot pan holders or oven mitts to rest it on a trivet set on top of a thick towel if you are serving the soup tableside. Serve the soup in bowls, making sure to get a bit of everything. Garnish if desired.
There is now more room in the donabe. Add leftover vegetables, meat, rice and or hot broth to the soup. Recover the pot to preserve the heat and allow the fresh ingredients to cook.


 March 12, 2014
 noelnoms
 Leave a comment


