Archive for January, 2014

Chocolate Chip Beet Brownies and Cream Cheese Frosting

I really enjoy red velvet cake and buy a gluten-free vegan piece whenever I find it at a store, bakery or restaurant, so I decided to treat myself for my birthday when my folks came to celebrate with me. I made my adaption from a recipe I found at the Gluten-Free Food Examiner, which looked really intriguing, but I wanted to make a healthier version. I was a bit leery of the recipe’s large amount of beets and was unsure how potent the the red color or earthy root flavor would work in this cake compared to the small amount of chocolate. The cake batter of this first attempt ended up tasting too much like beets but had a great raspberry shade. The chocolate lacked flavor intensity, but the batter was at least sweet. It needed more chocolate, so I quadrupled the amount of cacao when doubling was not enough. Unfortunately, adding this much chocolate made the batter much thicker and a very dark shade of brown. As bright red coloring faded a significant amount as while baking, it came out not looking red at all, so left out the red dye in the recipe listed below. Although the the concoction was tasty to me, they were not to everyone’s liking, as some changes to the recipe resulted in rather an intense dark chocolate flavor. (I prefer my chocolate very dark and bitter, sometimes eating dried cacao beans or 89 percent to 100 percent dark chocolate bars.)

The vegan cream cheese frosting that I made is AMAZING! It tastes and feels like REAL cream cheese frosting! It is sweet, tart, light and fluffy. It’s not healthy enough to eat by the spoonful but provides a perfect accompaniment to red velvet, various spice cakes or really in any other recipe that calls for cream cheese frosting. The original recipe called for too much sugar, and the frosting made from it appeared too sweet for my brownies. I listed the reduced powdered sugar measurement (see the recipe below), which prevented the frosting from overpowering the brownies. Feel free to experiment with other dry sweeteners, but I’m not sure how the recipe will turn our if you do. I do not recommend using liquid sweeteners, as the powdered sugar seemed to absorb some of the oils in the cream cheese and prevented the frosting from becoming too greasy.

I used Daiya’s new non-dairy plain cream cheese, which already has an incredible taste and texture by itself; it even has that classic cheesy tartness that is usually so difficult to simulate without fermentation. I first stumbled upon their cream cheese when I was perusing their non-dairy cheese selection on the Daiya website. I thought to myself, “With all of the recent progress in the foodie world with gluten-free, dairy-free and vegan foods, someone has to have a created a not only decent but good dairy-free cream cheese by now. I wonder if Daiya has one yet….” Lo’ and behold (and luckily for me), they do! I really like their other non-dairy cheeses, so I thought I might as well try it. Why not?

Roast Beet Purée
Adapted from the roasting instructions for Jessica’s red velvet cake at Desserts with Benefits.

Ingredients
2 Large Beets, scrubbed, trimmed
1 1/2 tsp Fresh Lemon Juice

Directions
Preheat the oven to 400 degrees F. Wrap the beats in aluminum foil. Place on a foil-lined lipped baking sheet due to a tendency for the beet juice to bubble over through the wrapping. Roast for an hour or until a fork easily pierces through the flesh. Cool slightly on a wire rack. Unwrap the beets. Be careful not to burn your hands. Quarter them before pureeing in a food processor or high-speed blender with the lemon juice.

Birthday Brownies

Gluten-Free Chocolate Chip Beet Brownies
Adapted recipe from Jen Cafferty’s recipe on the Gluten-Free Food Examiner.

Yields 15 to 20 Servings

Ingredients
3 T Chia or Flax Seeds, course ground
8 T Warm Filtered Water
2 C Cacao Powder
1 1/2 C Unsweetened Apple Sauce
2 tsp Vanilla Extract
1 – 2 C Evaporated Cane Juice or Turbinado Sugar
1 3/4 C Gluten-Free All-Purpose Flour
1 1/4 tsp Xanthan Gum
1 1/2 tsp Baking Soda
1/2 tsp Sea Salt
1 C Roast Beet Puree (see above)
20 oz Vegan Chocolate Chunks or Chips
Vegan Cream Cheese Frosting (see below)
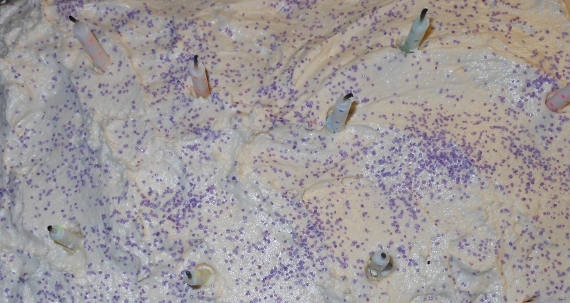
Red Sanding Sugar, optional

Directions
In a small bowl, beat chia or flax seeds and water with a fork until smooth to create “egg” substitute. Set aside for 15 to 20 minutes, stirring occasionally to prevent clumping.

Preheat oven to 350 degrees F. Grease and flour-dust a glass 9″ x 13″ baking dish. Set aside.

In a large bowl, mix cacao, apple sauce and vanilla. Set aside.

Into a medium bowl, sift flour, xanthan gum, 1 cup sugar, soda and salt. With an electric mixer, gradually add in cacao-apple mixture. Blend in “eggs” and beets. Stir until fully incorporated. Adjust batter to desired level of sweetness with remaining sugar, mixing in a quarter cup at a time. Fold in chocolate pieces.

Bake for at least 30 minutes (mine took 70) or until toothpick inserted in center comes out clean. Cool thoroughly on wire rack. Frost and decorate as desired.* Serve and enjoy!

*If you do not want to frost the brownies, they would also taste great accompanied by vanilla ice cream or whipped cream.

Frosted Red Velvet Beet Cake

Vegan Cream Cheese Frosting
I adapted this cream cheese frosting made by Rachel Young of Gladly Gluten Free.
I doubled this recipe from the original, since I planned to make cakes for two different occasions.

Yields 40 to 48 Servings.

Ingredients
16 oz Daiya Plain Cream Cheese, softened
2 C Earth Balance Spread, softened
2 tsp Vanilla Extract
4 C Powdered Sugar, to taste

Directions
Combine the cream cheese and spread in a large bowl until fluffy.Thoroughly incorporate the vanilla. Sift the sugar to get rid of lumps, gradually adding four cups of sugar to the cream, using an electric mixer. Adjust the frosting to your level of desired sweetness by slowly adding up to another cup of sugar. Store leftover frosting in a large airtight container, like a glass canning jar, for up to a week; just make sure you let it soften it a bit before attempting to spread it on a cake.

Garlic Pepper Pork Nabe

I have intended to make another hot pot style soup for a long while now and actually have not made any since the time I cooked the shrimp & vegetable nabe for my folks during the summer of 2012. Recently, the pork tenderloins were on sale at our local grocery store, and I was trying to think of another way to cook the meat beyond sauteing, grilling or roasting. Why not cook it in a nabe dish? Though I love my cute donabe, which I was luckily able to buy at Shiki, Inc., an amazing pottery shop in San Francisco Japantown’s West Mall (I absolutely love that store) where I bought my mom’s. I actually had not used my hot pot in who-knows-how-long and was feeling quite guilty for letting it just collect dust. I was got the idea of cooking the pork in my glazed clay donabe at when my husband and I decided to have dinner at Honey BBQ in Rohnert Park (check out my review from last week). The pork bibimbop was very inspirational; I will have to try my hand at making it in my pot later.

Fishy Donabe

Whole Grain Red and Black Rice

Adapted from “Japanese Rice for Shime” from Japanese Hot Pots by Tadashi Ono and Harris Salat.

Yields 2 cups of rice

Ingredients
2 C Filtered Water
1 tsp Gluten-Free Tamari Soy Sauce
OR 1 tsp Bragg’s Liquid Aminos
1/2 C Himalayan or Bhutanese Red Rice, uncooked
1/2 C Wild or Chinese Black Rice, uncooked
1 C Hot Filtered Water

Directions
Rinse the rice in cool water. Strain the rice through a fine mesh and set it aside. Bring two cups of water to boil with the tamari in the donabe. Stir in the rice and cover. Reduce the heat to low and cook for 40 minutes. Add a cup of hot water to prevent the rice from burning to the bottom of the pot. Cook another 20 minutes or until tender. Remove from the heat. Drain off the excess liquid, reserving it for later. Set the rice aside in a covered dish.

First arrangement of the nabe.

Garlic Pepper Pork Nabe
Adapted from my Shrimp & Vegetable Nabe recipe. This recipe makes a lot of soup, so you may want to use a larger pot. Keep in mind that not everything may fit in the pot; add the vegetables, broth and rice in batches. Include more meat if desired; my husband wished there was a greater amount in the meat to vegetable ratio.

Yields About 25 Servings

Broth Ingredients
5 C Filtered Water
2 T Minced Garlic
1 tsp Black Peppercorns
1 – 2 tsp Grains of Paradise
1 T Dried White or Yellow Chopped Onion
Remaining Rice Water
Meat and Vegetable Ingredients
Marinated Garlic and Peppercorn Pork Tenderloin
2 C Coarsely Chopped Collard Greens
2 C Coarsely Chopped Mustard Greens
3 Scallions, trimmed, cut into 4″ lengths
6 Inner Leafy Celery Stalks, cut into 1/2″ thick 3″ lengths
2 Large Carrots, cut into 1/2″ thick 3″ lengths
2 Medium or 1 Large Head(s) Broccoli, cut into bite sizes
1 – 2 Broccoli Stalk(s), cut into 1/2″ thick 3″ lengths
1 Small Head Cauliflower, trimmed, cut into bite sizes
Cauliflower Leaves, stems cut into 1/2″ thick 3″ lengths
1 C String or Green Beans, trimmed, cut into 3″ lengths
Cooked Whole Grain Rice (See Above)
1 C Enoki Mushrooms, separated from roots, cut into 3″ lengths, optional
1 C Bean Sprouts, cut into 3″ lengths, optional

Directions
Bring the broth ingredients to a boil in the donabe for 5 minutes over medium high heat.

Meanwhile, drain the marinade from the pork, reserving up to half a cup, and set aside. Thinly slice the pork about 1/8 to 1/4 inch thick rounds with a very sharp knife. Be careful not to cut yourself. Add the marinade and pork to the broth. Cook covered for about 5 minutes or until the meat is no longer pink. Transfer the broth and meat to another covered dish.

Arrange the cut vegetables on a large platter in groups in order to add them to the soup easily.

Inside the donabe, cover the bottom with the dark greens. On top of the greens, arrange about 1/3 of the vegetables in clustered groups around in a circle, leaving the middle open. Spoon about half of the rice into the center, piling the meat on top. Make sure not to stack it above the lower lip of the pot. Pour in the broth up to the lower lip of the donabe. Cover and cook the soup for 5 minutes on medium heat. The greens should wilt a bit, providing more room. Add more vegetables and meat into their designated sections, pushing them under the broth with a large wooden spoon. Cook another 5 minutes and repeat. When adding the last of the broth, I made sure to pour the grains of paradise and peppercorns onto the center on top of the meat instead of garnishing the each bowl of soup as I would with a shichimi togarashi or furikake. Do not over fill the pot; you do not want it to over flow during cooking.

Carefully bring the pot to the table with hot pan holders or oven mitts to rest it on a trivet set on top of a thick towel if you are serving the soup tableside. Serve the soup in bowls, making sure to get a bit of everything. Garnish if desired.

Remaining vegetables added to the nabe.

There is now more room in the donabe. Add leftover vegetables, meat, rice and or hot broth to the soup. Recover the pot to preserve the heat and allow the fresh ingredients to cook.

Honey Cuisine Korean BBQ

Recently my husband and I decided to have dinner recently at Honey BBQ in Rohnert Park. It was so satisfyingly tasty. I am very glad they are now open on Sundays, especially since the many diners are Sonoma State University students and staff. My husband and I were both particularly craving hearty soup and sushi. We shared a delicious “Crazy Spicy,” which was a delectable sushi roll with tempura shrimp, spicy tuna, salmon, slices of unagi, tuna and snapper, albacore tuna and a drizzle of spicy chili sauce; the roll actually was not too spicy for our palates. Roll in total had roughly a medium heat level. My husband really enjoyed his beef udon soup (the broth was delicious), and I found my pork dolsot (claypot) bibimbop quite inspiring. I substituted out the brown rice with their organic wild rice, which went wonderfully with the seasoned pork, carrots, spinach, mushrooms, white onion, egg, soy beans and Napa cabbage; all of the ingredients provided a delightful combination of flavors and textures. I will definitely order that again! I think next time I will have to try the “Sexy Mango” sushi roll. I am a big fan of mango, so the roll sounds rather enticing with its tempura shrimp, avocado, cucumber, and more shrimp on top with the mango.

Image Credit

This is not the first time that I tried out Honey BBQ’s food. The last time my husband and I went was for lunch years ago, not long after the restaurant first opened. At that time, I ordered a few sushi rolls, while my hubby ordered the BBQ beef. The caterpillar roll was really good and looked extremely cute as it decorated to look like a cartoonish caterpillar (its appearance has since changed). I also had their fantasy roll, which was amazing with the crunchy garlic and tasty sauce on top. The BBQ beef dish came with rice and vegetables, too, I think; either way, my husband greatly enjoyed it.

Paleo Carrot Coconut Muffins

Coconut Paleo Cornbread Muffins 1

The other day while browsing Facebook, I ran across Lauren’s paleo cornbread muffins. The muffins looked really good from their description, and the title seamed rather interesting. I mean, what are cornless cornbread muffins anyway? Well, these tasty treats are actually cornbread-style coconut muffins. I know that may sound strange, but the muffins are very tasty. The flavors blended nicely, covering up any potential coconut flavor almost entirely (if you want a more pronounced coconut taste, I’m sure it’s not too hard to adjust the flavors).

Savory Coconut Muffins

These muffins looked like they would go perfectly with the chili from the recipe I recently posted, but they also taste great on their own. The muffins contain honey without being overly sweet, especially since I swapped the originally listed apple sauce with carrot puree. I was bothered by the amount of oil that the recipe called for, which was equal to the flour measurement. My stomach doesn’t usually handle oily foods very well (it just sinks to the bottom of my stomach and lingers). I halved the oil, substituting it with more carrots. If you want, you can lower the fat even more by completely substituting the oil with puree; I plan to do this next time as an experiment.

Cheesy Savory Coconut Muffins

To increase savoriness, I added Daiya pepperjack cheese to half of the muffins by sprinkling it on top, but later realized that I should have put the cheese in the middle (I did include instructions for that below) to prevent it from so firmly sticking to the liners.

What do you put in your cornbread muffins? What do you eat them with?

Coconut Paleo Cornbread Muffins 2

Carrot Coconut Muffins
Adapted from Lauren’s Paleo Cornbread Muffins at Empowered Sustenance
The recipe below is a doubled adaptation of the original version. I have also included vegan options.

Yields 1 Dozen Muffins

Ingredients
1/2 C Coconut Flour
1/4 C Coconut Oil, melted
1/4 C + 2 T Raw Pureed Carrot, room temperature
4 Eggs, room temperature
OR 4 Chia Eggs (1/4 C Chia Seeds + 3/4 C Filtered Water)*
2 T Creamed Cinnamon Honey or Wildflower Honey**
1/2 tsp Baking Soda
2 tsp Unfiltered Apple Cider Vinegar
Filtered Water, as needed, room temperature
Daiya Pepperjack Style Shreds, optional

Directions
For vegan muffins, finely grind the seeds in a spice grinder. Mix the chia egg ingredients together with a fork in a medium bowl, adding up to 4 more tablespoons of filtered water if necessary to create an even egg-like consistency. Set aside for 20 minutes, stirring occasionally.

Preheat the oven to 350 degrees F. Grease or line the muffin tin with muffin papers. Set aside.

In a large food processor, combine the flour, oil and 1/4 cup puree until well combined. Incorporate the eggs fully until the batter no longer has any lumps. Mix in the remaining puree, sweetener, baking soda and vinegar. Add more water as needed to achieve proper muffin batter thickness.

Pour about 1 tablespoon of batter into the muffin cups. Sprinkle about 1 to 2 teaspoons of cheese on top if desired. Pour another spoonful of batter over the cheese.

Bake for 30 to 40 minutes or until a toothpick inserted in the center comes out clean. Cool the muffins on a wire rack for 15 minutes. Turn out the tin onto a rack or plate. Cool until they are warm to touch and ready to eat.

Store in an airtight container. They will last longer if chilled.

*You can make flax “eggs” instead of chia ones with the same seed to water ratio and instructions.

**For lower sugar content, use 1 tablespoon blue agave nectar or about 6 to 9 drops of liquid stevia in lieu of honey.

Note: If you want to leave out the sweetener entirely, just add more carrots. You can also add minced bacon, red bell pepper, chiles or scallions.