Posts from the ‘Healthy Cooking’ Category

Cheesy Lemon Thyme Millet Squares

I initially found this recipe on the back of an Arrowhead Mills puffed millet package I bought for my gingerbread marshmillets. Using the millet in a savory dish sounded interesting, and I was wondering how else I could use puffed milled beyond cereal and bird seed. The original recipe called for sharp cheddar cheese and wheat-based pastry flour, so I had to alter the recipe. Since I was making substitutions to the recipe anyway, I opted for a “chia egg” rather than the standard chicken variety and thyme rather than dill.

Cheesy Lemon Thyme Millet Squares-1

Honestly, replacing the sharp cheddar with cheddar-style shreds was a mistake. I have discovered I do not actually like Daiya’s cheddar; they taste is very strong and rather off. I do hope they change their recipe soon. The only recognizably cheddar-like property of these shreds is the color; otherwise, they taste like mildly cheesy peas. It was very hard to mask the pea flavor even after I added more spices. The only way I was able to mellow the flavor was to add sliced avocado on top; hummus or chicken salad might also work. I’m sure including real cheddar cheese would taste lovely. Maybe I will try Daiya’s Pepper Jack-Style Shreds in the future to improve my dairy-free version of the squares.

Cheesy Thyme Millet Squares
These can accompany entrees in lieu of bread or can be used as appetizers topped with various spreads, like hummus, tempenade, or bruschetta.

Yields 9 servings

Ingredients
1 C Daiya Cheese-Style Shreds
1 tsp Fresh Thyme Leaves
1 Pinch Fine Grain Sea Salt
1/2 tsp Fresh Minced Garlic
Dash Sweet California Paprika
1/4 tsp Smoked Spanish Paprika, more to taste
1/8 tsp Ground Mixed Peppercorns
3 T Earth Balance Spread, melted
1/2 C Fine Ground Buckwheat Flour
1 Chia Egg (1 T Ground Chia Seeds + 4-6 T Filtered Water)
1/4 tsp Baking Soda
1 Lemon, juice of
2 C Puffed Millet Cereal
Topping (see description above), optional

Directions
Preheat oven to 375F. Grease an 8″ square baking dish.

In large mixing bowl, combine the cheese, thyme, seasonings, spread, flour and baking soda. Stir in the lemon juice. Fold in the millet. Bake for 25 or until the top starts to brown. Cut into squares. Decorate as desired. Serve warm.

Italian Sausage & Spaghetti Squash Casserole

Spaghetti squash is a great option for people who want pasta without gluten or lots of carbohydrates. It readily absorbs flavors from sauce, herbs, and spices, so it blends very well with other ingredients. It is also easy to prepare; please see my Spaghetti Squash post for roasting directions. Spaghetti squash provides a lovely splash of color to any noodle dish, unlike bland beige wheat noodles.

Italian Sausage Spaghetti Squash Casserole 1A

This recipe is one of my favorite ways to prepare spaghetti squash. It is so colorful and flavorful, and it is easy to create various color and flavor combinations with different veggies. Additionally, you can use any protein you prefer, like veggie sausage, ground meat, cubed chicken, soy or hemp tofu, pine nuts, etc. You can also always dress your spaghetti squash with pasta sauces, too.

Keep in mind you are going to need a very large bowl to mix all of the components. It has been a while since, I used this recipe, so I quickly ran out of room as I added ingredients. I spit the recipe into two stages, mixing the squash, sausage, dried herbs, and cheese in one large Corning Ware dish and the fresh herbs and remaining vegetables in another. I used a third smaller bowl to help transfer half of the contents one bowl into the other, so I could incorporate all the ingredients together into each bowl and keep the right proportions. As a side note, even though I added the Daiya cheese to the sausage and squash while they were hot, it did not melt properly. Daiya’s shreds require higher temperatures to melt than dairy cheese, so I suggest reheating the casserole before it is served.

Italian Sausage Spaghetti Squash Casserole 2A

Italian Sausage & Spaghetti Squash Casserole

Yields 14 to 16 servings

Ingredients
1 Med Spaghetti Squash, roasted, skin removed
1 T Dried Ground Sage
1 T Dried Oregano
2-3 T Fresh Thyme
1 Bunch or 3 C Spinach or Kale, torn into bite-size pieces
1 Bunch or 1/2 C Fresh Sweet Basil, chopped
Olive or Grape Seed Oil for cooking
3/4 – 1 lbs Sweet Italian Chicken Sausage
3/4 – 1 lbs Spicy Italian Chicken Sausage
1 10-oz pkg Daiya Mozzarella-Style Shreds
1 Medium Yellow Onion, thinly sliced
3 T Fresh or Bottled Minced Garlic
1 lb String Beans, cut into 1″ lengths
3 Med Yellow or Orange Heirloom Tomatoes, chopped
4 oz Pea Spouts with long shoots, separated
Ground Peppercorns, to taste
Sea Salt, to taste

Directions
Be careful not to burn your fingers while handling the squash. In a large bowl, break up the squash into noodles with a fork. Mix the herbs and greens into the squash. Set aside to allow the dried herbs to absorb moisture from the noodles and the greens to wilt a bit.

Oil a large pan. If the sausage came in casings, remove them. Brown the sausage over medium heat. Mix the sausage and cheese-style shreds into the squash.

Saute the onion, garlic, and beans together in a large oiled pan. Add to the squash with the salt, pepper,  tomatoes, and sprouts. Serve and enjoy!

Anytime Oatmeal Cookies

I absolutely love oatmeal cookies! These have nuts, dried fruit, and oats with lots of fiber, protein, and other nutrients, and since the dough is low in fat and sugar, these cookies are also great any time of the day. You can also warm up a small bowl full to eat like regular oatmeal. As these cookies are completely vegan (and therefore eggless), you can safely eat the dough raw. If you like, you can even makes these cookies raw vegan (with raw oats, apples, and almonds) by dehydrating them instead of baking in the oven.

This recipe is so neat! As the dough does not spread out during baking, you can shape the cookies however you like, even into bars, which makes it easier to take them on trips or to work or school. You can completely customize the ingredients too with eggs, milk, and whatever fruit and seed/nut combination you want. If you have problems with fiber, you can choose to leave out the bran entirely or add more, just make sure you adjust the amount of liquids you add. This recipe is 4 5/8 cups of liquid, 4 7/8 cups of oatmeal cookie dough, and 6 3/4 cups of mix-ins, so you will need a very, very large mixing bowl. You can, of course, reduce the amounts to create a smaller batch. There are so many options.

Cosmic Cookies6

Gluten-Free Cosmic Cookies
Adapted from Cosmic Cookies on Wellsphere.
I like these cookies so much that I doubled the recipe to add a greater variety of ingredients.

Yields about 60 cookies

Ingredients
1 1/4 C Warm Filtered Water
1/4 C Chia or Flax Seeds, course ground
1 C + 2 T Hulled Oats
1 C + 2 T Oat Bran
1 C Bob’s Red Mill Gluten-Free All-Purpose Flour
1 C Almond Flour
1/2 C Sucanat
1/2 C Evaporated Cane Juice
1 T Ground Cinnamon
2 1/4 tsp Sea Salt
1 tsp Xanthan Gum
1/2 C Sunflower Seeds
1/2 C Pumpkin Seeds
1/4 C Hemp Seeds
1/2 C Chopped Walnuts or Pecans, shelled, chopped
1 C Dark Chocolate Chips
1 C Dairy-Free Malted or Regular Carob Chips
1/2 C Sulfur-Free Unsweetened Finely Shredded Coconut
1/2 C Dried Cranberries
1/2 C Golden Raisins
1/2 C Chopped Dried Figs
1/2 C Chopped Apricots
5 T + 1/8 tsp Blue Agave Nectar
1/4 C Sulfur-Free Blackstrap Molasses
1/4 C Filtered Water
1 C Unsweetened Apple Sauce
1 C Almond or Other Dairy-Free Milk

Directions
In a small bowl with a fork, beat ground chia or flax seeds together with 1 1/4 cup water. Set aside for 15 to 20 minutes to allow seeds to gel and soak up the liquid, stirring about every five minutes to avoid clumps.

Preheat oven to 350°F. Line 2-3 baking trays with parchment paper.

Cosmic Cookies1

Combine the dry ingredients in a large bowl.

Cosmic Cookies2

In a medium bowl, combine the wet ingredients, including remaining 1/4 cup water. Stir the wet ingredients into the dry.

Cosmic Cookies3

Use a 1/3 measuring cup to portion out the dough about two inches apart onto baking sheets. Gently flatten cookies with your fingers or a spoon, as this dough will not spread out as it cooks. Bake for 25 minutes or until lightly browned.

Cosmic Cookies4

Kale Saag

Velvety Kale Saag

I love saag and palak dishes, especially since they are so nutritious. They are so tasty, and I love the texture and spices. Palak is made with spinach, whereas saag is made with dark winter greens in general, like kale, collards or mustard greens, which are all very rich in fiber, iron, potassium, calcium, and vitamins A and C. You can mix pretty much any kind of protein into the greens, like homemade cheese (like paneer), chicken, lamb, fish, chickpeas, lentils, tofu or nuts (like cashews). Alternatively, you can use the saag as a kind of sauce and pour it over hearty vegetables, like carrots, broccoli or cauliflower; grains , such as rice, barley or buckwheat; or grain-like seeds, like quinoa, millet or amaranth.

Winter Greens

Kale Saag
Adapted from Ambika’s Saag Paneer.
This recipe is vegan.

Yields 4 to 6 servings

Ingredients
6 – 7 C Kale with stems, trimmed
1 Medium – Large Sweet Yellow Onion, peeled, skinned
3 T Minced Garlic
1″ Ginger Root, peeled
1/4 tsp Ground Turmeric
Pinch Sea Salt
1 1/2 C Filtered Water
4 T Almond Meal
1 1/2 T Dried Fenugreek Leaves
1 tsp Smoked Spanish Hot Paprika
1 1/2 tsp Garam Masala
1 T Sambar Curry Powder
1/4 tsp Ground Nutmeg
1/4 C Carrot Greens with stems, trimmed
1/4 C Cilantro Leaves with stems, trimmed*
1 T Extra Virgin Olive Oil
2 tsp Cumin Seeds
1 T Coriander Seeds
1 1/2 tsp Fenugreek Seeds
1/2 T Grains of Paradise
16 – 24 oz Choice Protein, prepared

Kale

Directions
Chop the kale, onion and ginger in a Vitamix (high speed blender) or food processor. Set aside.

Soak the almond meal, fenugreek leaves, paprika, garam masala, curry powder, nutmeg in 1 cup of water for 15 to 20 minutes. Blend them in the Vitamix with the carrot tops and cilantro.

Toast the seeds over medium heat for 30 seconds in a dry pan, stirring constantly. At this point, I recommend grinding the seeds until fine in a spice grinder.

Saute the garlic over low heat for about a minute. Add the onions, kale, ginger, ground seeds, turmeric and salt and saute for 5 minutes over medium heat, stirring occasionally. Mix in half a cup of water. Cover and cook over low heat for 10 minutes. Add the spiced almonds, greens and herbs. Cover and stir occasionally for next 10 to 15 minutes. Stir and adjust the consistency by adding more water if necessary.

If you want a more velvety texture, puree half of the saag in the Vitamix until smooth and stir it back into the chunkier spiced greens. At this point, mix in your desired source of protein. Serve and enjoy.

Creamy Kale Saag

Optional Ingredients and Directions
You can chop a medium to large seeded heirloom yellow or orange tomato (about 1 cup) to cook with the other vegetables and fresh herbs.

To make the dish more creamy, mix 1 cup unsweetened coconut milk, almond cream or cultured coconut or almond milk (like the “yogurts” by Almond Dream, Amande or So Delicious) with the cilantro, fenugreek, almonds and spices.

*if you are using dried cilantro leaves, measure 3 tablespoons, soak them with the spiced almond-fenugreek mixture.

Kale Saag and Eggs

Gingerbread-Infused Butter

I was thinking about the marshmillets from the other day, and I realized that I need to offer an alternative to holiday marshmallows made by Kraft. If possible, I recommend making the marshmillets more from scratch. I used the the flavored marshmallows out of convenience, but you can use other regular or vegan marshmallows. Even better, you can make your own marshmallows, like these, and I even found David Soleil’s ebook of vegan marshmallows.  If you are using plain marshmallows, substitute the Earth Balance spread with gingerbread spice-infused Earth Balance instead.

The only problem with using the recipe below is that it is missing molasses, but you can add between 1 to 2 cups of molasses (depending on your preference) when melting the marshmallows. In addition to adding molasses, if you want to use this as a butter spread on toast or the like, try adding some agave or honey for a little more sweetness.

Gingerbread-Spiced Butter
I have used Nicole Harris’ gingerbread spice mix and Leanne Vogel’s Gingerbread Cookies as guides to create my spice mixes, and I used André Baranowski‘s Ethiopian Spiced Butter as an inspiration for the infusion method.

Ingredients
2 Sticks or 1 C Earth Balance Spread or Salted Butter
2 tsp Ground Cloves
2 tsp Ground Nutmeg
2 T + 2 tsp Ground Cinnamon
1/4 C + 2 T Ground Ginger

Directions
Combine the spices in a bowl. In a large saucepan, melt the spread over low heat. Pour in the spices. Stir with frequently with a wooden spoon for 30 minutes to fully infuse the flavors. Transfer the mixture into a small glass bowl or storage container. Cool until solid.

Note
If you are using real butter, you can use this opportunity to clarify it of impurities by removing the foam that forms at the surface during spice infusion. Foam no longer forms, strain the melted butter through a fine mesh colander or cheesecloth into a bowl to remove the milk solids.

Split Pea and Ham Soup

Split Pea and Ham

A bit ago my husband and I received Pea Soup Andersen’s dried split peas from the Saslows; the peas were packaged in a cute little cotton drawstring bag with the soup recipe printed on the back. What a wonderful winter gift! If you have not visited one of Pea Soup Andersen’s locations before, I highly recommend that you go. They have all sorts of tasty, tasty dishes beyond pea soup, ranging from sandwiches and salads to steak and chicken. I have visited both of the California restaurants, one in Santa Nella and the other in Buellton, while on roadtrips with family and friends. Each time I found it difficult to decide what I wanted to order (other than the famous soup, of course), since their menus are so big!

The split pea and ham soup provided several great satisfying meals; sometimes I even had a few small bowls as snacks on they days that the weather was particularly chilly. Making this soup also allowed the perfect opportunity to incorporate some of the leftover ham from my earlier post into yet another delicious dish. The meat and spices really added to the soup’s over all flavor, making it even more hearty.

Andersen's premium selected split peas

Andersen’s premium selected split peas

Split Pea and Ham Soup
Adapted from the Pea Soup Andersen’s “Soup-in-a-Bag” instructions.

Yields 12 Servings

Ingredients
3 C Dried Split Green Peas*
4 qt Filtered Water, divided
1 Large Stalk Celery, trimmed, coarsely chopped
1 Large Carrot, trimmed, Chopped
1 Large Sweet Yellow Onion, skinned, trimmed, chopped
2 – 3 T Minced Garlic Cloves
1 lb Ham, cubed
1 tsp Dried Thyme Leaves
2 Pinches Ground Cayenne Pepper
1 Large Bay Leaf
Sea Salt, to taste
Ground Mixed Peppercorns, to taste

Directions
Thoroughly rinse the peas under cool water in a fine mesh strainer. Pour into large stock pot. Cook at a rolling boil with two quarts water for 20 minutes or until peas are tender. Strain through fine mesh strainer.

Return peas to stock pot with two more quarts water. Add vegetables, herbs, ham. Bring to boil. Reduce heat to medium-low. Simmer 10 minutes or until ham is heated through and flavors are blended. Salt and pepper to taste. Serve.

*For a more colorful soup, you can use a mixture of split peas with half green and half yellow.

Garlic Pepper Pork Nabe

I have intended to make another hot pot style soup for a long while now and actually have not made any since the time I cooked the shrimp & vegetable nabe for my folks during the summer of 2012. Recently, the pork tenderloins were on sale at our local grocery store, and I was trying to think of another way to cook the meat beyond sauteing, grilling or roasting. Why not cook it in a nabe dish? Though I love my cute donabe, which I was luckily able to buy at Shiki, Inc., an amazing pottery shop in San Francisco Japantown’s West Mall (I absolutely love that store) where I bought my mom’s. I actually had not used my hot pot in who-knows-how-long and was feeling quite guilty for letting it just collect dust. I was got the idea of cooking the pork in my glazed clay donabe at when my husband and I decided to have dinner at Honey BBQ in Rohnert Park (check out my review from last week). The pork bibimbop was very inspirational; I will have to try my hand at making it in my pot later.

Fishy Donabe

Whole Grain Red and Black Rice

Adapted from “Japanese Rice for Shime” from Japanese Hot Pots by Tadashi Ono and Harris Salat.

Yields 2 cups of rice

Ingredients
2 C Filtered Water
1 tsp Gluten-Free Tamari Soy Sauce
OR 1 tsp Bragg’s Liquid Aminos
1/2 C Himalayan or Bhutanese Red Rice, uncooked
1/2 C Wild or Chinese Black Rice, uncooked
1 C Hot Filtered Water

Directions
Rinse the rice in cool water. Strain the rice through a fine mesh and set it aside. Bring two cups of water to boil with the tamari in the donabe. Stir in the rice and cover. Reduce the heat to low and cook for 40 minutes. Add a cup of hot water to prevent the rice from burning to the bottom of the pot. Cook another 20 minutes or until tender. Remove from the heat. Drain off the excess liquid, reserving it for later. Set the rice aside in a covered dish.

First arrangement of the nabe.

Garlic Pepper Pork Nabe
Adapted from my Shrimp & Vegetable Nabe recipe. This recipe makes a lot of soup, so you may want to use a larger pot. Keep in mind that not everything may fit in the pot; add the vegetables, broth and rice in batches. Include more meat if desired; my husband wished there was a greater amount in the meat to vegetable ratio.

Yields About 25 Servings

Broth Ingredients
5 C Filtered Water
2 T Minced Garlic
1 tsp Black Peppercorns
1 – 2 tsp Grains of Paradise
1 T Dried White or Yellow Chopped Onion
Remaining Rice Water
Meat and Vegetable Ingredients
Marinated Garlic and Peppercorn Pork Tenderloin
2 C Coarsely Chopped Collard Greens
2 C Coarsely Chopped Mustard Greens
3 Scallions, trimmed, cut into 4″ lengths
6 Inner Leafy Celery Stalks, cut into 1/2″ thick 3″ lengths
2 Large Carrots, cut into 1/2″ thick 3″ lengths
2 Medium or 1 Large Head(s) Broccoli, cut into bite sizes
1 – 2 Broccoli Stalk(s), cut into 1/2″ thick 3″ lengths
1 Small Head Cauliflower, trimmed, cut into bite sizes
Cauliflower Leaves, stems cut into 1/2″ thick 3″ lengths
1 C String or Green Beans, trimmed, cut into 3″ lengths
Cooked Whole Grain Rice (See Above)
1 C Enoki Mushrooms, separated from roots, cut into 3″ lengths, optional
1 C Bean Sprouts, cut into 3″ lengths, optional

Directions
Bring the broth ingredients to a boil in the donabe for 5 minutes over medium high heat.

Meanwhile, drain the marinade from the pork, reserving up to half a cup, and set aside. Thinly slice the pork about 1/8 to 1/4 inch thick rounds with a very sharp knife. Be careful not to cut yourself. Add the marinade and pork to the broth. Cook covered for about 5 minutes or until the meat is no longer pink. Transfer the broth and meat to another covered dish.

Arrange the cut vegetables on a large platter in groups in order to add them to the soup easily.

Inside the donabe, cover the bottom with the dark greens. On top of the greens, arrange about 1/3 of the vegetables in clustered groups around in a circle, leaving the middle open. Spoon about half of the rice into the center, piling the meat on top. Make sure not to stack it above the lower lip of the pot. Pour in the broth up to the lower lip of the donabe. Cover and cook the soup for 5 minutes on medium heat. The greens should wilt a bit, providing more room. Add more vegetables and meat into their designated sections, pushing them under the broth with a large wooden spoon. Cook another 5 minutes and repeat. When adding the last of the broth, I made sure to pour the grains of paradise and peppercorns onto the center on top of the meat instead of garnishing the each bowl of soup as I would with a shichimi togarashi or furikake. Do not over fill the pot; you do not want it to over flow during cooking.

Carefully bring the pot to the table with hot pan holders or oven mitts to rest it on a trivet set on top of a thick towel if you are serving the soup tableside. Serve the soup in bowls, making sure to get a bit of everything. Garnish if desired.

Remaining vegetables added to the nabe.

There is now more room in the donabe. Add leftover vegetables, meat, rice and or hot broth to the soup. Recover the pot to preserve the heat and allow the fresh ingredients to cook.

Paleo Carrot Coconut Muffins

Coconut Paleo Cornbread Muffins 1

The other day while browsing Facebook, I ran across Lauren’s paleo cornbread muffins. The muffins looked really good from their description, and the title seamed rather interesting. I mean, what are cornless cornbread muffins anyway? Well, these tasty treats are actually cornbread-style coconut muffins. I know that may sound strange, but the muffins are very tasty. The flavors blended nicely, covering up any potential coconut flavor almost entirely (if you want a more pronounced coconut taste, I’m sure it’s not too hard to adjust the flavors).

Savory Coconut Muffins

These muffins looked like they would go perfectly with the chili from the recipe I recently posted, but they also taste great on their own. The muffins contain honey without being overly sweet, especially since I swapped the originally listed apple sauce with carrot puree. I was bothered by the amount of oil that the recipe called for, which was equal to the flour measurement. My stomach doesn’t usually handle oily foods very well (it just sinks to the bottom of my stomach and lingers). I halved the oil, substituting it with more carrots. If you want, you can lower the fat even more by completely substituting the oil with puree; I plan to do this next time as an experiment.

Cheesy Savory Coconut Muffins

To increase savoriness, I added Daiya pepperjack cheese to half of the muffins by sprinkling it on top, but later realized that I should have put the cheese in the middle (I did include instructions for that below) to prevent it from so firmly sticking to the liners.

What do you put in your cornbread muffins? What do you eat them with?

Coconut Paleo Cornbread Muffins 2

Carrot Coconut Muffins
Adapted from Lauren’s Paleo Cornbread Muffins at Empowered Sustenance
The recipe below is a doubled adaptation of the original version. I have also included vegan options.

Yields 1 Dozen Muffins

Ingredients
1/2 C Coconut Flour
1/4 C Coconut Oil, melted
1/4 C + 2 T Raw Pureed Carrot, room temperature
4 Eggs, room temperature
OR 4 Chia Eggs (1/4 C Chia Seeds + 3/4 C Filtered Water)*
2 T Creamed Cinnamon Honey or Wildflower Honey**
1/2 tsp Baking Soda
2 tsp Unfiltered Apple Cider Vinegar
Filtered Water, as needed, room temperature
Daiya Pepperjack Style Shreds, optional

Directions
For vegan muffins, finely grind the seeds in a spice grinder. Mix the chia egg ingredients together with a fork in a medium bowl, adding up to 4 more tablespoons of filtered water if necessary to create an even egg-like consistency. Set aside for 20 minutes, stirring occasionally.

Preheat the oven to 350 degrees F. Grease or line the muffin tin with muffin papers. Set aside.

In a large food processor, combine the flour, oil and 1/4 cup puree until well combined. Incorporate the eggs fully until the batter no longer has any lumps. Mix in the remaining puree, sweetener, baking soda and vinegar. Add more water as needed to achieve proper muffin batter thickness.

Pour about 1 tablespoon of batter into the muffin cups. Sprinkle about 1 to 2 teaspoons of cheese on top if desired. Pour another spoonful of batter over the cheese.

Bake for 30 to 40 minutes or until a toothpick inserted in the center comes out clean. Cool the muffins on a wire rack for 15 minutes. Turn out the tin onto a rack or plate. Cool until they are warm to touch and ready to eat.

Store in an airtight container. They will last longer if chilled.

*You can make flax “eggs” instead of chia ones with the same seed to water ratio and instructions.

**For lower sugar content, use 1 tablespoon blue agave nectar or about 6 to 9 drops of liquid stevia in lieu of honey.

Note: If you want to leave out the sweetener entirely, just add more carrots. You can also add minced bacon, red bell pepper, chiles or scallions.

Almond Flour Pancakes

My husband and I love almond pancakes, especially since they are tasty, versatile and gluten-free. The original recipe was not vegan, but I included egg-less options in the recipe below to make some pancakes with either “chia eggs” or “flax eggs.” We have tried out a few different versions of gluten-free pancakes, including the buckwheat pancakes from Kelly E. Keough’s Sugar-Free Gluten-Free Baking and Desserts and the mixed gluten-free flour pancakes in Kelli and Peter Bronski’s Artisanal Gluten-Free Cooking.We like this one best, so much so that I’m sharing it with you!

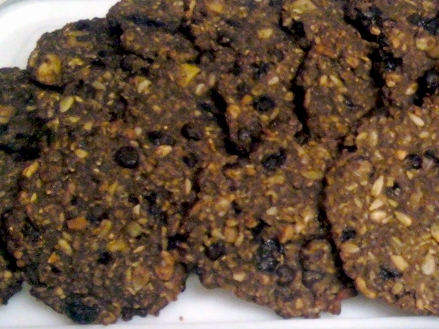
A while ago, we completely ran out of almond meal, which meant no more pancakes or almond flour-based foods. When I bought almonds, I kept forgetting to set aside some for making flour and we just kept snacking on them instead. Oops. This meant no almond milk either. Our focus had changed I suppose; we were eating and drinking other things instead. I really missed making my almond pie crusts and almond pancakes though. Thankfully, a friend’s family has a bakery-cafe that is only about a 15 to 20 minute drive away. We hadn’t been down to visit in a while, but was on the way to another friend in a series of theatrical performances, which provided a great excuse to go. We had a nice lunch, good catch-up chat, delicious gluten-free cookies and bought a few pounds of almond flour, too. The performances were pretty good and the plots rather moving. All in all it was a great day!

I insisted that we make pancakes the following day. I could wait no longer. Since we hadn’t made them in a while, we had to make quite a few adjustments as we were going along, tweaking the batter consistency, pan temperature and cook times. It was quite a challenge between the two of us, but we figured it out with only a few getting burned. I had forgotten to write down my recipe alterations from the last time we cooked them. Oh well, so now I am writing them down here for you and for my own reference later. For curiosity’s sake, if you have your own food blog, how often do you go back and remake the food from your recipe entries? What have you remade?

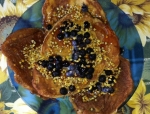
My hubby likes his pancakes rather plain with blue agave and Earth Balance spread, but I top mine with coconut oil (which provides a satisfying crunch once it cools), fresh or frozen berries, warm compote (like apples, pears or quince), pie spices, bee pollen, and blueberry or raspberry blue agave or dark amber grade A or B maple syrup, depending on my mood. Vegan homemade chocolate and nut butter chips would be tasty on top, too. I am curious to find out what eating the pancakes with a bit of molasses, ginger and apples would taste like, since molasses contains a boat load of vitamins and minerals. Has anyone tried this?

How do you make your pancakes? What do you top them with? Do you like to make special shapes? Do you try to sneak in extra vitamins? If so, how?

Almond Pancakes
Adapted from Elana Amsterdam’s The Gluten-Free Almond Flour Cookbook. The batter from the original recipe was too thick, like cake batter, so I thinned it out to prevent burning.

Yields 15 Pancakes

Ingredients
2 Eggs
Or 2 Chia or Flax Seed Eggs (2 T Ground Seeds + 6 – 10 T Filtered Water)
1/4 C Blue Agave Nectar
1 T Vanilla Extract*
1/2 C Filtered Water or as needed
1 1/2 C Almond Flour
1/2 tsp Himalayan Sea Salt
1/2 tsp Baking Soda
1 T Arrowroot Powder
Grape Seed Oil

Optional Toppings
Coconut Oil or Earth Balance Spread
Agave Nectar, Maple Syrup, Honey or Fruit preserves
Fresh or Frozen Fruit
Hemp, Flax Seeds, Sunflower or Other Seeds
Crushed Walnuts, Pecans, Almonds, etc.
Ground Cinnamon, Carob, Cacao, Pie Spices
Bee Pollen
Gluten-Free Granola

Directions
In a food processor, beat the eggs. If you are making vegan pancakes with the ground chia or flax seed eggs, mix the seed meal with water in a small bowl and set aside for 15 to 20 minutes, adding more water if necessary to obtain an egg-like consistency.

In the processor, mix together the eggs, agave, extract and water on high for 1 minute. Mix in the flour, salt, baking soda and arrowroot until thoroughly combined.

In a large oiled pan over low or a little above low heat, spoon one tablespoon full of batter. Quickly spread out the batter with the edge or backside of the spoon to speed up the cooking time and ensure even cooking. Once bubbles form on the top of the batter through the bottom of the pancake, lift the edges off the pan with a spatula before flipping it over. If you just try to flip the cake over, it can squish together into a heap, depending on the thickness of pancake. Cook the other side thoroughly. Transfer the pancake to a plate and place in the oven (or microwave) to keep warm. Continue to cook the remaining batter into pancakes. Serve with desired toppings.

*You can substitute the extract with the scraped out seeds of 1 – 2 vanilla beans.

Note: If you like, you can add the nuts, seeds, fruit or spices to the batter rather than put them on top.

Autumn Buckwheat Pancakes

I had wanted to make buckwheat pancakes for a while now, since I had never eaten them before.  I usually eat buckwheat as cereal and have only otherwise eaten buckwheat in noodle form. I have heard that buckwheat pancakes are generally akin to rather dense, dry and heavy sponges-like griddlecakes, soaking up all traces of butter and syrup slathered onto them. Either you like them or you do not. Well, challenge accepted! I thought, “Why not give them a try? I bet I can make them taste great.” I was rather impressed with my little pancakes, as they came out thin, light and delicious.

The original recipe called for banana, which I would normally replace with apple sauce, but as I did not have either of these ingredients when I made the pancakes, I used pumpkin puree instead. Thankfully autumn is pumpkin season, so I can buy them at the farmers market. Although bananas are available all year long in grocery stores, they are not even remotely local and have more carbohydrates than I want, especially sugar. It really does not matter what kind of puree you use. If you want to make savory pancakes instead, you can add any myriad of vegetable purees.

Image Source:

Image Source: Chris and Jenni on Flickr

Sprouting Buckwheat
Surprisingly, buckwheat is not actually part of the wheat family, but is still considered a grain by some people due to its use as fine flour in making many baked goods. Soak the seeds (as in my previous nut preparation entry); the process is the same as with other seeds. I generally use Ani Phyo’s suggestion of soaking the seeds for about 6 hours from her book, but it is perfectly fine to soak them overnight. Rinse in a large fine mesh non-reactive (stainless steel, fabric or plastic) strainer. Rest the strainer over a bowl or container that is deep enough for the bottom of the strainer does not touch the container. Daily rinse the buckwheat groats. Mix them from the bottom to the top with a large spoon or clean hands in the strainer to provide even light and air distribution and prevent molding. Reset the strainer over the container. Repeat this process over the next two to three days or until the seeds sprout, and the “tails” grow between a 1/4 and an 1/2 inch in length. Dehydrate the seeds at 105 degrees Fahrenheit until they are crunchy. Store them in an airtight glass container, like a canning jar.

Pumpkin Buckwheat Pancakes
Adapted from Kelly E. Keough’s gluten-free baking cookbook.
This makes lots of pancakes, so cook them in a larger pan to speed up the over-all cooking time.

Yields 20 to 24 pancakes

Ingredients
3/4 C Rooibos Chai Tea, cooled*
1 T Flax Meal
1 C Sprouted Buckwheat Groats (see above)
1 C Egg Whites (from about 8 large eggs)
1/2 C Pumpkin Puree
1 T Blue Agave Nectar
2 tsp Ground Cinnamon
2 tsp Ground Ginger
Extra Virgin Olive Oil

Optional Toppings
Grade B Maple Syrup
Flavored Blue Agave Nectar
Spiced Creamed Honey
Coconut Oil
Cranberries
Apple Compote
Bee Pollen
Peanut Butter Chips
Chocolate Chips
Carob Chips

Directions
For better consistency, pre-soak the flax meal in the tea for about 15 minutes, occasionally stirring.

In a food processor or high speed blender, like my Vitamix dry grain mill, grind the buckwheat into a fine meal. Add in the tea-flax mixture, egg, pumpkin, agave and spices. Blend until the ingredients are evenly distributed.

Cooking Pancakes

In an oiled pan over low heat, pour in about 2 to 3 tsp (1 tablespoon) of batter for each pancake. Spread out the batter into thin round pools of about four to six inches in diameter. Cook for several minutes on the first side. Carefully flip the pancakes over with a spatula when you can easily loosen all of the edges from the pan without scrunching the cakes into heaped messes. Cook on the second side until the edges are golden brown. Adjust the stove temperature accordingly to avoid burning your cakes during cooking. Serve warm. Decorate with your desired toppings. Enjoy!

Pumpkin Pancakes with Cranberries

Note: I included rooibos chai to aid my digestion, but you can use black or green tea versions or any spiced teas, like Good Earth’s herbal tea.
When eating leftovers during breakfast the following day, I realized these would also taste rather scrumptious with chopped pecans or walnuts added to the batter or scattered on top.